Spiced pour over coffee
Pour over coffee is simple, sustainable and delicious. It is the absolute best way to highlight the unique flavors of your favorite beans or to experiment with different varieties of coffee and bring out their unique attributes. For a special treat, compliment your cup by mixing fresh-ground spices right into your coffee grounds.

Mix fresh-ground or whole spices right into your coffee grounds for a warming coffee treat.
Pour over coffee is simple, sustainable and delicious. It is the absolute best way to highlight the unique flavors of your favorite beans or to experiment with different varieties of coffee and bring out their unique attributes.
If you want to understand the differences between the pour over method and machine-brewed or French Press coffee, head over to our blog about the benefits of pour over. If you want to level up your game, check out our blog about how to make a better cup of pour over.
From there, you might experiment with adding complementary spices for the ultimate coffee treat. That’s the magic we’re serving here!
How to make spiced pour over
The short of it is this: mix your favorite spices right into the grounds and pour the hot water through.
Ingredients
The ratio you’re going for is ⅓ tsp of ground spices for each 42 grams of coffee. This makes one cup of pour over.
The recipe below is for two cups of coffee brewed using a Chemex coffee maker. This is a great starting place for any pour over method. If you’re making a single cup using a dripper, just cut the recipe in half
Gather together:
⅓ tsp ground cinnamon
⅙ tsp ground cloves
⅙ tsp ground nutmeg
84 grams of medium ground coffee
1400 grams of water, boiled to 205 degrees
How to make it
Rinse and wet your coffee filter and place it in your coffee maker.
Place the coffee maker with the filter in it on a kitchen scale and zero it.
Grind your coffee, if doing so at home.
Mix the ground coffee and spices together and place in the filter. Here is where the scale comes in, if you’re using one. You’ll get exactly 84 grams + the weight of the spices (which you can weigh ahead of time for extra precision)
Bloom the grounds with hot water (about 205 degrees). To bloom, slowly wet all of the grounds and let sit for 30 seconds. You should see the coffee rise and bubble slightly.
Finish pouring the hot water in slow spirals until you have the right amount of water, about 1400 grams for this two-cup recipe.
Pour into your mugs and enjoy.
Five delicious ways to use chai spice
Cardamom, cinnamon, anise, clove and peppercorn. Warm chai is a whole late fall mood. If you’re looking for ways to add that chai vibe to your cooking, here are five more ways you can chai-spice-up your December. (Yes, there will be cookies.)
Cardamom, cinnamon, anise, clove and peppercorn. Warm chai is a whole late fall mood. Here are five more ways you can chai-spice-up your December. (Yes, there will be cookies.

Even if you are a year-around chai drinker, there’s something extra magical about the smell and taste of spiced drinks as the weather turns cool. It’s the subtle warming sensation of cinnamon and pepper, and the slight earthy burn of ginger. It’s the way the whole house smells glorious when you’re warming chai spices on the stove.
It’s comforting, cozy, meditative, and kind of moody—a true late-fall vibe. And once you realize how simple and rewarding it is to make your own chai from whole spice, you’ll want to have it cooking all the time.
But what to do with all that chai? We’ve got you covered!
But first, a chai tutorial
If you didn’t grow up drinking chai, you may be surprised to learn that the word “chai” simply means “tea” in Hindi, a word probably derived from “chá” the Chinese word for tea.
In other words, it’s a general term in many cultures and could represent a wide variety of tea flavors. The spices we tend to associate with the chai lattes and other chai products we purchase in the States come from generalized recipes for “masala chai” or “spiced tea.”
You’ll probably notice that many chai spice products have slightly different variations on cardamon, cinnamon, ginger, anise, peppercorn and clove. To come up with your favorite version, check out our Chai Chart and recipe to get you started.
Five other ways to use chai
Please drink up all the chai you want, there’s no hurry to that liquid gold into cookies and jams and cocktails. But, when you’re ready…and you will be ready… try these options!
Dirty chai. The easiest on this list and the most caffeinated! At your local café, a dirty chai means a shot of espresso added to your chai latte. To make dirty chai at home, simply add hot or cold brewed coffee to your chai. We recommend 1 part coffee to 2 parts milky chai.
Chai syrup. Make your chai on the less milky side for this. Once the tea is hot, jump straight to the “syrup” portion of this recipe.
Chai sugar cookies. For this recipe, you’ll infuse butter with chai spice. Yes…chai infused butter…you read that right. Because the cookies already have sugar in them, skip the full tea recipe for this one and use the chai chart to ground up spices and black tea and put them into the butter instead of the oolong called for in this recipe. For the flavored sugar topping, you can even use our chai spice pack.
Chai french toast. For two servings, wisk two eggs into one cup of milky chai and place in a wide bowl. Cut six thick slices of challah bread and dip each side into the egg and chai mixture. Fry on a griddle and enjoy with that chai syrup!
Chai overnight oats. Have you gotten on board with overnight oats? It’s so simple and nutritious and makes for the easiest mornings. We love the Minimalist Baker recipe. To make it chai flavored, swap out the milk with your milky chai. Place ½ cup of rolled oats in a jar, cover with ½ cup milky chai, add ¾ tbsp of chia seeds, cover and let sit in the fridge overnight. That’s it! Top how you like in the morning and eat.
May your home smell of chai until the first blooms of spring (or forever if you prefer)! What are your favorite ways to use chai?
Homemade oat milk
If you love the creaminess of oat milk, but don’t want the extra ingredients and expense of store-bought brands, try making your own. Oat milk is surprisingly easy and affordable to make. You don’t need anything more fancy than a blender and a way to strain the blended oats.
If you love the creaminess of oatmilk, but don’t want the extra ingredients and expense of store-bought brands, try making your own.

Oat milk is surprisingly easy and affordable to make. You don’t need anything more fancy than a blender and a way to strain the blended oats. (Hint: There’s a sock for that.)
It’s also really fast. Unlike DIY nut milk, which takes hours to soak, you can have a fresh batch of oat milk ready in about 10 minutes.
Ingredients
Here’s what you’ll need to make 4, 8-ounce glasses of creamy oat milk—about the thickness of whole milk. If you prefer your milk a bit thinner, use more water.
Required ingredients
1 cup of rolled oats (we use organic, gluten-free oats. If gluten isn’t an issue for you, use your favorite rolled oat brand)
4 cups of water
Add ins
Choose your own adventure for sweetness and flavor
1 tsp of vanilla or your favorite extract
1 tbsp of maple syrup for sweetness, adjust to taste
2 tbsp of cocoa powder for chocolate milk, adjust to taste
Equipment
Blender
Nut milk bag, cotton coffee filter, or fine mesh strainer
Mason jar or glass pitcher
How to make oat milk
Add oats and water to the blender
Blend right away for about 45 seconds. Do not overblend. The mixture should look smooth, without a bunch of chunks. As soon as you achieve this, stop blending.
Strain the mixture through your strainer and into the jar or pitcher.
Strain it again.
Refrigerate.
Keep your oat milk in the fridge for up to one week.
Maple spiced coffee
As the darker months roll in, there’s something especially soothing in a warm mug of coffee, a lit candle, and the smells and tastes of allspice, clove, and cinnamon. Maple syrup adds that hint of sweetness that rounds out the fall vibe.

As the darker months roll in, there’s something especially soothing in a warm mug of coffee, a lit candle, and the smells and tastes of allspice, clove, and cinnamon. Maple syrup adds that hint of sweetness that rounds out the fall vibe.
This cozy drink is highly customizable—choose your favorite fall spices and get the sweetness just the way you like it. Then grab a book and a blanket and sip away.
Ingredients per serving
8 oz of hot coffee. We enjoy the smoothness of pour over. But any hot coffee will work here.
2 oz of milk—your favorite types
1 tsp of pure maple syrup
1 tsp ground spice mixture. Try any combination of cinnamon, clove, allspice, anise, or nutmeg.
How to make it
Add your spices to bottom of a mug and top with the maple syrup. Stir to combine.
Pour the hot coffee over the spices and stir until spices and syrup are dissolved into the coffee.
Top with warm milk and a sprinkle or two of nutmeg or cinnamon.
Enjoy.
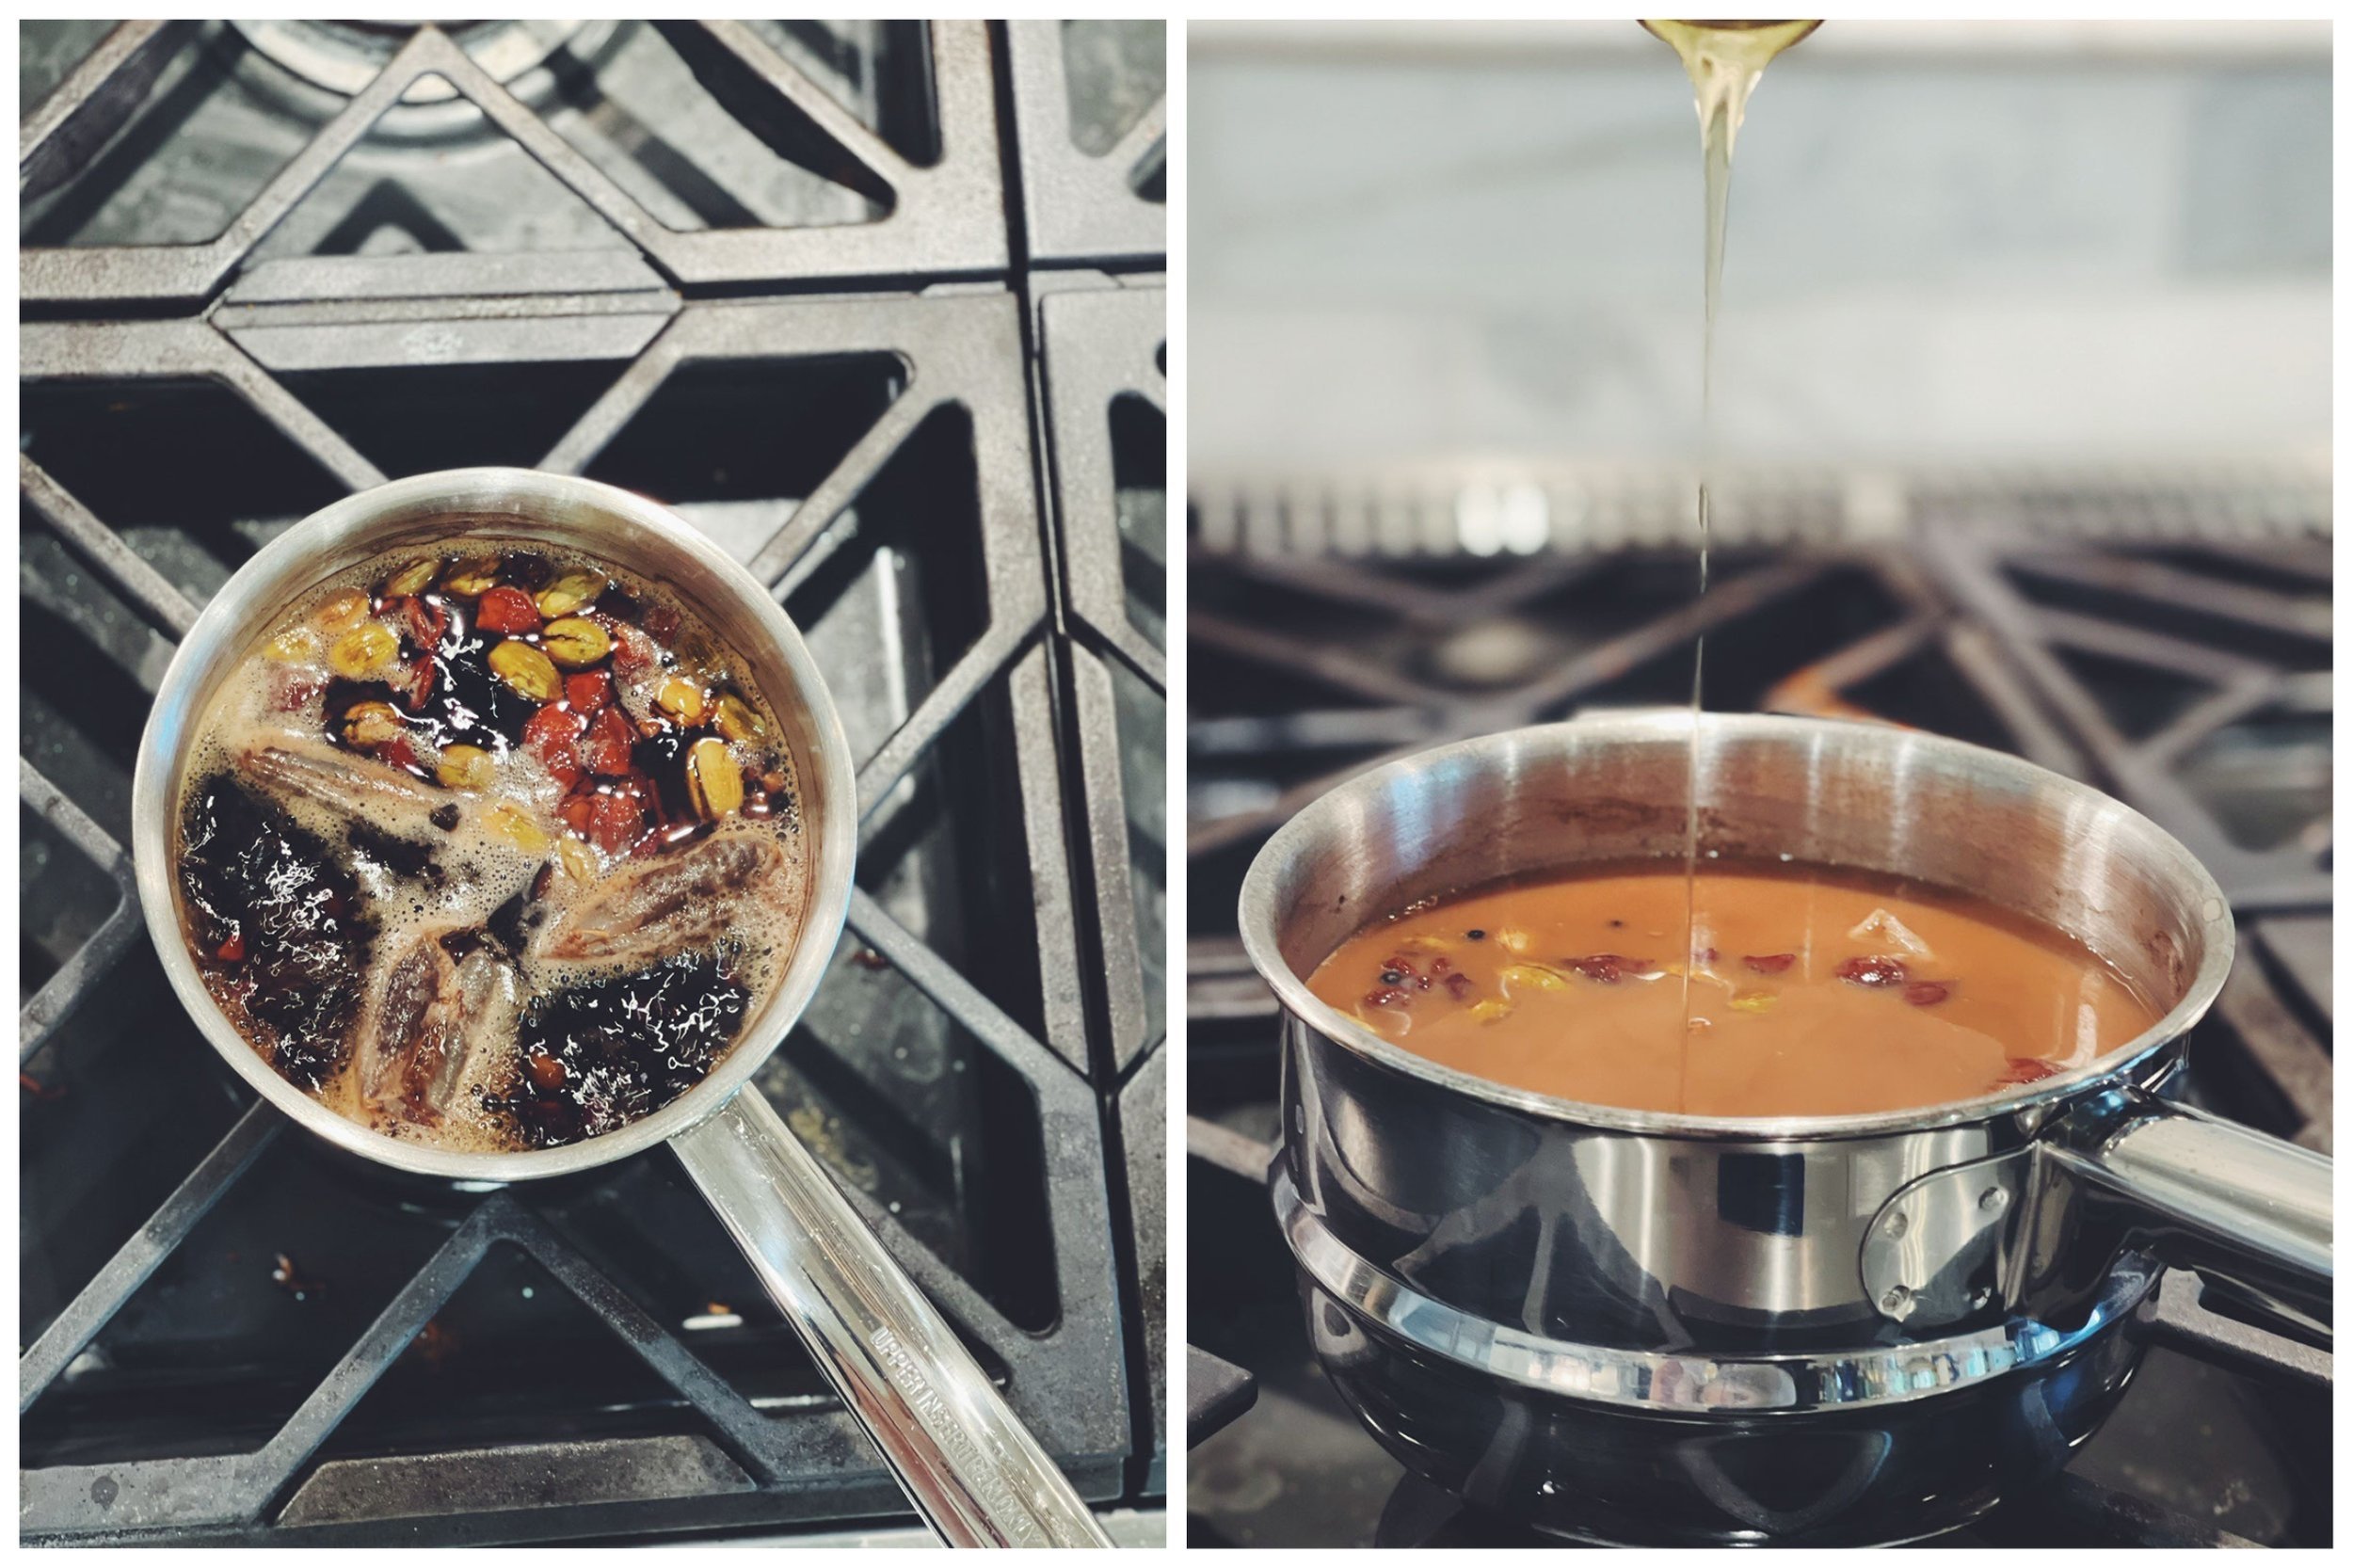
Make jam or syrup with tea leaves
Tea flavored syrups and jams make an unexpected, flavorful, and kicky addition to cookies, toast, and even cocktails. And, in celebration of Indigenous People’s Day, we’re singing the praises of yaupon tea. The yaupon plant is the only caffeine containing plant indigenous to the U.S. And Native Americans have been drying the leaves and brewing the tea for centuries. Here’s how to turn it into syrup or jam.

Tea-flavored syrups and jams make an unexpected, flavorful, and kicky addition to toast, a cheese spread, or even as a cocktail or mocktail sweetener. In this recipe, we use yaupon. But you can use any tea flavor that suits you. (We sing the praises of yaupon tea here. The yaupon plant is the only caffeine-containing plant indigenous to the U.S. And Native Americans have been drying the leaves and brewing the tea for centuries!)
To make a syrup, you’ll use equal parts liquid and sugar. This recipe uses 4 cups of each, but you can make more less depending on how much you want. This recipe uses 4 cups of each, but you can make more less depending on how much you want.
To turn it into jam, add pectin to thicken. Get the details below.
Ingredients
Enough loose tea to make 2 cups of tea. For yaupon, use 2 tsp of tea steeped for 5 minutes in 2 cups of boiling water,
A squeeze or two of lemon
2 cups of water
4 cups of sugar
For jam: 1 package of powdered pectin
Directions
Steep your tea according to directions. See above for yaupon amounts.
Pour the tea into a pan on the stovetop and add lemon juice to taste.
If you'r tea is still hot, move to the next step. If not, bring it close to a boil.
For syrup
Stir in the sugar and bring back to a boil to dissolve.
Remove from heat and let cool.
Pour cooled syrup into an airtight container, preferably one you can pour out of, like a squeeze bottle.
Store in the fridge for up to a month.
To use, bring to room temperature and pour (or squeeze).
For jam
Stir in the pectin and bring to a boil.
Stir in the sugar and bring back to a boil to dissolve.
While boiling, keep stirring for about one minute. The pectin should congeal and have the texture you expect from jelly or jam.
Remove from heat and let cool.
If you’re going to eat the jam within a couple of days, you can place it in a jar and store it in the fridge.
If you’re going to gift the jam or keep it around for a while, use a canning method to seal, such as this one.
Classic Café au Lait
Café au Lait is so simple—half coffee and half milk. What makes it feel like a treat? Good coffee and a little milk foam set it apart. Here’s how to get foamy milk without a frother for an easy daily cup of joy.
It’s a simple recipe—half coffee and half milk. Good coffee and a little milk foam set it apart.

You might think steamed milk is a coffee shop treat, but you can make it at home without a frother (but if you have a frother, nice!). Warm milk and a little froth elevate a cup of black coffee into a treat. Use a flavorful, dark-roast bean for your brew, and the milk fat accentuates the flavor nicely.
It’s really easy and very satisfying.
Ingredients
Your favorite strong-brewed coffee—enough for the number of people you’re serving
2% or nonfat milk—the same amount as your coffee
16oz mason jar
How to make it
Brew your coffee as usual. We make 2-3 cups using our trusty Chemex. (Here’s why we love the pour over method.)
Add milk to a saucepan over medium low heat and warm slowly until it just starts to steam. Bring the milk to an almost simmer, but don’t let it boil.
Put the warm milk in your mason jar, close the lid, and shake until frothy.
Pour equal parts coffee and foamy milk into each cup.
Sprinkle with cinnamon or nutmeg and enjoy!
Have a microwave? You can make foamier foam with this mason jar method.
Coconut water cold brew
Coconut water is hydrating and full of antioxidants and potassium. It’s got a light sweetness that makes it a great substitute for plain water in post-workout drinks, smoothies, and other liquid treats. We tried steeping our cold brew in coconut water...and it turned out delicious. Give it a try for a refreshing afternoon pick-me-up. A little goes a long way!

Three coldbrew kits brewing coconut water cold brew in different sizes.
Coconut water is hydrating and full of antioxidants and potassium. It’s got a light sweetness that makes it a great substitute for plain water in post-workout drinks, smoothies, and other liquid treats. We tried steeping our cold brew in coconut water...and it turned out delicious.
Give it a try for a refreshing afternoon pick-me-up. A little goes a long way!
What you’ll need
1 cup of coarsely ground coffee per 32oz (We typically use 2 cups and make 64oz)
Filtered water
2 cups of your favorite coconut water (Or 4 cups for a 64oz container)
Coldbrew filter and jar
Instructions
Place the coldbrew filter into your jar and add the coarse grounds.
“Bloom” the grounds. To do this, add just enough filtered, plain water to the grounds to wet them. Then let it sit for 30 seconds. This helps ensure you won’t have dry pockets or uneven flow.
Slowly pour your coconut water through the grounds. When the container is about ¾ full, close off the filter and fill the jar the rest of the way with the coconut water.
Let steep for 6-10 hours for a 32oz container. The warmer your room, the less time it takes. You can let it steep in the fridge for a full 12 hours. Adjust according to the size of your container and the temperature of your space.
Pull the coldbrew filter from the container, compost the wet grounds, rinse your filter with plain water and hang to dry.
Drink your coldbrew as is, or cut with plain water or more coconut water to get the brew strength to your liking.
Need a visual? There’s a brew-time chart and a video on our Brew Instructions page.
Add ins and extras
Want a little something extra? Try adding simple syrup or one of these homemade flavorings.
How to air dry and save herbs
Late summer is a great time to find fresh herbs and plants. If you dry your own, you can ensure you have fresh and high-quality ingredients for cooking or making teas. No need for expensive dried herbs from the store that are….who knows how old! With a little patience and a few common items, you can dry and save herbs and plants to use all year long. Here’s the “recipe” for air-drying herbs.
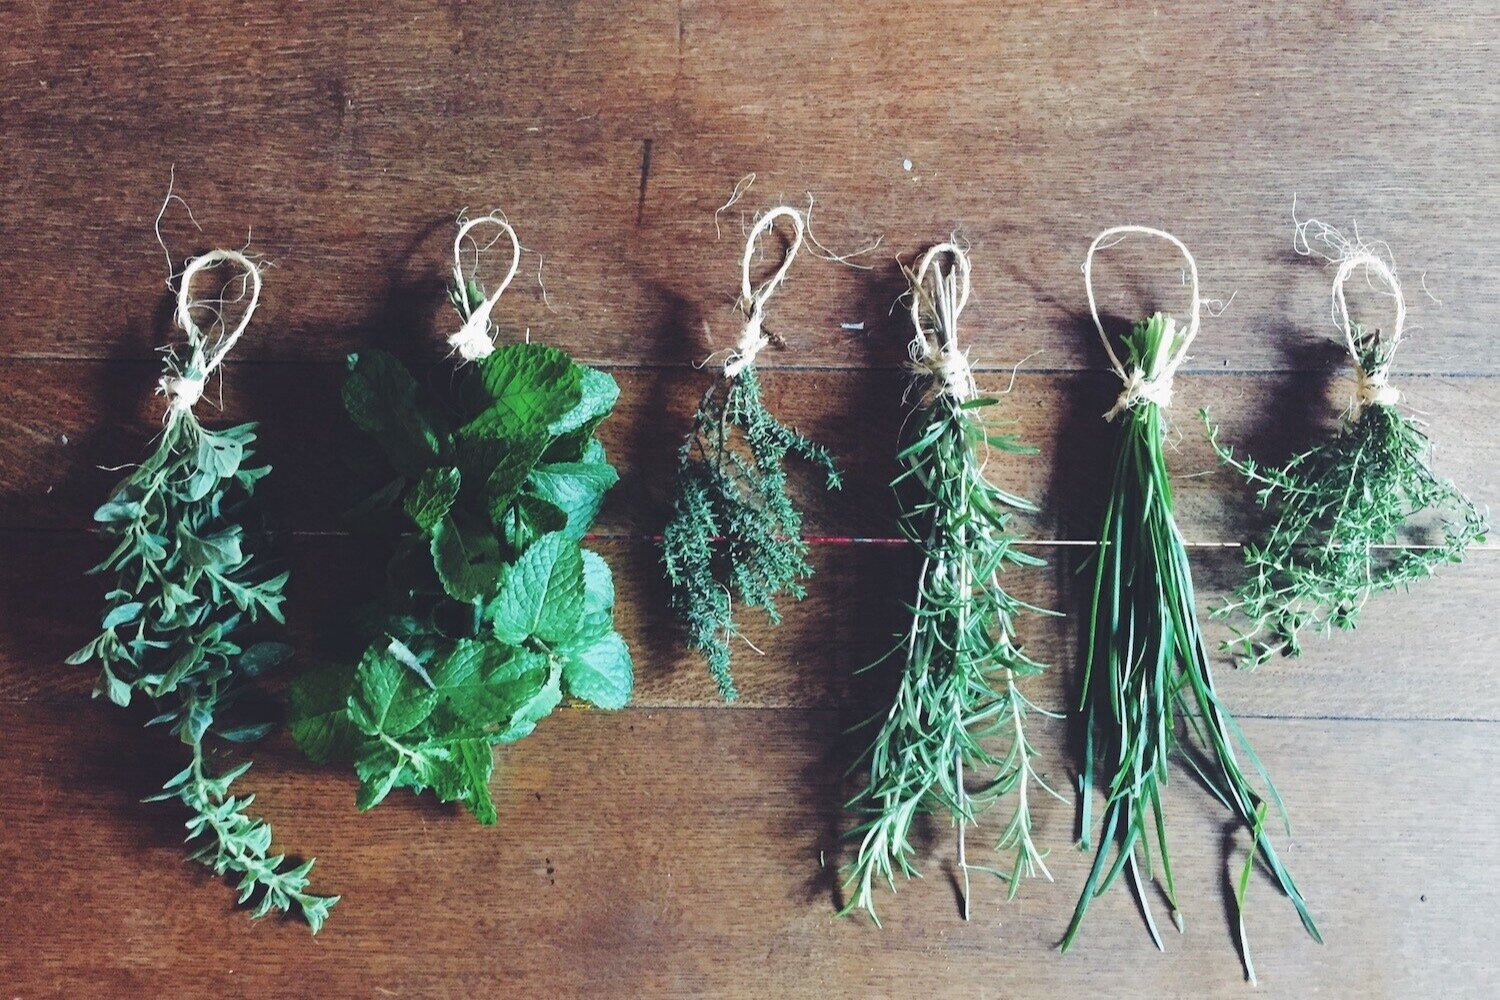
Late summer is a great time to find fresh herbs and plants. If you dry your own, you can ensure you have fresh and high-quality ingredients for cooking or making teas. No need for expensive dried herbs from the store that are….who knows how old!
With a little patience and a few common items, you can dry and save herbs and plants to use all year long.
Our favorite way to dry herbs is air drying. The key for air drying herbs is to put them in an environment where they can dry as quickly as possible without attracting moisture or continuing to respond to sunlight. Dark and dry! That’s the key.
Here’s the “recipe.”
What you need
Fresh herbs and plants with the stems intact.
Twine
Rubber bands (optional but recommended)
Small paper bags
A dark, dry place to hang the herbs—a cupboard can work, as can a basement or attic
Method
Gather into small bunches
Gather herbs into small bunches, keeping only one type of herb or plant per bundle. Different plants will dry at different rates, so avoid mixing your bundles.
What is a “small bunch”? Most instructions say to keep bunches small. When you gather the stems together, they should measure ½ to 1 inch across. Too large and the bundle will have trouble drying quickly enough to avoid mold.
Secure the stems
As your plants dry, the stems will shrink. Use rubber bands to keep a good grip. If you don’t have or don’t want to use bands, you can tie the bunches tightly with twine.
Secure the stems together about ½ inch from the end of the shortest stem. Check them occasionally to make sure they stay secure.
Hang upside down in a dark, dry place
Using more twine, hang the bunches clothesline-style in a place where they won’t be exposed to sunlight and will stay dry. This is critical. You don’t want moldy herbs. If you live in a humid environment, check your herbs daily and move them if they don’t stay dry, or try a dehydrator or the oven drying method.
Cover bunches with a paper bag
For plants with soft petals or leaves, you can secure a paper bag over the bunches to further protect them, keep them dry, and catch any leaves that fall. This isn’t necessary for sturdier herbs like rosemary, but feel free to cover them all.
Dry for a few days to a couple of weeks
Until you’ve done it a few times, you’ll need to check often to see how your herbs are doing. And stay patient! While this method is really hands off, you won’t know exactly how long it will take until you try.
It’s going to depend on the type of plant (soft-leaved plants may take longer), and on the environment in which you’re hanging them. In a dry, dark basement, it could go faster than in a cool cupboard.
Destem and store your dried plants
You’ll know your plants are dry when you can crumble them easily with your fingers and no moisture appears. When this happens, gently pull or crumble leaves from the stems, chop or crumble to your preferred size, and store in an air-tight container.
If you won’t be using the herbs in the next few weeks, consider hermetically sealed containers or store in the refrigerator away from light.
Cold brew popsicles!
Nothing says summer like a popsicle. And it’s pure genius to combine afternoon treat time with afternoon coffee time. Make your popsicles sweet and creamy, or go dark if that’s your thing. Either way, grab some popsicle molds and get this recipe!

According to the calendar, it’s officially summer. According to the thermostat here in Austin, Texas, it’s been summer for at least six weeks. But even still, the solstice deserves a special celebration. And these cold brew popsicles fit the bill.
Nothing says summer like a popsicle. And it’s pure genius to combine afternoon treat time with afternoon coffee time.
This recipe is flexible—make your popsicles as sweet and creamy as you like. Or go dark if that’s your thing. A black coffee popsicle is unexpected and kinda awesome.
What you need
Popsicle mold of your choice
Cold brew concentrate (2 ounces of concentrate per popsicle)
Your favorite dairy or nondairy milk or cream (Same amount as the concentrate)
Make your popsicles
Start by mixing the cold brew as though you were going to drink it:
Add enough cold brew concentrate for your popsicle mold. For 6 popsicles, use 12 ounces of concentrate.
Add another 12 ounces of liquid—either milk, cream, or water. Here you can experiment. If you like the coffee stronger, add a bit more concentrate and less milk or water. Or vice versa if you want just a hint of coffee flavor.
Sweeten to taste. I love to add cinnamon and vanilla simple syrup!
Pour the prepped brew into the molds, almost to the top. Leave maybe ⅛” of space for the liquid to expand as it freezes.
Follow instructions for your molds to attach the popsicle handles or sticks.
Freeze and enjoy!
Sun tea
There’s something about a tall glass of iced tea on a warm, sunny day. Make a whole pitcher of your favorite flavor without ever touching your kettle. Get this solar powered tea recipe.
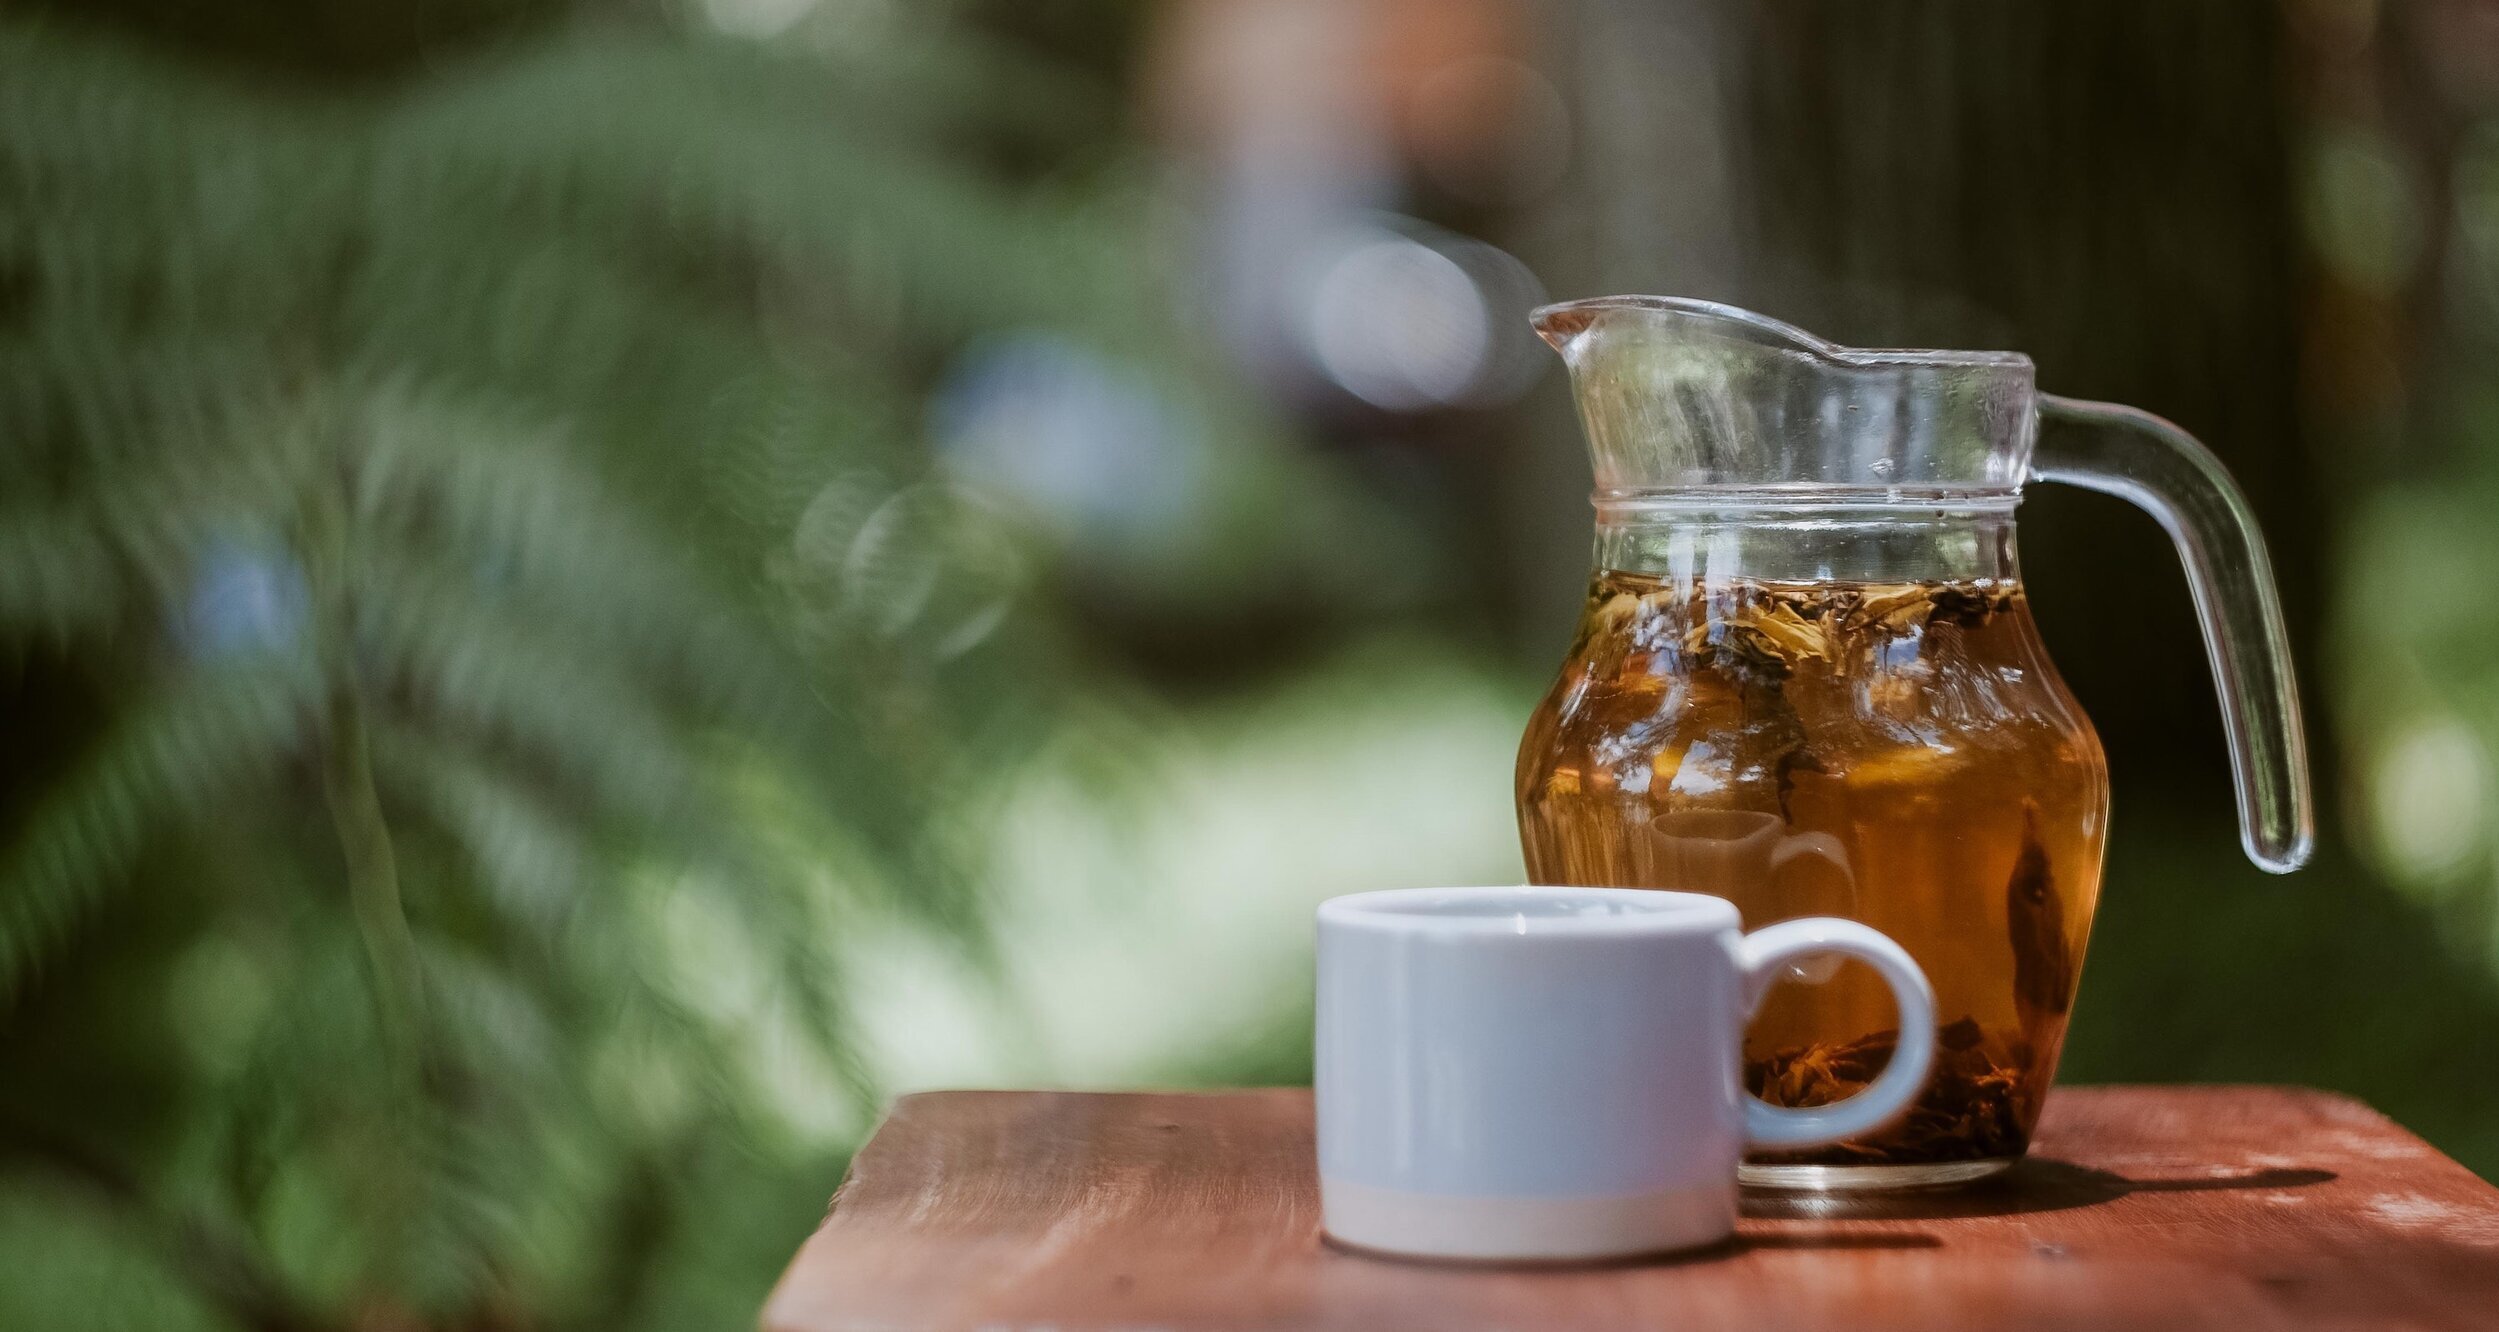
Here’s the thing about a pitcher of tea in the summer. It’s refreshing, a welcome addition to any gathering, and very, very easy. You don’t even technically need sun, because tea leaves in water will flavor the water eventually without doing anything. The sun simply speeds up the process by doing what your kettle does—warming the water so the tea leaves steep.
When you take advantage of a sunny day and an infusion filter (or simply use tea bags), you’ll have a whole pitcher of tea in no time. Repeat as often as you like with any tea that you like.
Here’s what you’ll need
A tea of your choice. Either use tea bags or loose leaf with a cold brew tea filter or infusion filter.
A pitcher, jar, or jug with a lid to keep out the flying things
Water—enough to fill your container ¾ full
Ice
Optional things, like slices of citrus, mint leaves, or simple syrup. (We’ve got a recipe for that)
To make your tea
The basic formula is 1 small tea bag or 1½ tsp of loose tea for every cup of water.
Fill your container ¾ full with water and the right amount of tea to get the strength you want. Use the basic formula as a guide.
If you’re using loose tea, place it in a steeping or infusion filter. If you’re using pre-bagged tea, just toss the bags right in the water.
Put a lid on your container and set it inside or outside in the sun.
Check your tea every hour on a warm day or every two hours if you’re brewing indoors or on a less sunny day. It can take up to five-six hours in the fridge—but it’s much faster on a hot day.
When you get the color and flavor you’re after, pull the tea out of the water and compost the used leaves.
Now you can add your optional ingredients to get the flavor and sweetness you want.
If you want sweet tea, use a liquid sweetener, like agave or simple syrups so you don’t need to bother with trying to dissolve sugar granules.
If you’re going to drink your tea right away, fill your container the rest of the way with ice. If you’ll drink it later, it can go in the fridge without ice until you're ready to serve.
Enjoy!
Our favorite formulas
Minty tea
I’ve been known to mix mint iced tea with a little bourbon for an easy mint julep, but you do you.
Add 4 tbsp of loose mint tea to a cold brew tea filter
Fill a 64 oz mason jar ¾ full with water
Add tea filter to the water and place in a sunny spot for up to 4 hours
Add 2 tbsp agave and a few mint sprigs and store in the fridge
Try this hibiscus mint variation too!
Southern sweet tea
If you’re from the southern US, this will be a familiar flavor. I’m pretty sure I got iced tea in a bottle as a toddler (it was the 70s, so…)
Add 4 tbsp of black tea to a cold brew tea filter—orange pekoe works great, or grab bagged Lipton for the full southern experience.
Fill a 64 oz mason jar ¾ full with water
Add tea filter to the water and place in a sunny spot for up to 4 hours
Add 3-4 tbsp simple syrup (sugar melted in water) and a few sliced lemon rounds and store in the fridge
Sweet, spicy, creamy iced coffee
Celebrate the strong, sweet and spicy flavors of southeast Asia with this creamy iced blend. Inspired by our favorite Thai and Vietnamese coffee recipes, use your cold brew concentrate to make an easy and delicious treat.
Celebrate the strong, sweet and spicy flavors of southeast Asia with this creamy iced blend. Inspired by our favorite Thai and Vietnamese coffee recipes, use your cold brew concentrate to make an easy and delicious treat.
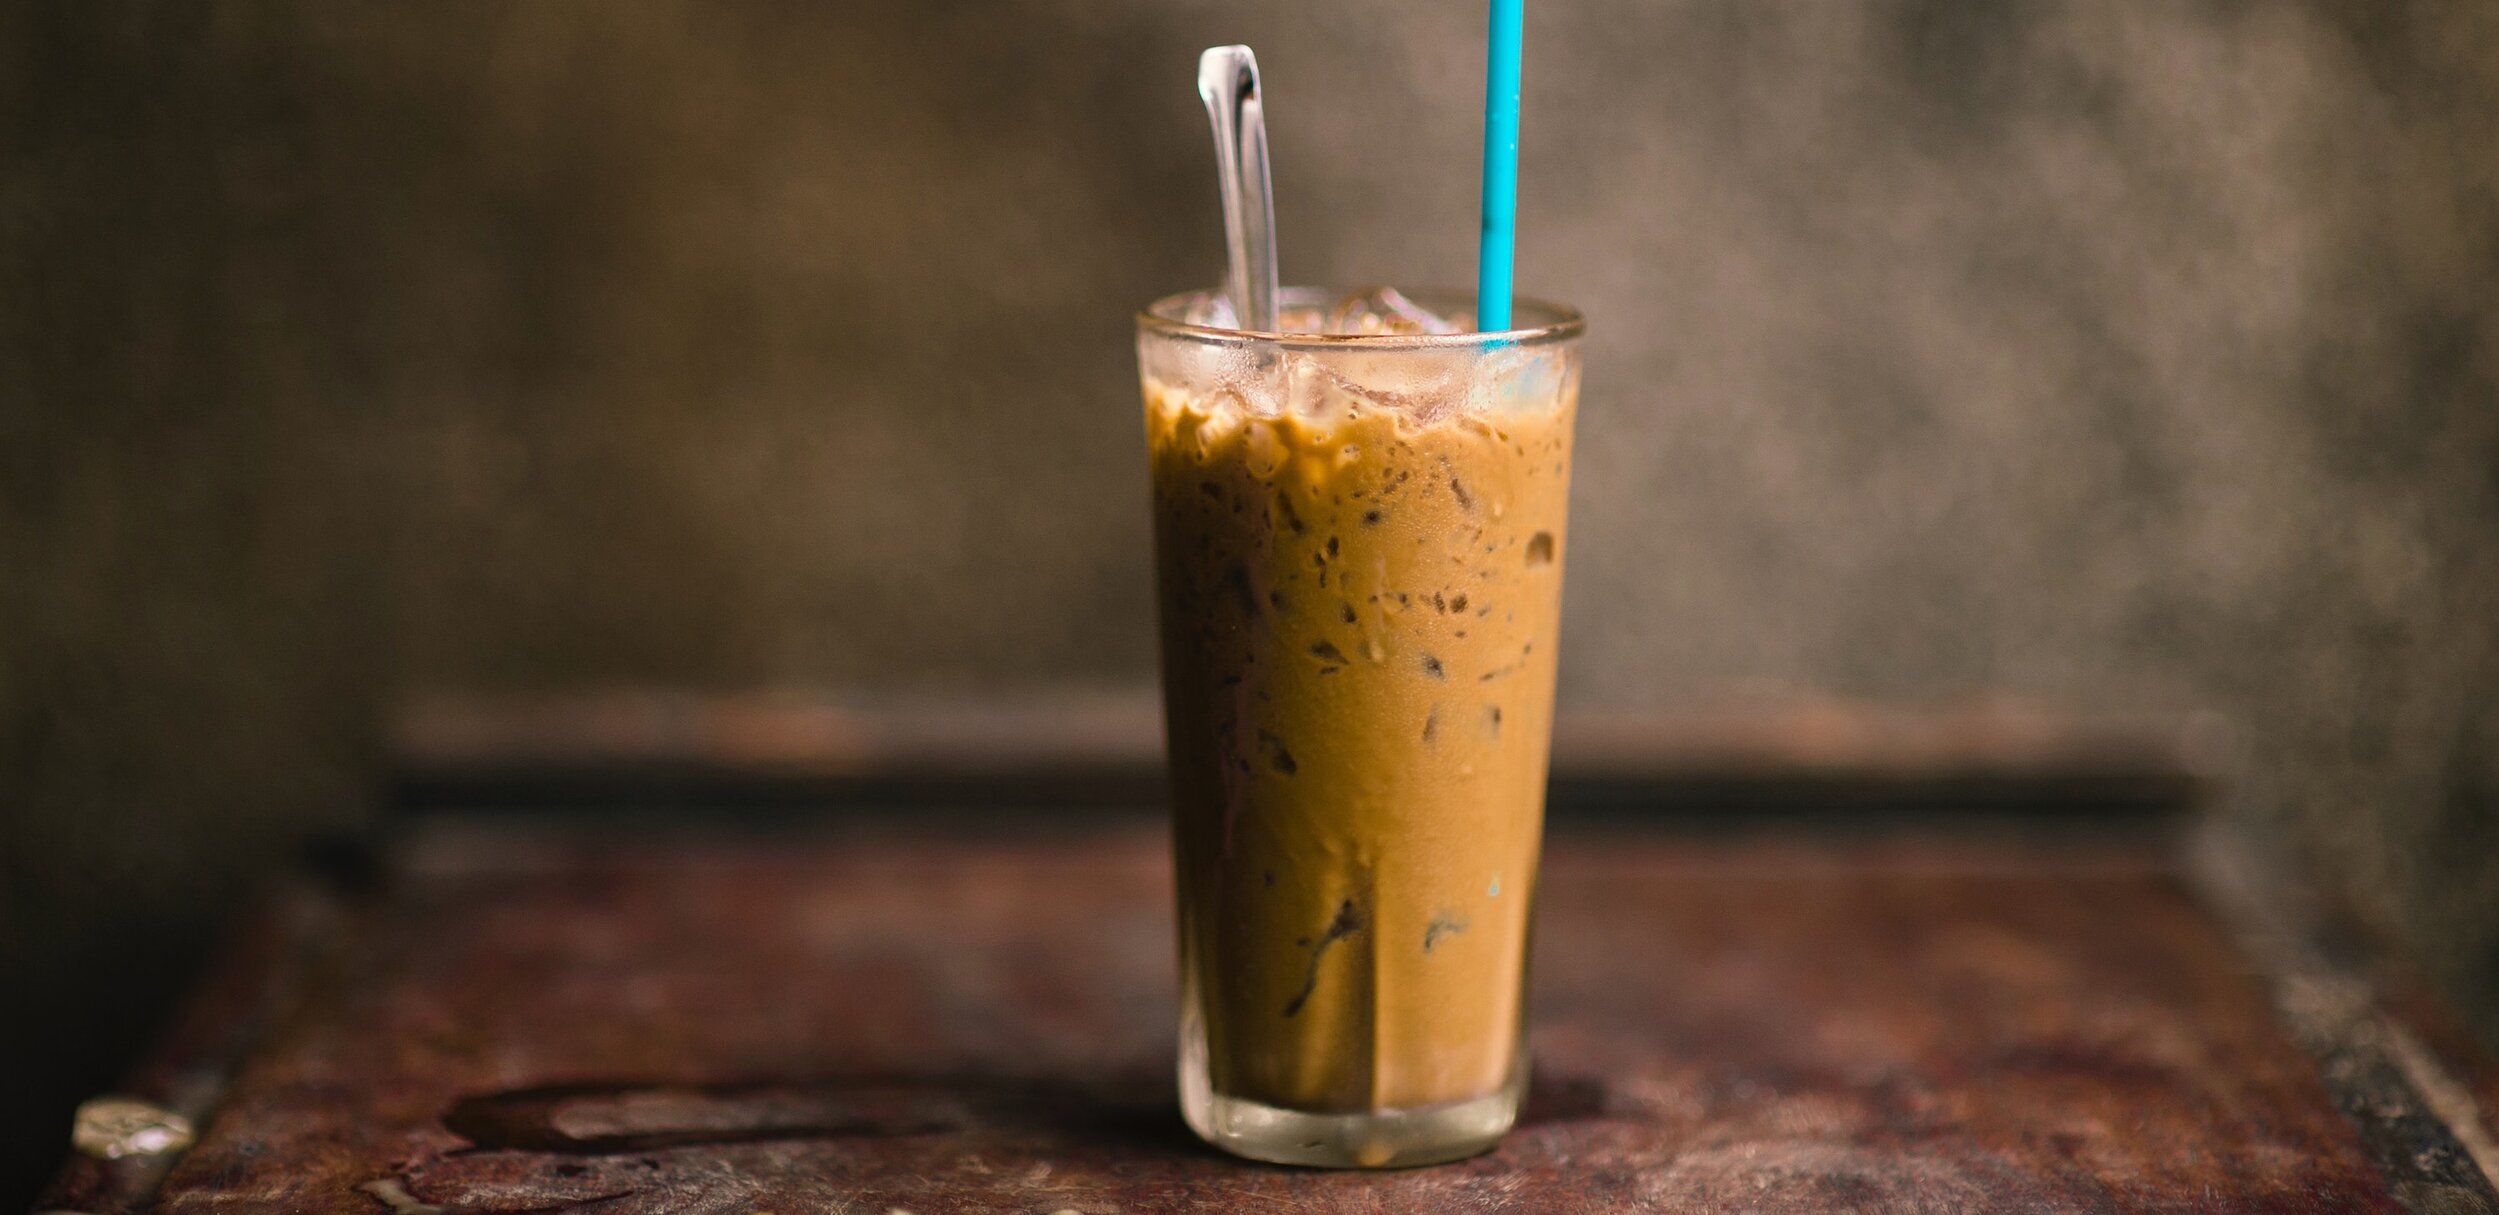
Picture it with me.
You’re sitting on a sunny deck, kicking back in the afternoon sun. It’s warm and slow and easy. You bring an iced coffee to your lips and POW—you’re in flavor town. Sweet, creamy, subtly spiced and so, so strong.
That’s the magic of this drink. We scoured recipes to recreate some of our favorite Thai and Vietnamese coffee recipes, then experimented with cold brew concentrate to get this version.
Grab Your Ingredients
Use this amount for each serving (so, if you want to make two, double it!)
1 cup of cold brew concentrate (see method below)
2 tbs of sweetened condensed milk
¼ tsp almond extract
A pinch or two of ground cardamom or cinnamon (optional)
Milk to fill the glass (Try evaporated milk or whole to keep it creamy)
Method
For the cold brew concentrate, you want double strong coffee. We recommend a 1:4 coffee/water ratio. If you're using a 32oz cold brew kit, that means you’re using about 6 ounces of coarse ground coffee and 24 ounces of water. Check out our Cold Brew 101 for more details.
Mix together the first three ingredients, along with the spices, if using. Pro tip: You can add whole spices to the batch when you’re making your cold brew concentrate—they’ll steep along with the coffee and infuse it with flavor.
Add ice to your glass, pour in the coffee mixture, then finish off with a bit more milk.
Homemade coffee and tea flavorings—with or without sugar
Elevate your beverage with your own cafe-level flavors. Think cinnamon infused cold brew, vanilla Earl Grey, or a homemade bottle of your favorite coffee shop syrup. Check out these basic recipes, then remix to your heart’s desire.
Elevate your beverage with your own cafe-level flavors. Think cinnamon infused cold brew, vanilla Earl Grey, or a homemade bottle of your favorite coffee shop syrup. Check out these basic recipes, then remix to your heart’s desire.

If you love the benefits of making coffee or tea at home, but miss some of your favorite flavored coffee shop concoctions, never fear. We’ve got your guide to homemade deliciousness.
Depending on whether you make your beverage hot or cold, you’ve got three basic options for flavoring:
Infusions can work in hot or cold brews—you’ll add flavor while you’re brewing
Powdered add-ins work best in hot brews and store well without refrigeration
Simple syrup (liquid sugar) means you don’t need to dissolve sugar in your cold brew or iced tea.
Method one: Infuse your flavor as you brew
This method couldn’t be easier. Choose a fresh herb, spice, or fruit rind, and add it as you brew.
Choose a flavor and rough it up a little
To release the oils and deliciousness of your favorite fresh herb or spice, you’ll need to “bruise” it a bit. Depending on the ingredient, that may mean rolling it your hands, smashing it gently with a fork or even using a rolling pin to add a few breaks.
Some suggestions
Cinnamon sticks—lightly roll with a rolling pin
Lemon rind—rub the rind between your fingers and thumb
Ginger root—cut and bruise with a fork
Vanilla bean—cut open and lightly smash
Mint leaves—Leave on the stem and run between your hands
Add before you start brewing
For cold brew, add your bruised spice to your container, outside of your coffee sock. Add the coffee, pour the water, and steep as usual. Remove the spice at the end of the steep time for a gentle flavor.
For hot brew coffee or tea, likewise add the flavor to the bottom of the pot or cup. Then brew your tea or coffee as usual. Your hot beverage will pour right over your flavoring and brew together. When it’s all cool enough to drink, pull out the spice and compost.
Method two: Mix up a powdered add in—with or without sugar
Yes, you can buy powered add-ins—like these spice packs—but you can also DYI for greater control of what goes in.
Choose one of our favorite blends below, and add one teaspoon per cup of coffee.
Chai spice: Three parts ground cinnamon and cardamom to two parts ground ginger and one part ground clove and nutmeg. Add sugar or not—your call! It’s yum either way.
Cocoa: Two parts cocoa to one part sugar. Try adding a pinch of cinnamon or cayenne for an extra kick.
Method three: Simple syrups
A simple syrup is just liquid sugar. They work great in mixed drinks because you don’t need to dissolve the sugar—you dissolve it ahead of time. Simple syrup is probably called “simple” for some scientific reason, but it’s also really simple to make.
Just combine equal parts sugar and water and heat to dissolve. From there, you can add flavorings for vanilla syrup, mint syrup, lemony syrup, hazelnut… you get the picture.
Basic simple syrup
1 cup sugar
1 cup of water
Flavoring of your choice (optional)
Combine in a pot on a medium-high burner and bring to a low boil. Then reduce the heat and keep the mixture at a simmer until the sugar is dissolved and begins to reduce and get syrupy. This usually takes 8-10 minutes, but will vary depending on your stove.
Remove from the heat and let sit until cool. If your flavoring has whole herbs or spices, remove them or strain them out and store your syrup in the fridge.
Here are some favorites for inspiration:
Mint syrup: To your basic simple syrup recipe, add ½ part of mint leaves. For example: 1 cup water and 1 cup sugar, plus ½ cup of mint leaves. Strain out the leaves when it’s cooled.
Cinnamon vanilla syrup: Add 3-4 cinnamon sticks to your syrup right after the sugar has dissolved. Simmer as usual. Remove from the heat and let sit for several hours to infuse the cinnamon. Remove the sticks and stir in a teaspoon of vanilla extract.
Citrus syrup: Zest, slice and juice enough lemons, limes or oranges to replace ½ (or more if you really want a zing) of the recipe water with the citrus juice. Make the syrup as usual, adding the zest after the sugar is dissolved.
Eat your coffee—4 ways to use coffee in your cooking
Add brewed coffee to deepen the flavor of your next chocolate cake, add a punchy surprise to whipped cream, and make next-level cookies. Keep a container of cold brew in the fridge, and you’ll always be ready to swap in some flavor.

Keep cold brew in the fridge and you’ll always have it around for cooking. Pic by @blackcoffeerecycling
Coffee. It’s not just for drinking. You can—and should—eat it too.
Add brewed coffee to deepen the flavor of your next chocolate cake, add a punchy surprise to whipped cream, and make next-level cookies. Keep a container of cold brew in the fridge, and you’ll always be ready to swap in some flavor.
Here’s our four favorite ways to eat your coffee.
Make coffee whipped cream
For your next batch of whipped cream, sub cold brewed coffee concentrate for the vanilla. Or use both, especially if you have vanilla bean paste, which will make the mix less liquid.
Use brewed coffee to deepen the flavor of chocolate.
Jami Curl, author of Candy is Magic, started pouring her leftover coffee into a jar and keeping it in the fridge for baking. Why? Because coffee shares a few key flavors with chocolate, and when you mix in a little strong coffee you get a deeper chocolate but without the coffee flavor. Swap out cold brew concentrate or leftover coffee for some of the liquid in your recipe. It’s basically magic. Here’s a primer from Food52.
Bake up some cold brew cookies
We stumbled across this trick one holiday season in a frenzy of cookie making. And it’s simple...add cold brew to cookies. Yes, the chocolate kind. But the peanut butter and oatmeal kind too. All the kinds. Read all about it.
Pour coffee syrup on things
Thicken and sweeten your coffee and pour it over ice cream or pancakes. We wrote about this a few months ago, and it’s worth a revisit!

Preserve an orange peel two ways
It’s citrus season. If you stock up on oranges, save those peels! They have the potential to bring citrusy magic alive months from now, long after the chill has left the air. Imagine looking for a summer treat and finding candied orange waiting in your pantry or dried zest ready to be tossed into a recipe. Future you will thank you.
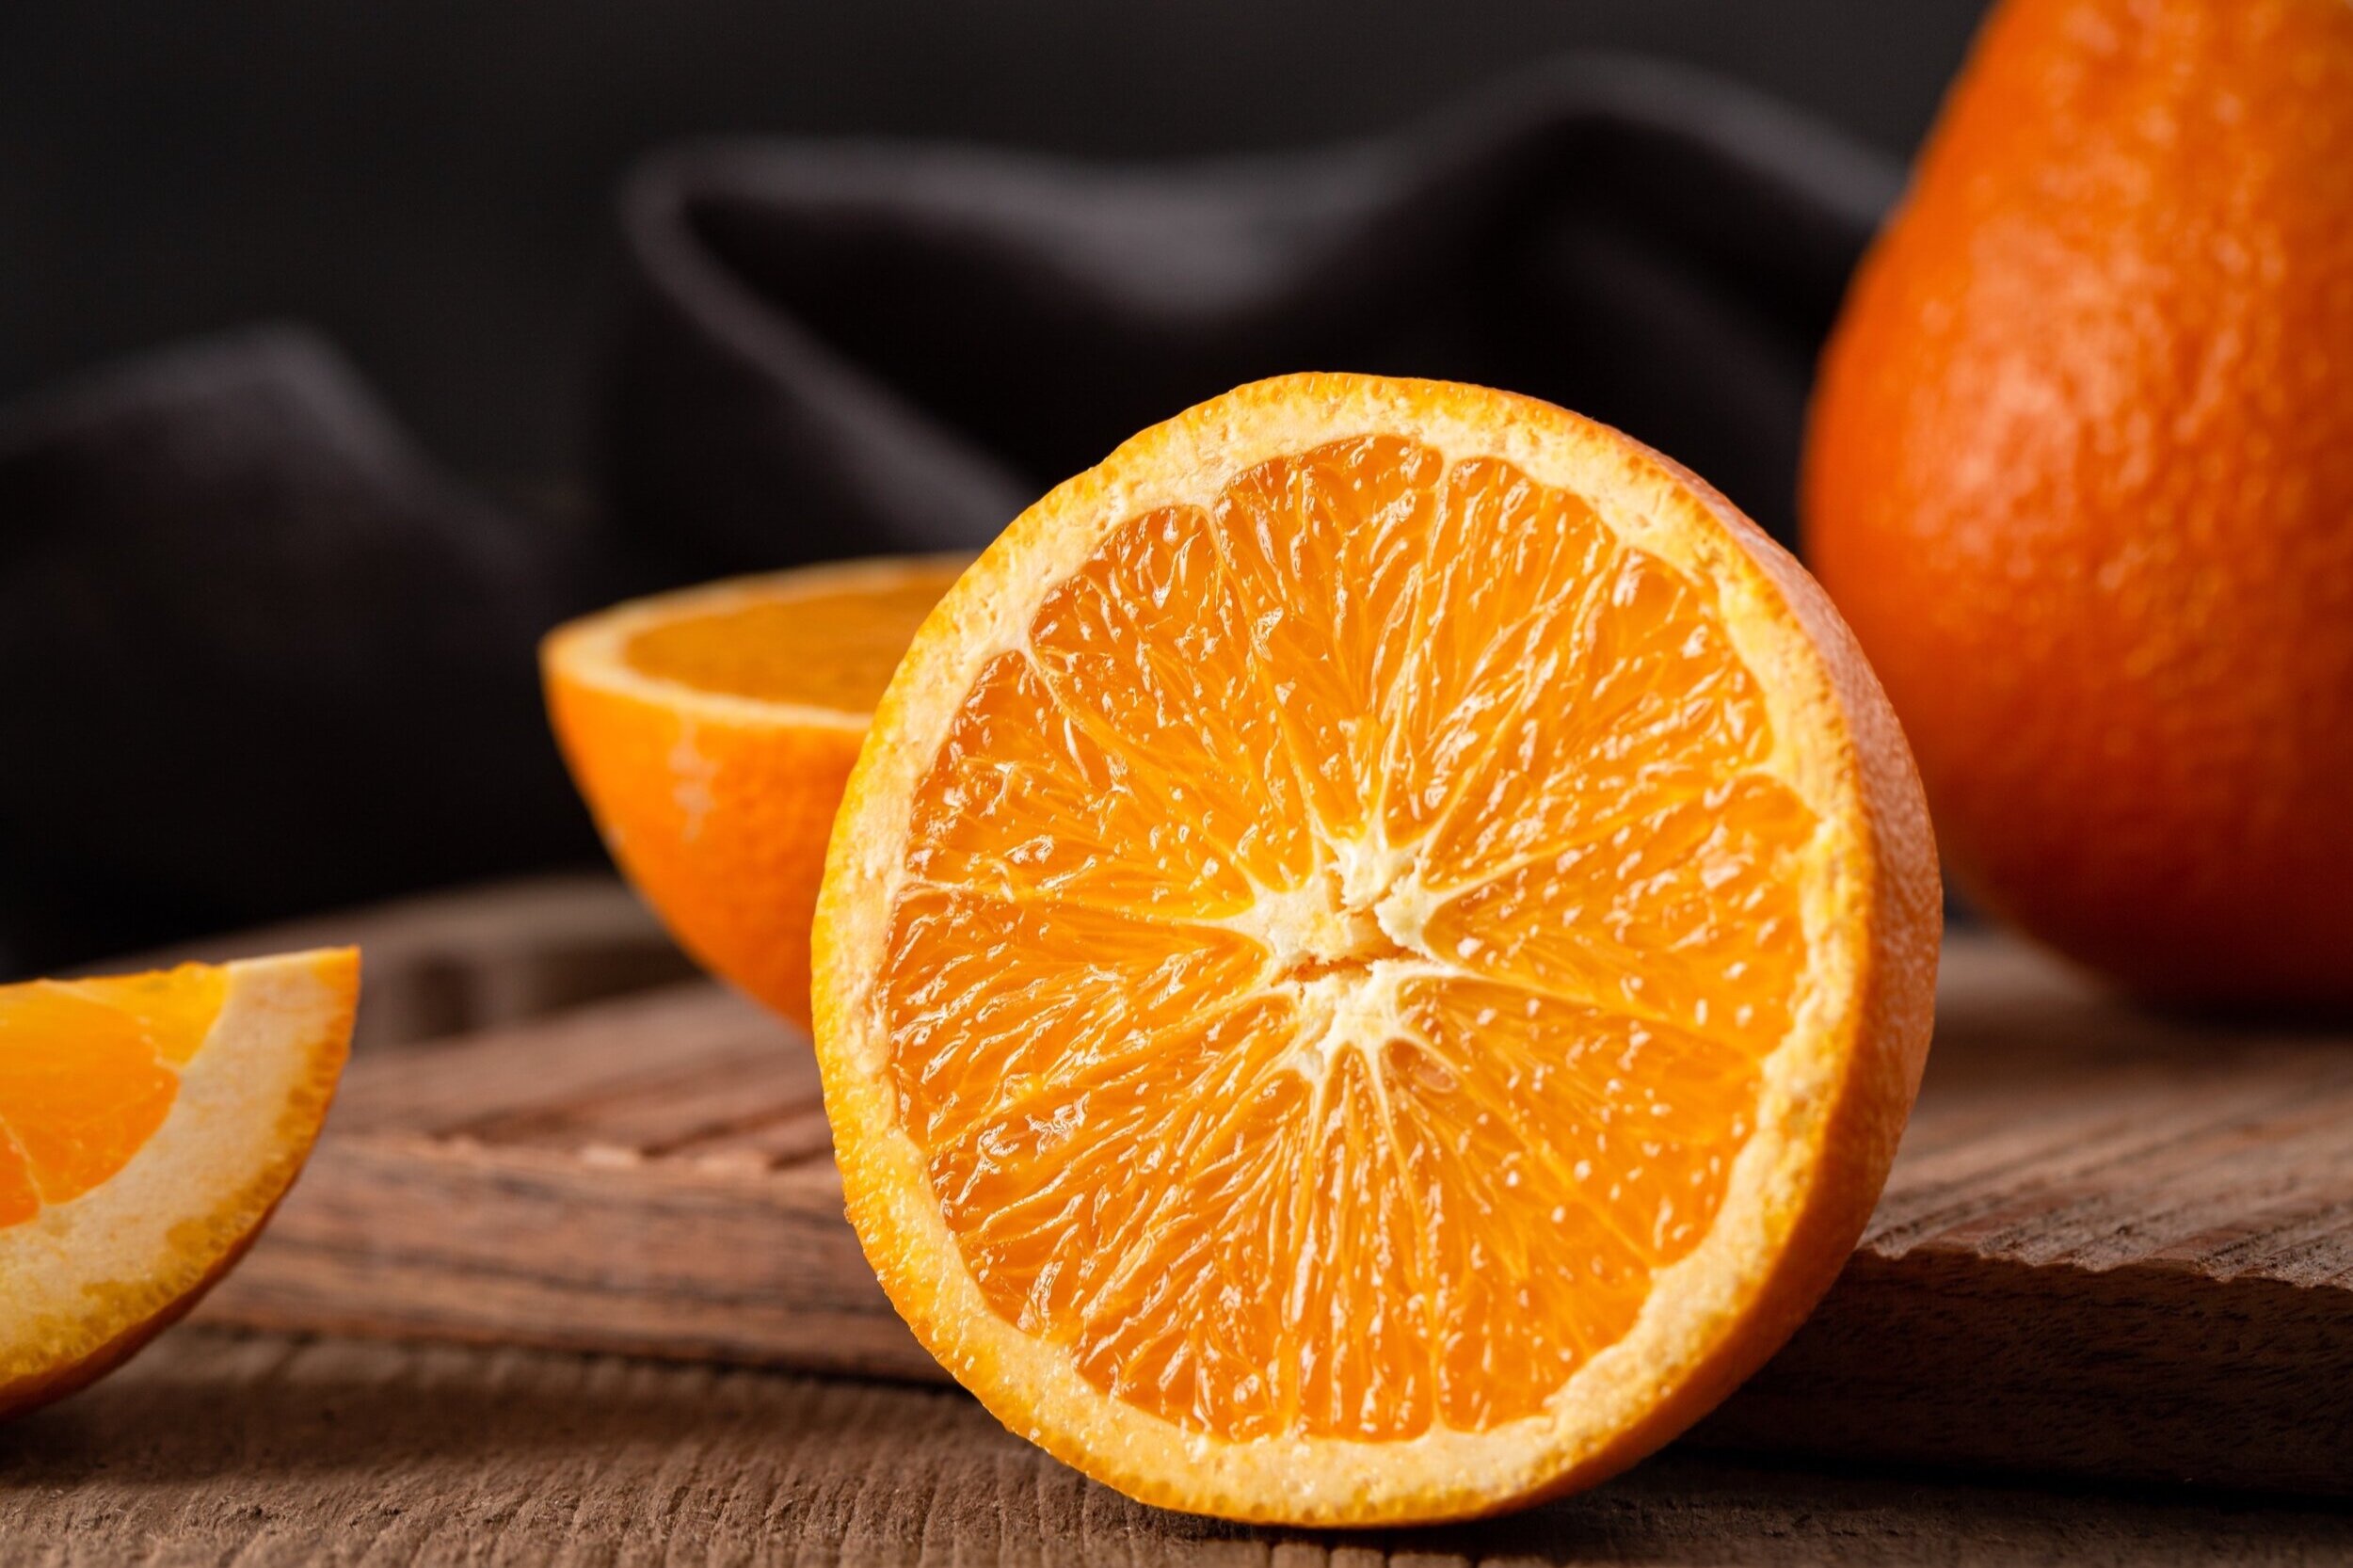
It’s citrus season and we may have bought a lot of oranges recently. To peel an ripe orange and bite in is to have a moment of bright magic even on the coldest February day.
And those peels? They have the potential to bring that magic alive months from now, long after the chill has left the air. Imagine looking for a summer treat and finding candied orange waiting in your pantry. Or dried zest waiting to mixed into whipped cream or even ice cream.
Your future self is going to think your past self is the cleverest person in the world. Save those orange peels for future you. Here’s two ways.

Candied orange peel
(Dip them in chocolate if you’re feeling extra.)
You’ll find plenty of candied orange peel recipes with various amounts of sugar. We prefer the lower sugar version, but this is not an exact science. Experiment with more or less sugar when you create your syrup. Just adjust the water up or down accordingly.
Ingredients
3 rinsed and peeled navel oranges
1.5 cups of sugar
2 cups of water
A vanilla bean (optional)
Method
Peel the orange to the width you prefer. Aim for 1/4 to 1/3 an inch peels.
Use a paring knife to remove as much of the white pith as you can.
Place the peels in a sauce pot and cover with water.
Bring to a boil and boil gently for 10 minutes. Rinse and repeat so that you’ve boiled them twice.
Remove the peels to a plate.
Mix 1 cup of sugar with 2 cups of water and bring to a low boil.
Place peels in the syrup and simmer for 45 mins.
Use a slotted spoon to remove the peels from the syrup and set aside on a cooling rack for about 5 mins.
Place the remaining 1/2 cup of sugar on a plate and toss the syrupy peels in the sugar to coat.
Allow them to cool and dry completely. Then store in an airtight container.

Dried zest
Toss dried zest in recipes all year
We love the bright flavor of citrus zest. It turns homemade breads, cakes, cookies and ice cream into something surprising and special.
You can keep a jar of dried zest in your fridge for 6 months or more…if it lasts that long.
Ingredients
Rinsed and dried oranges—as many as you have!
That’s it!
Method
Use a microplane or zester and zest your fruit peel.
Drying method one: Spread the zest on a baking sheet or piece of parchment and allow it to air dry (this can take a couple of days, depending on your house temperature and humidity).
Drying method two: Set your oven to its lowest temperature. Spread zest on a parchment lined baking sheet and allow to dry at low temperature in the oven. This takes anywhere from 30 minutes for finely zested peels, to several hours for thicker zests.
Allow to cool completely and store in an airtight jar in your fridge.
Homemade Coconut Milk
Cook it in a curry, blend it a smoothie, or pour it in a bowl of cereal—however you use coconut milk, you will be rewarded. It’s creamy, naturally a little sweet, and full of antioxidants. And it’s easy to make! Here’s how.

Cook it in a curry, blend it a smoothie, or pour it in a bowl of cereal—however you use coconut milk, you will be rewarded. It’s creamy, naturally a little sweet, and full of antioxidants.
And? It’s easier than you think to make it at home. Reduce packaging and save some money by trying this DIY recipe. A blender helps, but you can do it without a blender too!
Homemade Coconut Milk
You’ll want two cups of water for every cup of coconut. This recipe makes about four cups, but you can adjust to your heart’s desire.
Gather your ingredients
2 cups of shredded coconut, unsweetened. (You can use bulk aisle coconut chips or a good quality packaged kind)
4 cups of water (Use less water if you prefer a thicker milk.)
Optional: sweetener of choice. Try a dash of maple syrup!
Make your milk
With a blender: Blend the coconut, water, and sweetener (if using) on high until smooth. Most of the chunks should be gone. Pour the milk through a cheesecloth or nut milk bag.
Without a blender: Use your hands! Put the coconut and water in a bowl and smoosh it with your clean hands. Keep smushing until most chunks are gone. For this method, let the mixture steep for an hour or so, then pour through a cheesecloth or nut milk bag.
Chill and enjoy. Put your milk in the fridge to chill. It might separate a little. Just give it a shake before using.

Visit our instructions page for detailed instructions.
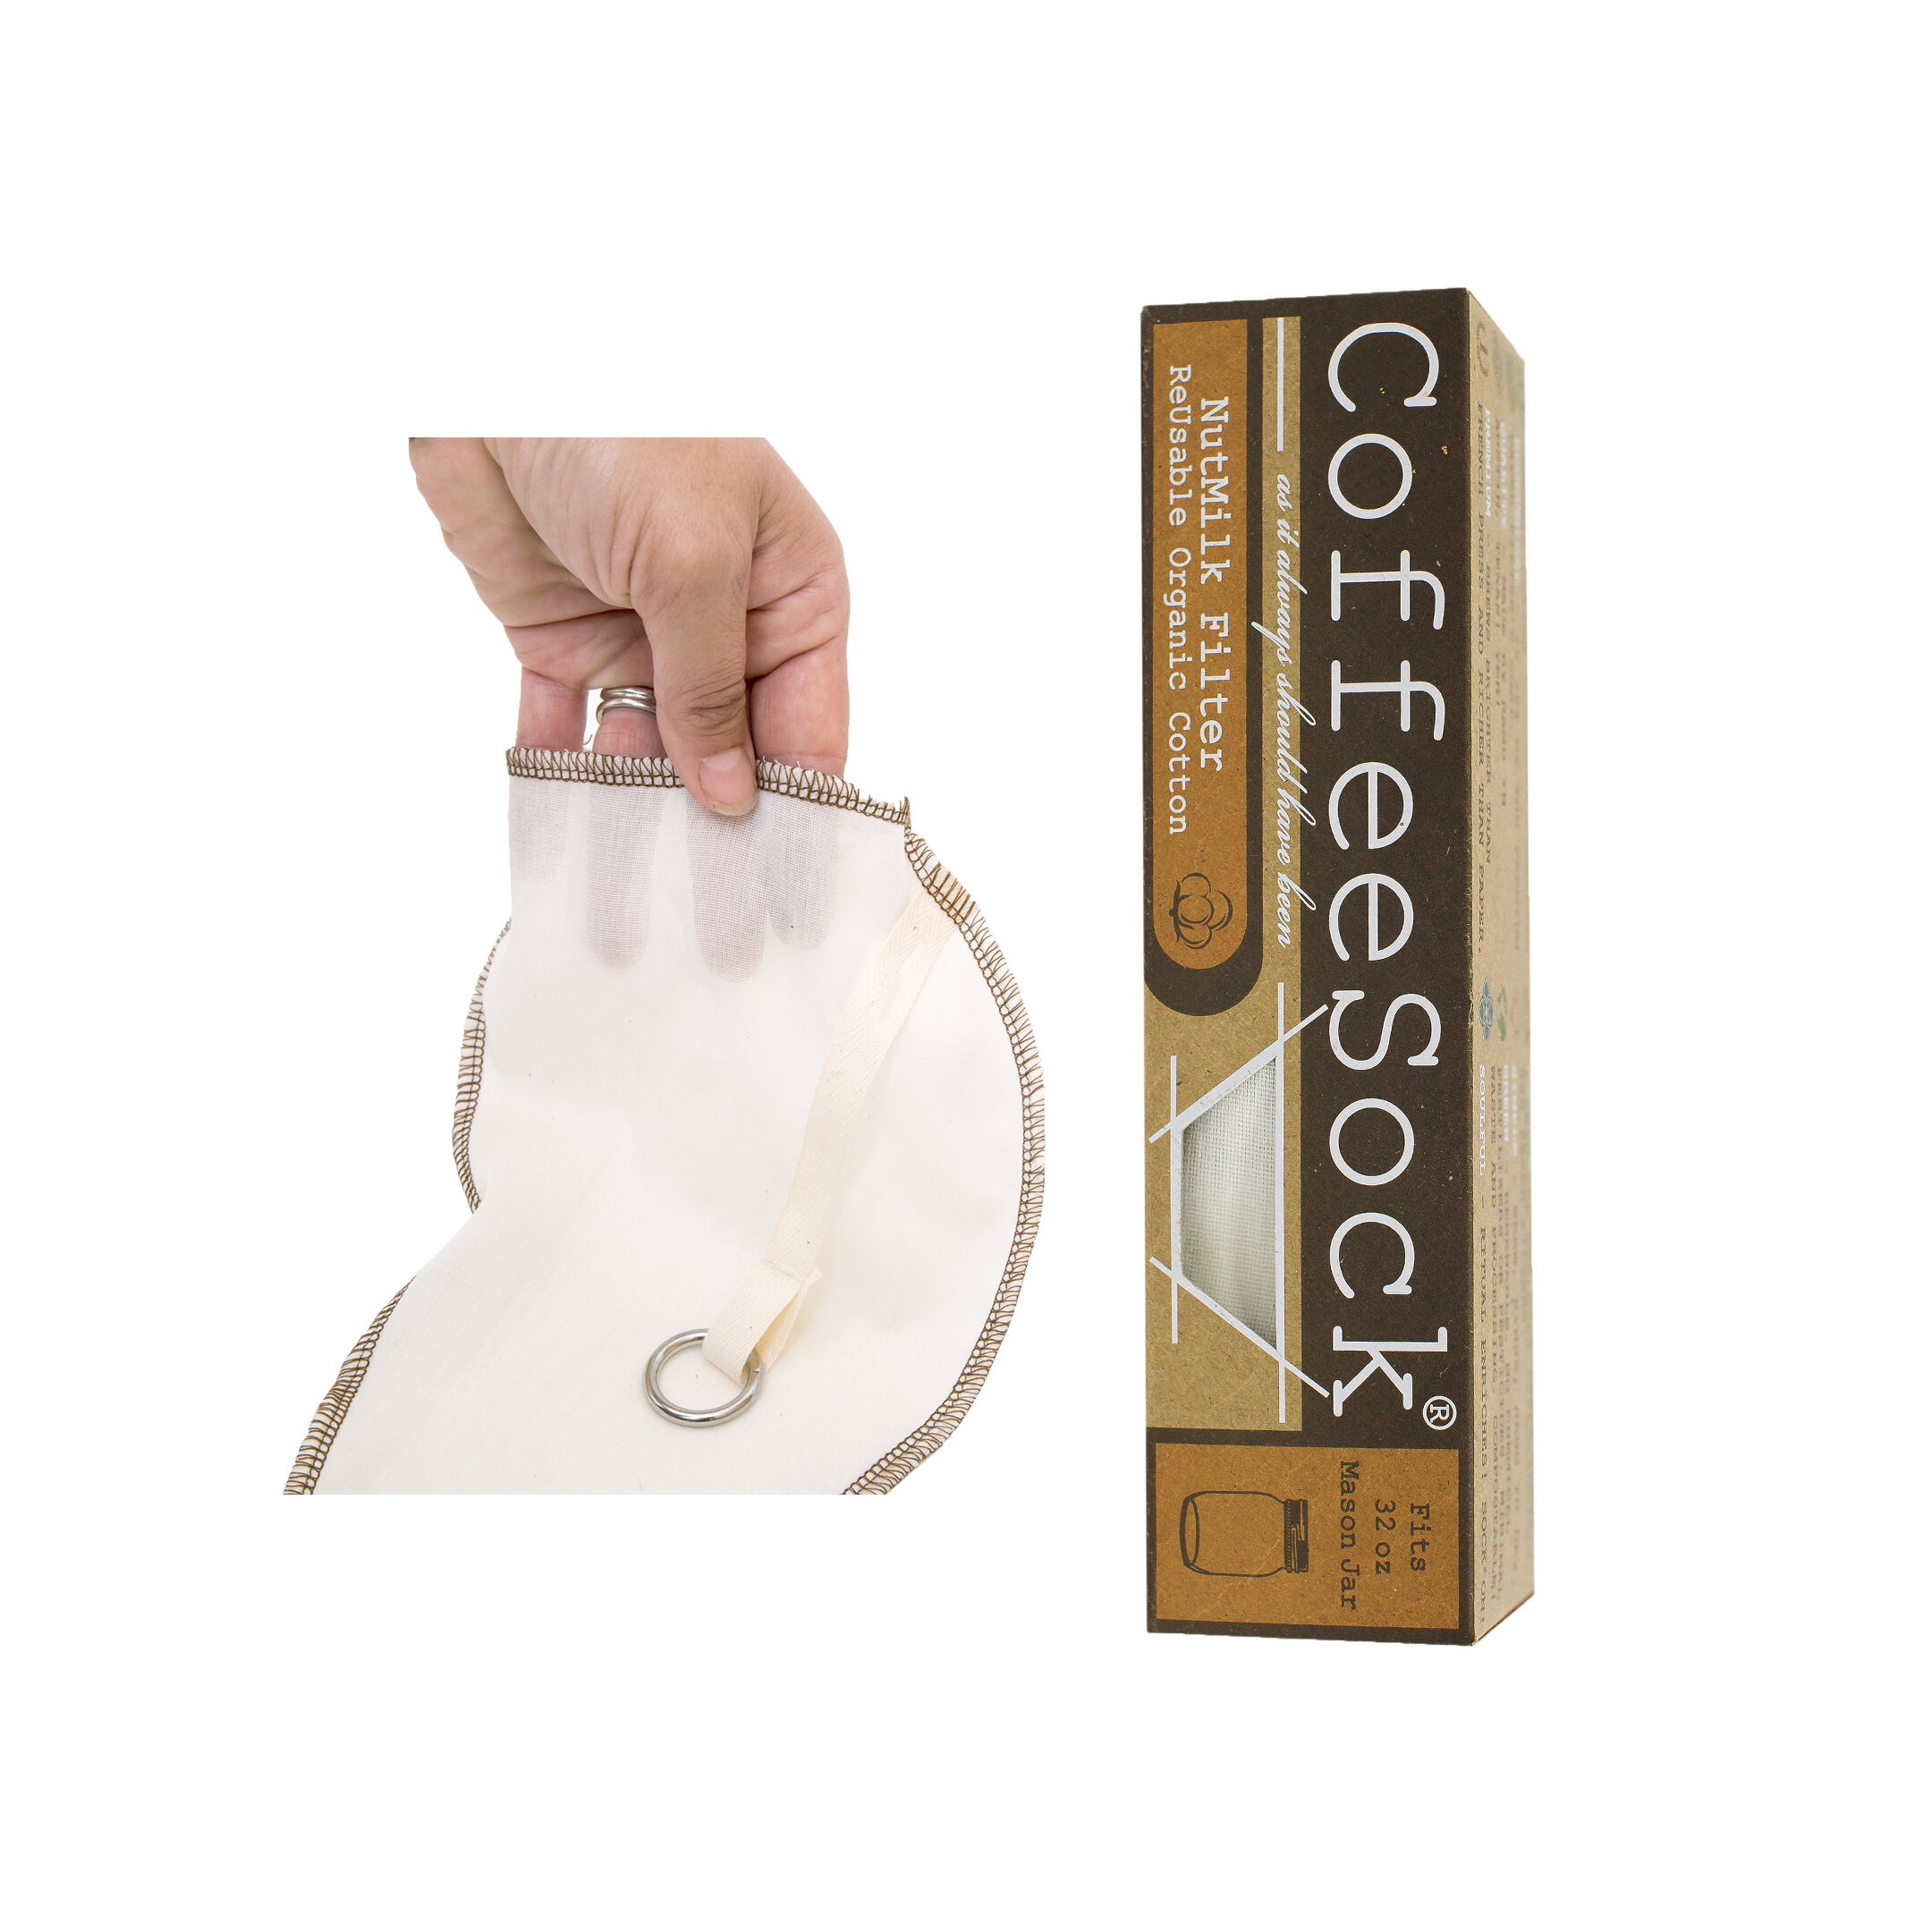
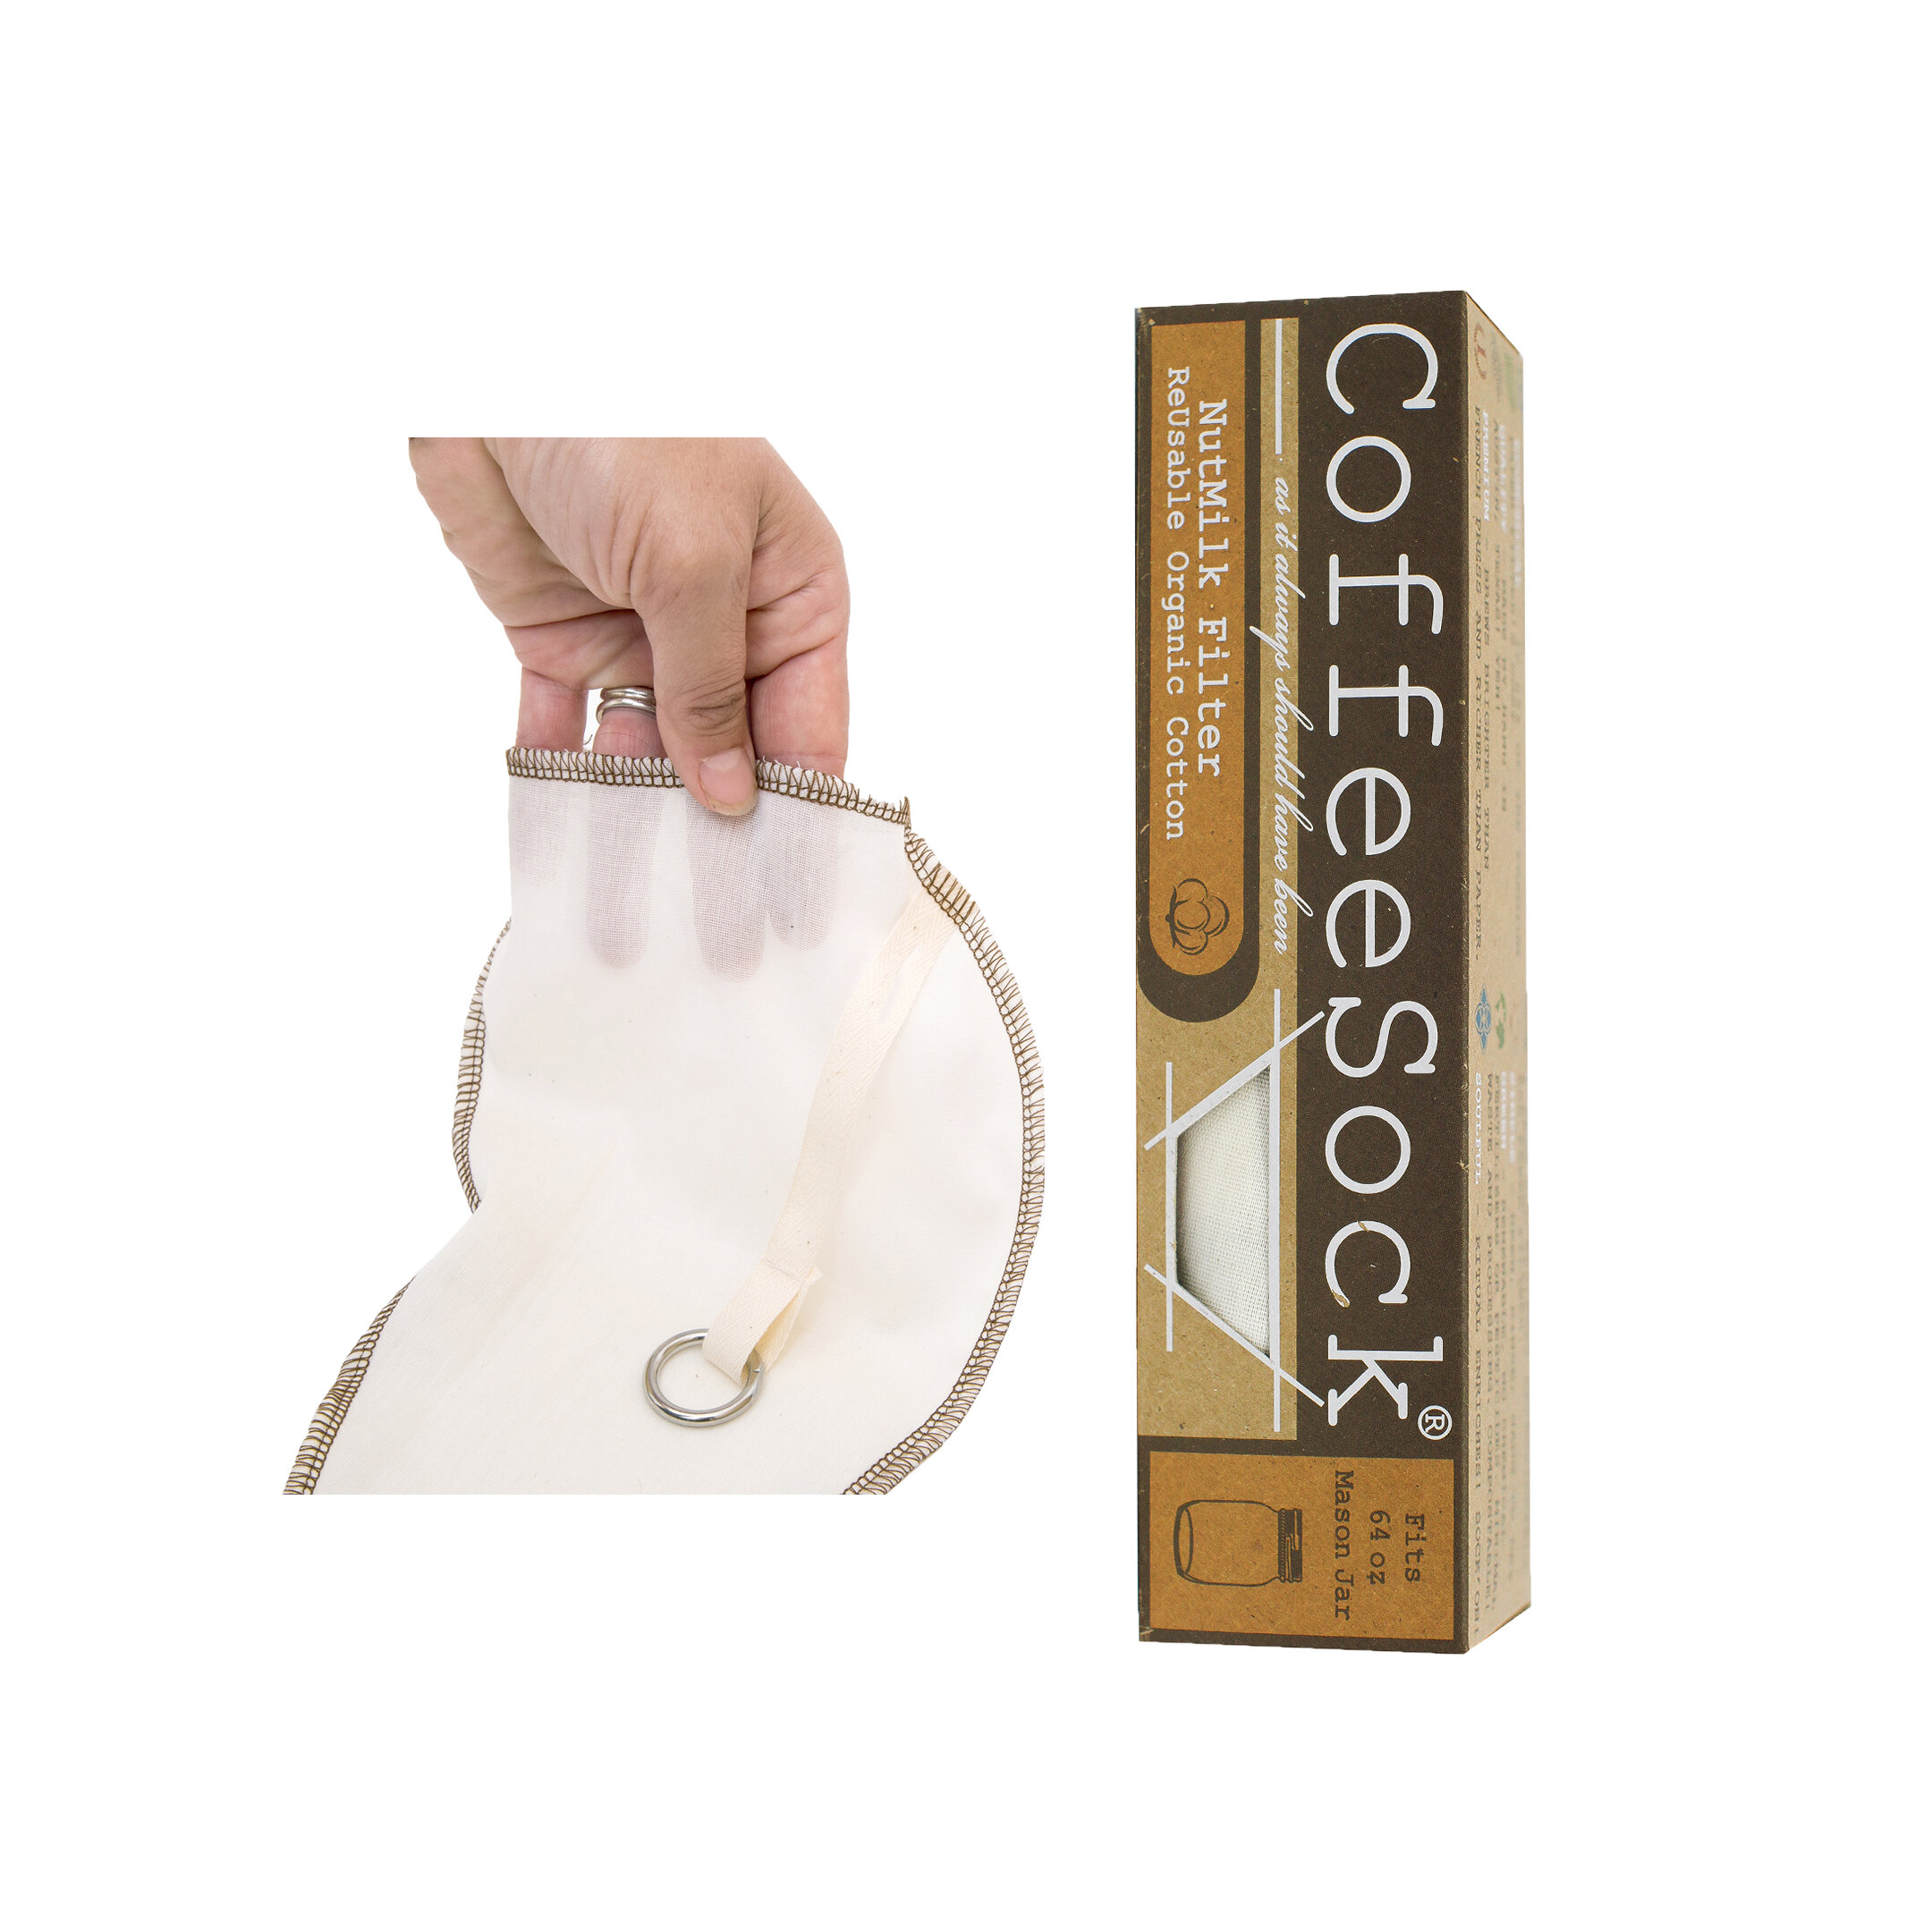
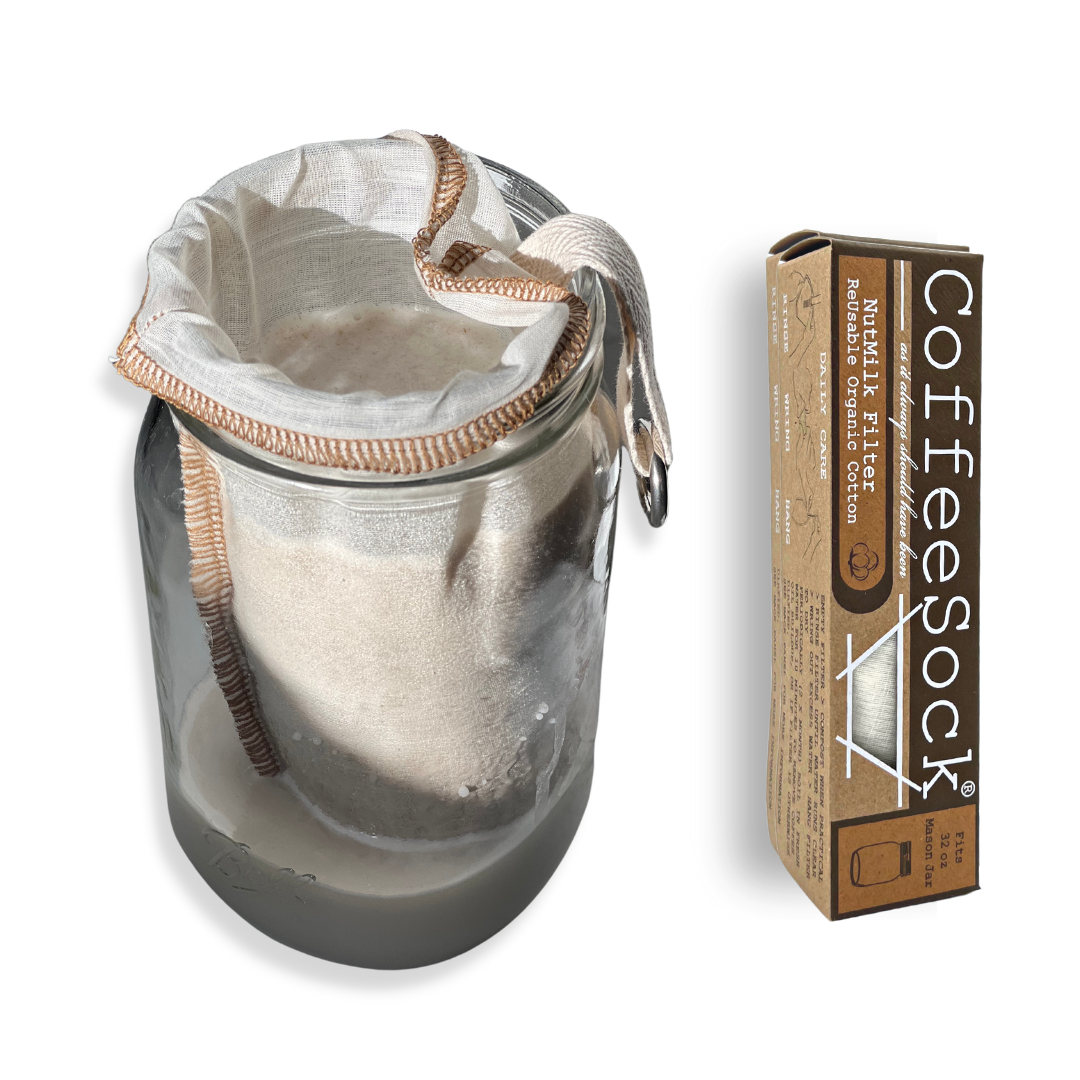
CoffeeSock NutMilk filters are durable and may last a year or more. CoffeeSock filters are a reusable alternative to paper filters and nylon sacks. All of our filters out-perform any comparable disposable and reusable filters. CoffeeSock filters are made with Certified Organic Cotton. Cotton imparts no flavor on the finished brew unlike paper. Cotton is 90% cellulose, which is a tasteless and odorless compound that is insoluable in water. Wood is 40-50% while Hemp is approximately 45% cellulose. CS filters are made in Austin, Texas. All filters are sewn and packaged by happy human beings making a fair and living wage.
Packaged 1 Filter to a pack.
ReUsable | ReNewable | Economical | Simple
Made to Fit: Canning Jar
Manufactured in the USA
Easy cleanup - Just empty nut blend, rinse, and hang to thoroughly dry.
High quality and less expensive than many market alternatives.
Made from Organic Cotton - a responsibly produced, renewable resource
Shipping and Handling time: 1-3 business days
The Chai Chart
How do you like your chai? Full of spice or mild and sweet? Use our basic recipe, then choose your own chai adventure with the chai chart.

If you’re a chai fan, maybe you’ve noticed that every shop and restaurant that serves it seems to have their own unique take on the tea. Some sweeter, some full of ginger, and some smooth and light. After the black tea, sweetener and milk, you can play around with spices to get your chai just the way you like it.
Think of it more like a template than a rigid recipe.
The basics—tea, sweetener and milk
Black tea—2 tbsp of loose Darjeeling (You can use the Tea Sock for steeping)
Water—4 cups cold water
Milk—2-3 cups of dairy or nondairy milk. Choose a rich milk, like whole, coconut, or cashew milk
Sweetener of choice—1/4 to 1/2 cup packed brown sugar, honey, or maple syrup. Use the amount and type you prefer
The spices—use the chai chart
We highly recommend you use whole spices. You’ll need to crush them, but you don’t need to buy a mortar and pestle if you don’t have one. You can use the back of a spoon or a frying pan to gently crush the spices. You don’t need to pulverize them, just lightly crush them to release the oils and flavors.
You’ll be rewarded with a glorious smelling kitchen!
How much to use? That’s up to you—and the results will range from tangy and spicy to mild. We created a handy chart for you!

Put it all together
Once you’ve selected your spices, lightly crush them with a mortar and pestle or the back of a large spoon, and add them to the cold water in a saucepan.
Bring to a simmer and let cook for about 10 minutes.
Add your milk and tea and steep another 5 minutes.
Remove from the heat and stir in your sweetener until it’s fully dissolved.
Taste and adjust milk and sweetener to your liking.
Enjoy!
Coffee or tea simple syrup
Simple syrup is genius, and as the name implies, it’s really simple to make. Use your favorite coffee or tea blend to make tea or coffee simple syrup for your sweet treats and drinks.

Simple syrup is genius, and as the name implies, it’s really simple to make. Boil your liquid of choice, add sugar. Done.
Also known as “bar sugar” simple syrup is commonly used by bartenders to sweeten cocktails without having to dissolve sugar crystals. So you get all the sweet without the grainy bits.
While most simple syrup is made with water and sugar, you can make flavored syrups by replacing the water with another liquid. In this case, coffee or your favorite tea.
Then use your fancy flavored syrup in everything—desserts, waffles, ice cream, sparkling water, cocktails...you get the idea.
Coffee or tea simple syrup
Ingredients
1 cup of sugar
1 cup of strong coffee or black tea
Method
You want strong brewed coffee or tea, so choose your favorite blend (Earl Grey syrup anyone?) and double the usual amount of tea or coffee you’d use for one cup of brew. For coffee, you can also use cold brew concentrate.
Bring the liquid to a boil and add the sugar, stirring to combine and dissolve the grains.
Reduce the heat and simmer until sugar is completely dissolved and the mixture has reduced slightly.
Remove from heat and cool completely.
Bottle it up and enjoy.

DIY Herb Infusions
Make infused stocks, spiced oils and DIY teas with reusable infusion filters. Get the basic recipe, then play around with your favorite whole and dried spices.
Infused stocks, spiced oils, and DIY teas. Make your own whole herb blends with reusable infusion filters.
Looking to add to your cooking tricks? Browsing for make-it-yourself holiday gifts? Got herbs?
Skip the expensive store-bought stocks, gourmet infused oils and health teas. Prune your garden herbs or buy whole herbs at the grocery and make your own infusions.
Herb infusions add extra health benefits to tea and water and intense flavor to cooking essentials. Think thyme oil, calendula or bay leaf tea, rosemary infused water or even spiced Vodka. All you need is whole herbs and spices, a liquid base, a jar, and a sieve or reusable infusion filters.
Infusions have health benefits
Plenty of herbs and spices have well known health benefits. According to recent medical studies, cinnamon helps lower blood sugar, cayenne peppers improve heart health, and sage strengthens brain function—and that’s just three of the many antioxidant-filled treasures that also smell and taste wonderful.
Sneak extra flavor and nourishment into water, teas, and cooking oils with a few basic rules.

Infused Tea or Water
(We’ve listed our favorite herb blends below)
Use one or two tablespoons of dried herbs or several sprigs of fresh whole herbs that you’ve rolled a bit with a rolling pin. (This helps release the oils. You can use a mortar and pestle if you’ve got it.)
Use an infusion filter or be ready to strain out the herbs with a fine mesh sieve later.
Place the herbs in a glass jar and add two cups of very hot water.
Let steep for several hours. Overnight is even better.
Remove the infusion filter or strain out the herbs and enjoy.
Herb-infused broth
OK—truth be told, herb-infused broth is basically just herbed water with more herbs, and it’s almost always savory. While broth still has the health benefits of herbs, it’s all about that flavor.
Use this recipe as the base for your next soup.
Use about a cup of fresh, savory herbs and spices. We like rosemary, bay leaf, thyme, sage, and peppercorns.
Place the herbs in two or more infusion bags, or add directly to a stockpot.
Pour six cups of water over the herbs and bring it all to a simmer.
Simmer (don’t boil), for about ten minutes, then remove from heat and let the stock steep until cool.
Remove the infusion bags or strain out the herbs.
Store in a glass jar in the fridge, or freeze if you don’t plan to use in the next couple of days.
Our favorite infusion blends
Detox Drink: Combine two or more cinnamon sticks, 1 tsp of cayenne, a little lemon rind for an infused water or warm tea.
Refresh Water: Steep two rosemary sprigs and one or two thyme sprigs in water, then chill.
Chai Tea (Or Vodka—wink wink): Two cardamom pods, four whole cloves, two cinnamon sticks and ginger to taste. Steep in hot water. Add milk and honey to taste after you remove the spices.
Ginger Turmeric Broth: Add some cold-fighting zing to your broths with your favorite herbs, plus a whole piece of ginger, chopped, and a full tablespoon of turmeric.

Infused Honey
Get the health benefits of raw, local honey with these tasty infusions. It's easy to make. We'll show you you how.

Warmer temperatures and the first blooms of spring means honey bee season. And as nature’s most industrious workers busy themselves pollinating our trees and veggies, they turn that work into summer and autumn crops of honey.
Honey is delicious. And raw, local honey may even have health benefits ranging from allergy relief to cough suppression and wound treatment. As far as sweeteners go, a dab of honey adds a natural sweetness to your money toast and tea.
Flavored honey for your toast and tea
The hardest part about infusing honey is deciding what flavors to choose. Let us get you started with three honey infusions for your morning cup or afternoon treat.
Supplies
A quart-sized or smaller mason jar with a tight-fitting lid
A fine sieve
Your choice of flavor infusions (try our suggestions below or get creative). It’s best to choose dried herbs and spices that are large enough to strain out
Instructions
Fill your mason jar ¼ to ½ full with the herbs and spices of your choice (the more spices, the more flavor). Choose dried herbs to avoid a sad, moldy honey. And larger pieces are easier to strain out.
Fill the jar with raw, local honey, covering the infusion and allowing the honey to seep to the bottom. Screw on the lid and place the jar in a nice, sunny window sill.
Once or twice a day, give the jar a shake. Turn it upside down. If the lid is keeping everything put, you might even leave the jar upside down and the flip it back for the next shake.
Let the mixture work its magic for a couple of days—a week is even better.
Open it up and strain the honey into a fresh jar, composting the left over infusion.
Store your infused honey in the fridge.

Cinnamon Vanilla
Vanilla bean (scrape out the seeds and add seeds and pod to the jar)
3-5 cinnamon sticks

Dried Citrus
The peel of one orange or lemon
Dry the peel completely and place in a 200 degree oven for about 30 minutes to finish drying

Cardamom Ginger
5-10 cardamom pods
Dried ginger to taste
A Cup of Self Care
Self care doesn’t have to be expensive or time consuming. Turn your daily cup of tea or coffee into a cup of self care by adding good for you ingredients. We’ve done the research for you.

This Valentine’s Day, show a little extra love to that special someone who’s always there for you… yourself!
Sure, you could go for the usual slate of chocolates, wine, and roses. If that makes you happy, we are all about it! But you don’t have to head to the spa to indulge in well-earned self care. Self care can happen in quiet, early-morning moments, in a short bedtime ritual, or in a 15-minute mid-afternoon coffee date with yourself.
In fact, with a few special ingredients, you can turn your daily cup of tea or coffee into a cup of self care.
We have even gone the extra mile for you and checked out the health claims of some of the most popular add-ins. We struck gold with a helpful infographic from Information is Beautiful, which compiles scientific studies testing the health benefits of supplements and superfoods. According to their data analysts, the add-ins below have science-backed promise – one of our favorite kinds of promise!
A bonus? Coffee itself makes the “worth it” list. Strong evidence shows it reduces risk of cardiovascular disease. So your treat your heart to a cup, and boost benefits with these proven add-ins.

Peppermint Oil
Peppermint oil can sooth stomachs, especially for those who suffer from IBS, due to its muscle relaxing properties. Add a couple of drops to your coffee or tea for a minty treat.
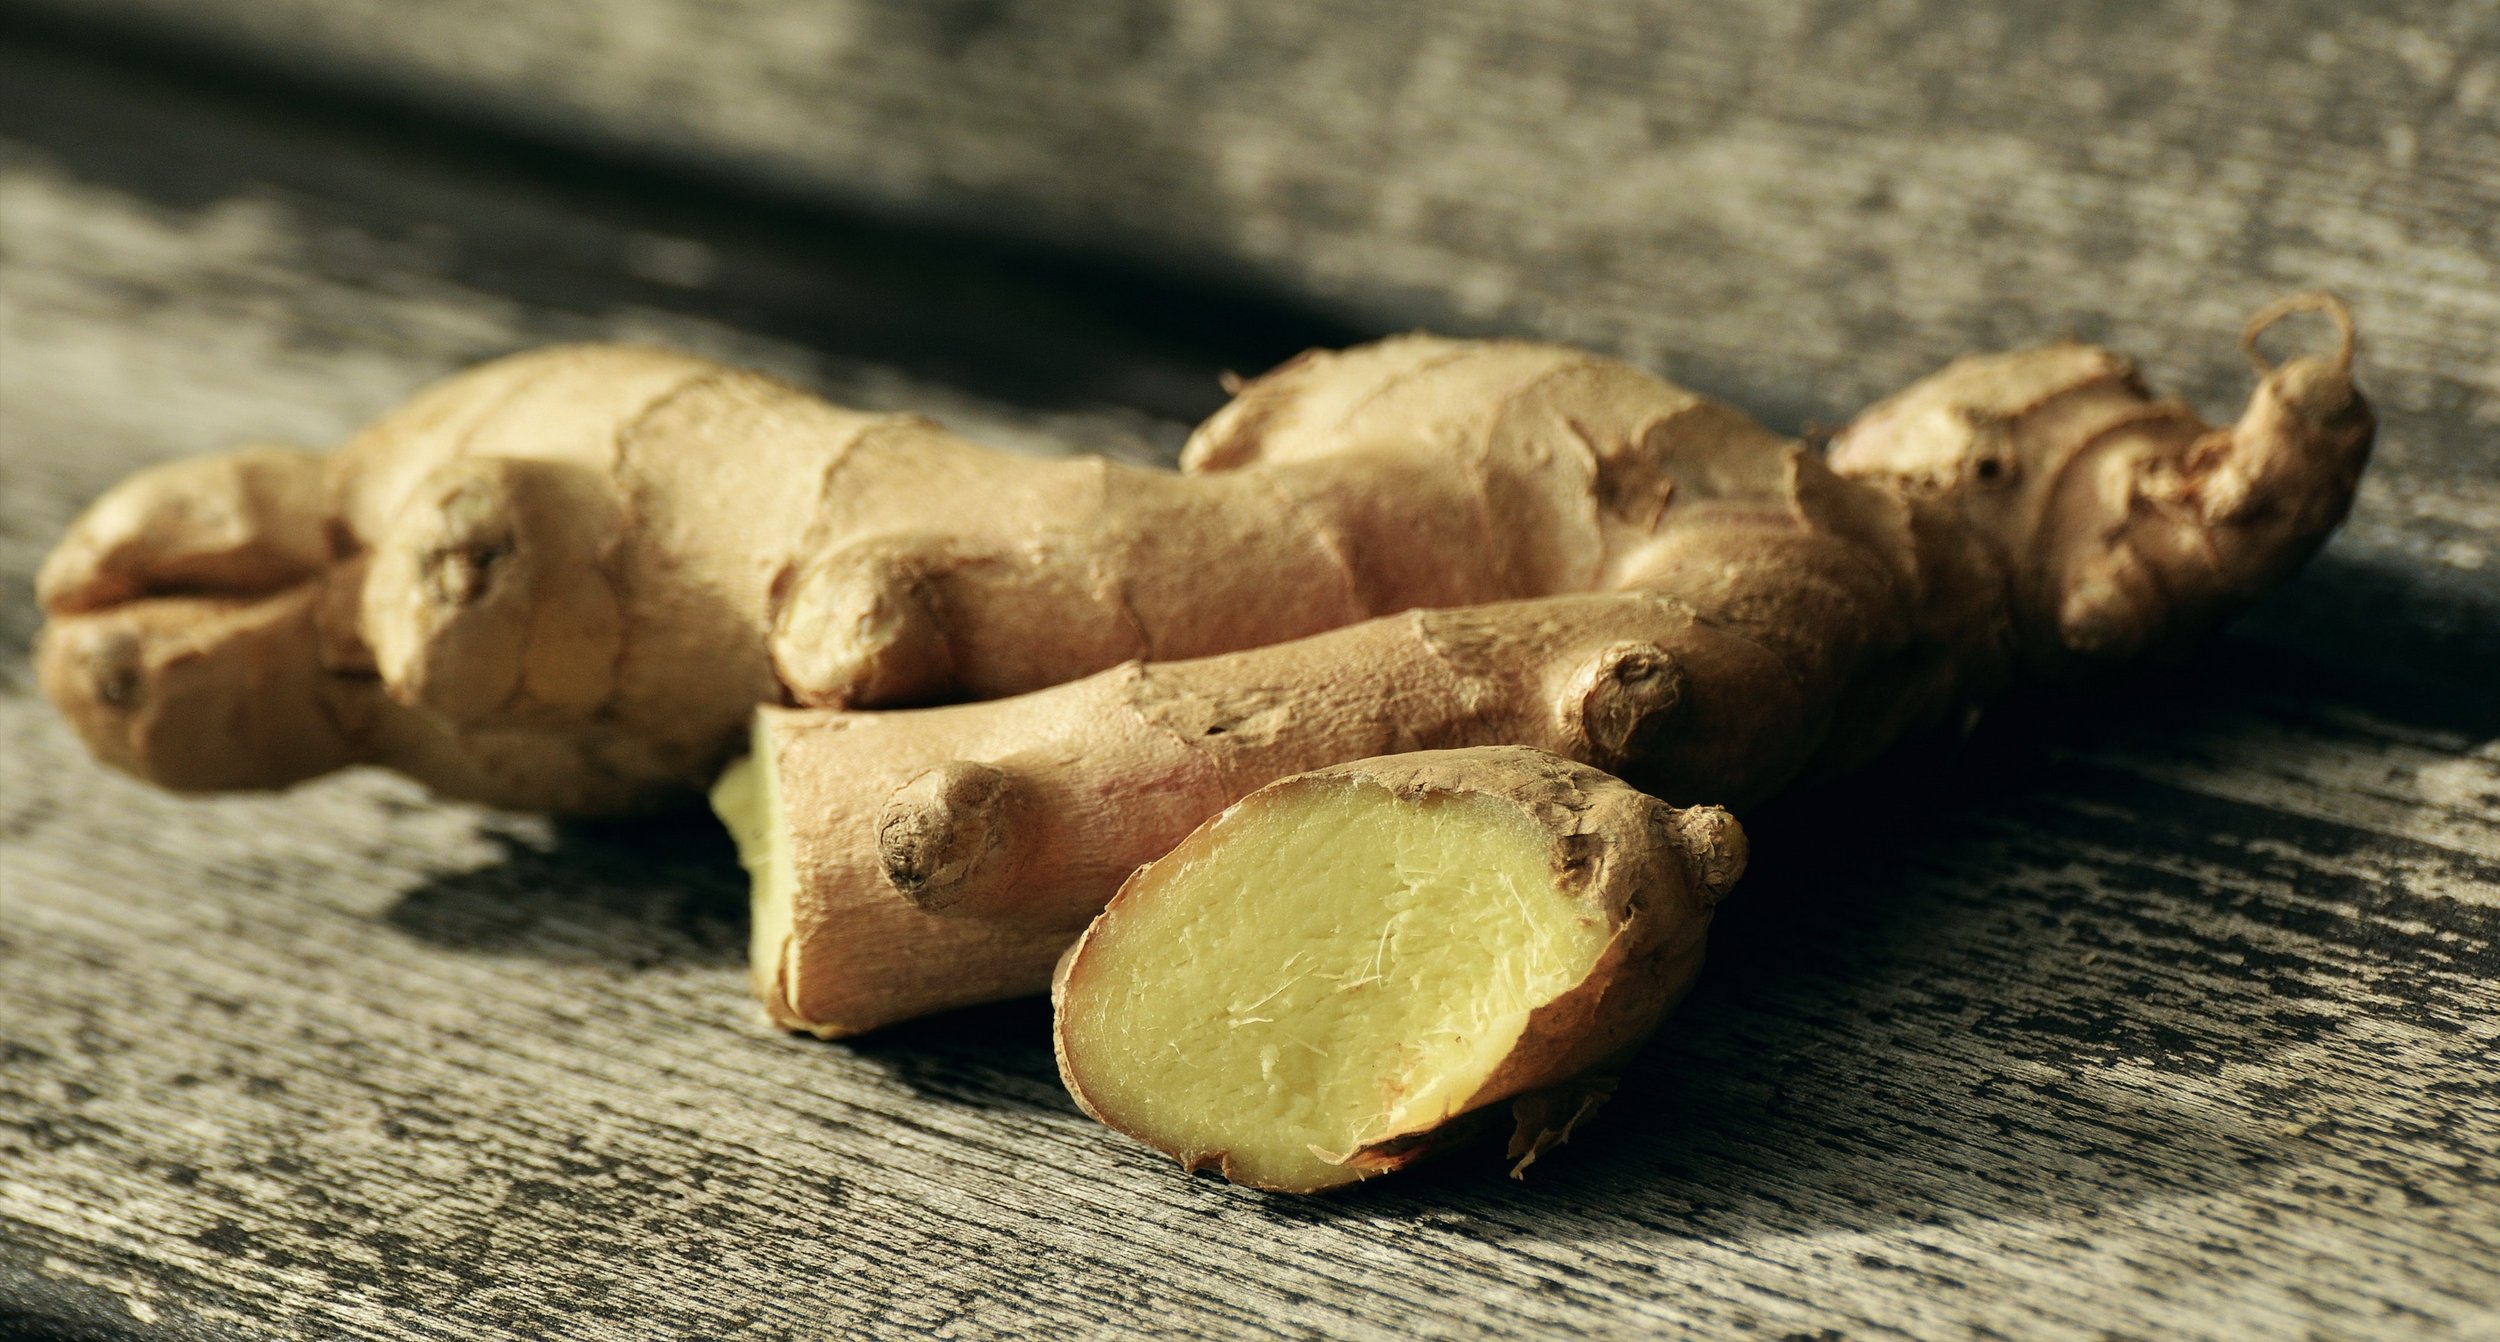
Ginger
Ginger has a long history as a digestive aid, and science is coming around to the idea, placing ginger above the “worth it” line for treating nausea. You can steep ginger root right in your tea cup. Or try fresh ginger powder in your coffee if you’re a gingerbread fan.

Coconut Oil
Coconut oil shows promise in reducing waist size and fighting obesity. Start with a couple of teaspoons and work your way up to a tablespoon.

Ashwagandha
Ashwagandha can relieve stress and anxiety, according to 5 separate scientific trials. It also earned a nod for possible arthritis relief. Add a scoop of powder with a little coconut oil, or check out any of the “adaptogen” coffees on the market.
And honorable mention for our favorite self-care standby

Dark Chocolate
Dark Chocolate may have inconclusive health benefits according to the lab coats, but it’s place in our coffee is very, very conclusive. We’ll take a scientific maybe as a good enough reason to keep dark chocolate on our own personal “worth it” list!