Herb-infused vinegar
Looking for a way to use up extra herbs? Homemade herbed vinegar is ingenious, thrifty, and makes a truly delicious salad dressing or sauce. You don’t need to buy expensive vinegar to make up a batch—the herbal infusion will elevate even the humblest brand you buy. Here's how to DIY your own herbed vinegar!

Why do stores sell such large bundles of herbs when you only need a fraction for your recipe? If you’re more organized than most people I know, maybe you’re chopping the whole bunch and preserving the leftovers in the freezer.
We’ve got an even more convenient way to use up those herbs—and you can chop them or not. Homemade herbed vinegar is ingenious, thrifty, and makes a truly delicious salad dressing or sauce. You don’t need to buy expensive vinegar to make up a batch—the herbal infusion will elevate even the humblest brand you buy, and the steeping time will mellow it out.
Here’s how to DIY an impressive herbal vinegar.
Gather your ingredients
2 cups of white wine vinegar
1/4 cup of fresh herbs of choice (you can use one type of herb or a mix. We like rosemary or a thyme and tarragon mix, but you do you)
1 sterilized mason jar or another jar with a tightly-sealed lid
1 metal jar funnel (optional, but super handy)
Make your infused vinegar
Be sure you’re using sterilized jars. They can be right out of the dishwasher or boiled in water, as for making preserves.
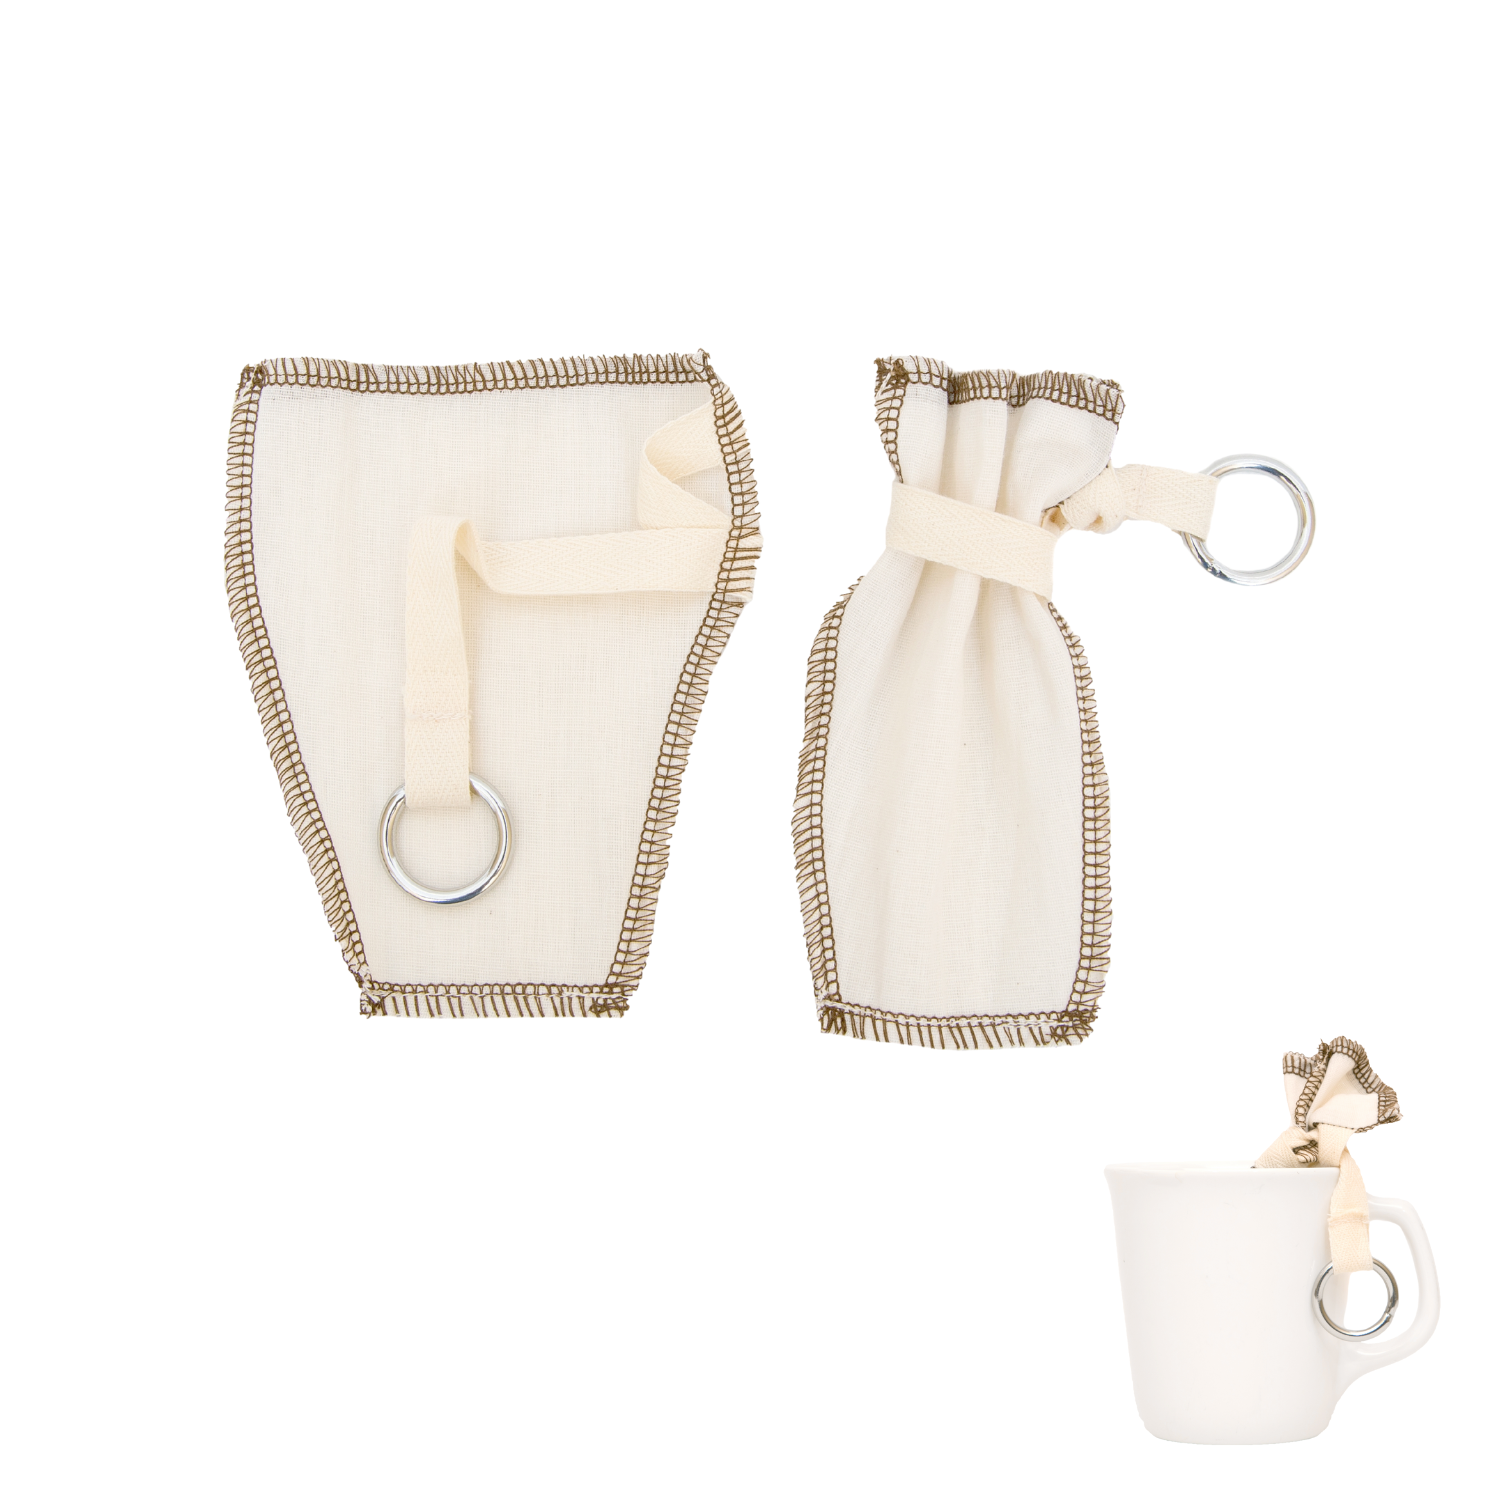
Add loose herbs to the infusion filter and place in the jar. You can add larger, hardier stems right to the jar if you prefer.
Heat the vinegar in a small saucepan until it starts to steam—but don’t boil it.
Allow the vinegar to cool to just above room temperature.
Slowly pour half of the vinegar into the jar over the herbs. Using a spoon or muddler, smash down the herbs a bit, making sure that the vinegar is wetting the infusion bag. Pour in the remaining vinegar. This is where a funnel will come in handy, getting all of that liquid gold into the jar without a mess.
Tightly seal the lid and let it steep in the refrigerator for at least 3-4 days, but a couple of weeks is best for top flavor.
Use your vinegar with olive oil, crushed garlic, lemon, and capers for tangy salad dressing or fish sauce. Or add it directly onto chopped kale and toss it with a bit of oil, salt, and pepper. It makes a wonderful tofu marinade, too.
Enjoy!
Vietnamese Iced Coffee Cookies
We love the flavor profile of Cafe Sua Da (Vietnamese Iced Coffee with Condensed Milk). Café Sua Da is a traditional Vietnamese coffee recipe. Historical access to fresh milk was limited, therefore sweetened condensed milk was added to a dark roast coffee. In honor of this delicious recipe we decided to whip up Vietnamese Iced Coffee inspired cookies that will make the perfect match for your next cuppa coffee.

We love the flavor profile of Cafe Sua Da (Vietnamese Iced Coffee with Condensed Milk). Café Sua Da is a traditional Vietnamese coffee recipe. Historical access to fresh milk was limited, therefore sweetened condensed milk was added to a dark roast coffee. In honor of this delicious recipe we decided to whip up Vietnamese Iced Coffee inspired cookies that will make the perfect match for your next cuppa coffee.
Gather Your Ingredients
Makes 24-28 cookies
For the cookies:
2 1/4 cups all-purpose flour
1/2 tsp baking powder
1/4 tsp salt
3/4 cup butter, unsalted
3/4 cup granulated white sugar
1 large egg
2 tsp vanilla extract
3 tbsp ColdBrew made with CoffeeSock DIY ColdBrew Kit
1 tbsp coffee grounds
For the icing:
3 Tbsp meringue powder
6 Tbsp condensed milk (to start, will add more until right consistency)
1 tsp ColdBrew made with CoffeeSock DIY ColdBrew Kit
4 cups powdered sugar, sifted
Make Your Cookies
In a large bowl, beat the butter and sugar together on high speed until completely smoothly, about 2 minutes. Add the egg, vanilla extract, and ColdBrew (See ColdBrew instructions) and beat for another minute until combined. Add the dry ingredients: flour, baking powder, salt, and ground coffee to the wet ingredients than mix on low speed until combined.
Divide the dough into two equal parts. Place each portion onto a piece of lightly floured parchment paper or a lightly floured silicone baking mat. Roll the dough out to about 1/4-inch thickness with a floured rolling pin. Place a piece of saran wrap or bees wrap to cover then refrigerate for about an hour.
Preheat your oven to 350F degrees. Line baking sheets with parchment paper or silicone mats. Remove the chilled dough for the refrigerator. Using a cookie cutter, cut the dough into shapes. Arrange cookies on baking sheets about 2 inches apart. Bake for 11-12 minutes or until it’s lightly browned around the edges. Allow cookies to cool before icing.

To make the icing, let the condense milk and meringue whip on high until it gets super frothy, about 2-4 minutes. Then add the powdered sugar and let it whip for another 7-10 minutes and add the ColdBrew. The icing should appear thick, slowly add more condense milk until it’s the right consistency for flooding. Put icing in a disposable piping bag for ease of decorating. Once the cookies have cooled, decorate the cookies with the icing. * Optional: Add 2 whole coffee beans in the center of the cookie.
Enjoy with a delicious cup of ColdBrew!
Cinnamon Hot Tea Toddy
We love a hot toddy in the winter. It’s spicy, warming, and soothing on our weather-beaten throats. A traditional hot toddy uses whiskey or bourbon instead of tea. We’ve replaced the booze in this recipe with our favorite black tea, but we won’t judge if you throw a splash in your mug.
We love a hot toddy in the winter. It’s spicy, warming, and soothing on our weather-beaten throats. A traditional hot toddy uses whiskey or bourbon instead of tea. We’ve replaced the booze in this recipe with our favorite black tea, but we won’t judge if you throw a splash in your mug.
Gather Your Ingredients
Makes 2 cups of yum.
2 cups of water
2-4 tablespoons honey (depending on your sweetness preference)
4 tablespoons lemon juice
2 cinnamon sticks
2 tsp ground cinnamon
4 whole cloves
1 tsp grated ginger
2 tbsp of loose black tea
Make Your Toddy
Heat the water to near boiling in a small saucepan. You could use a kettle and steep ingredients separately in your mugs, but the saucepan way is a little simpler.
While the water is heating, add cinnamon sticks, loose tea, cloves, and ginger to your tea sock.
When water starts to bubble, remove it from the heat and stir in honey to dissolve, then add the lemon juice and ground cinnamon, continuing to stir until everything is incorporated.
Add the tea sock and steep for 3-5 minutes.
Remove the tea bag after steeping and pour the mixture into your mugs
Sip and smile!
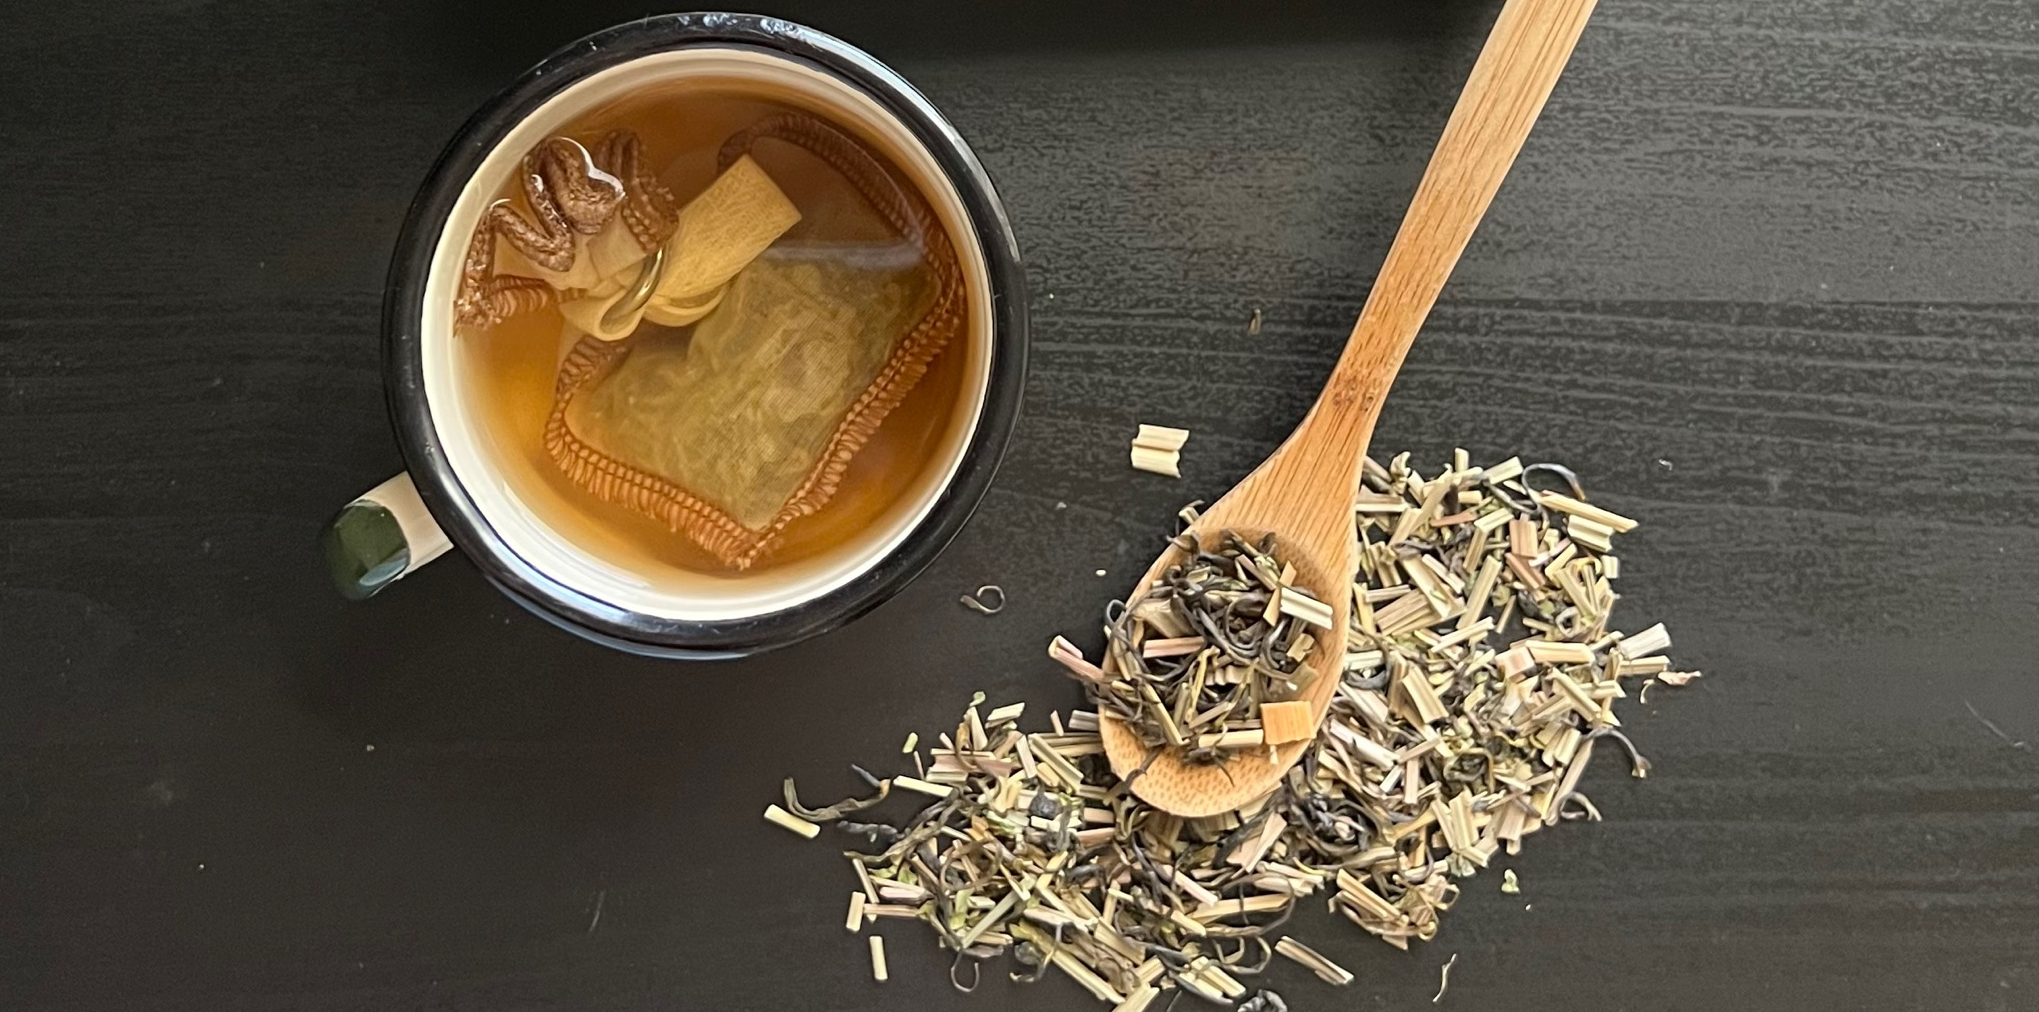
Turmeric tea
Every ingredient in this nourishing turmeric tea is a powerhouse for health. Turmeric—a powerful anti-inflammatory and antioxidant spice—is the star of the show. Black tea, cinnamon, honey and oat milk play supporting roles, bringing an extra dose of anti-inflammatory properties along with flavor and sweetness.
Every ingredient in this nourishing brew is a powerhouse for health. Turmeric—a powerful anti-inflammatory and antioxidant spice—is the star of the show. Black tea, cinnamon, honey and oat milk play supporting roles, bringing an extra dose of anti-inflammatory properties along with flavor and sweetness.
Turmeric tea makes an excellent afternoon pick-me-up, or use decaf black tea for an evening wind-down brew.
Gather your ingredients
The amounts listed below make 2 cups of tea
1 inch piece of fresh turmeric, peeled and grated (you can substitute 1 tsp of ground turmeric if you don’t have fresh)
1/2 inch piece of fresh ginger, peeled and grated (you can use 1/2 tsp of ground here too)
2 tsp of your favorite loose black tea
1/2 cup of water
2 cinnamon sticks
1 tablespoon of honey (you can use more or less to your taste)
2 cups of oat milk
Make your tea
Add the grated turmeric and ginger along with the tea to reusable tea filter.
Add the water to a small saucepan and bring to a simmer.
Add the filled tea filter and the cinnamon sticks to the pan.
Let the brew simmer for one minute, then add the milk and honey.
Once the milk is warm and the honey dissolved, taste and adjust your sweetness and spice to your liking.
Pour into two mugs and enjoy!
Vanilla Oat Milk Steamer
We’ve got three word: Milk. And. Cookies. And we’ve got a specific combo in mind! Try this warm and spiced oat milk steamer with our customizable cold brew cookies! These steamers use rich and think oat milk with vanilla and a hint of cinnamon. You can add your favorite drink spices to the recipe, but we like to keep it simple to pair with a powerful cookie. Enjoy!
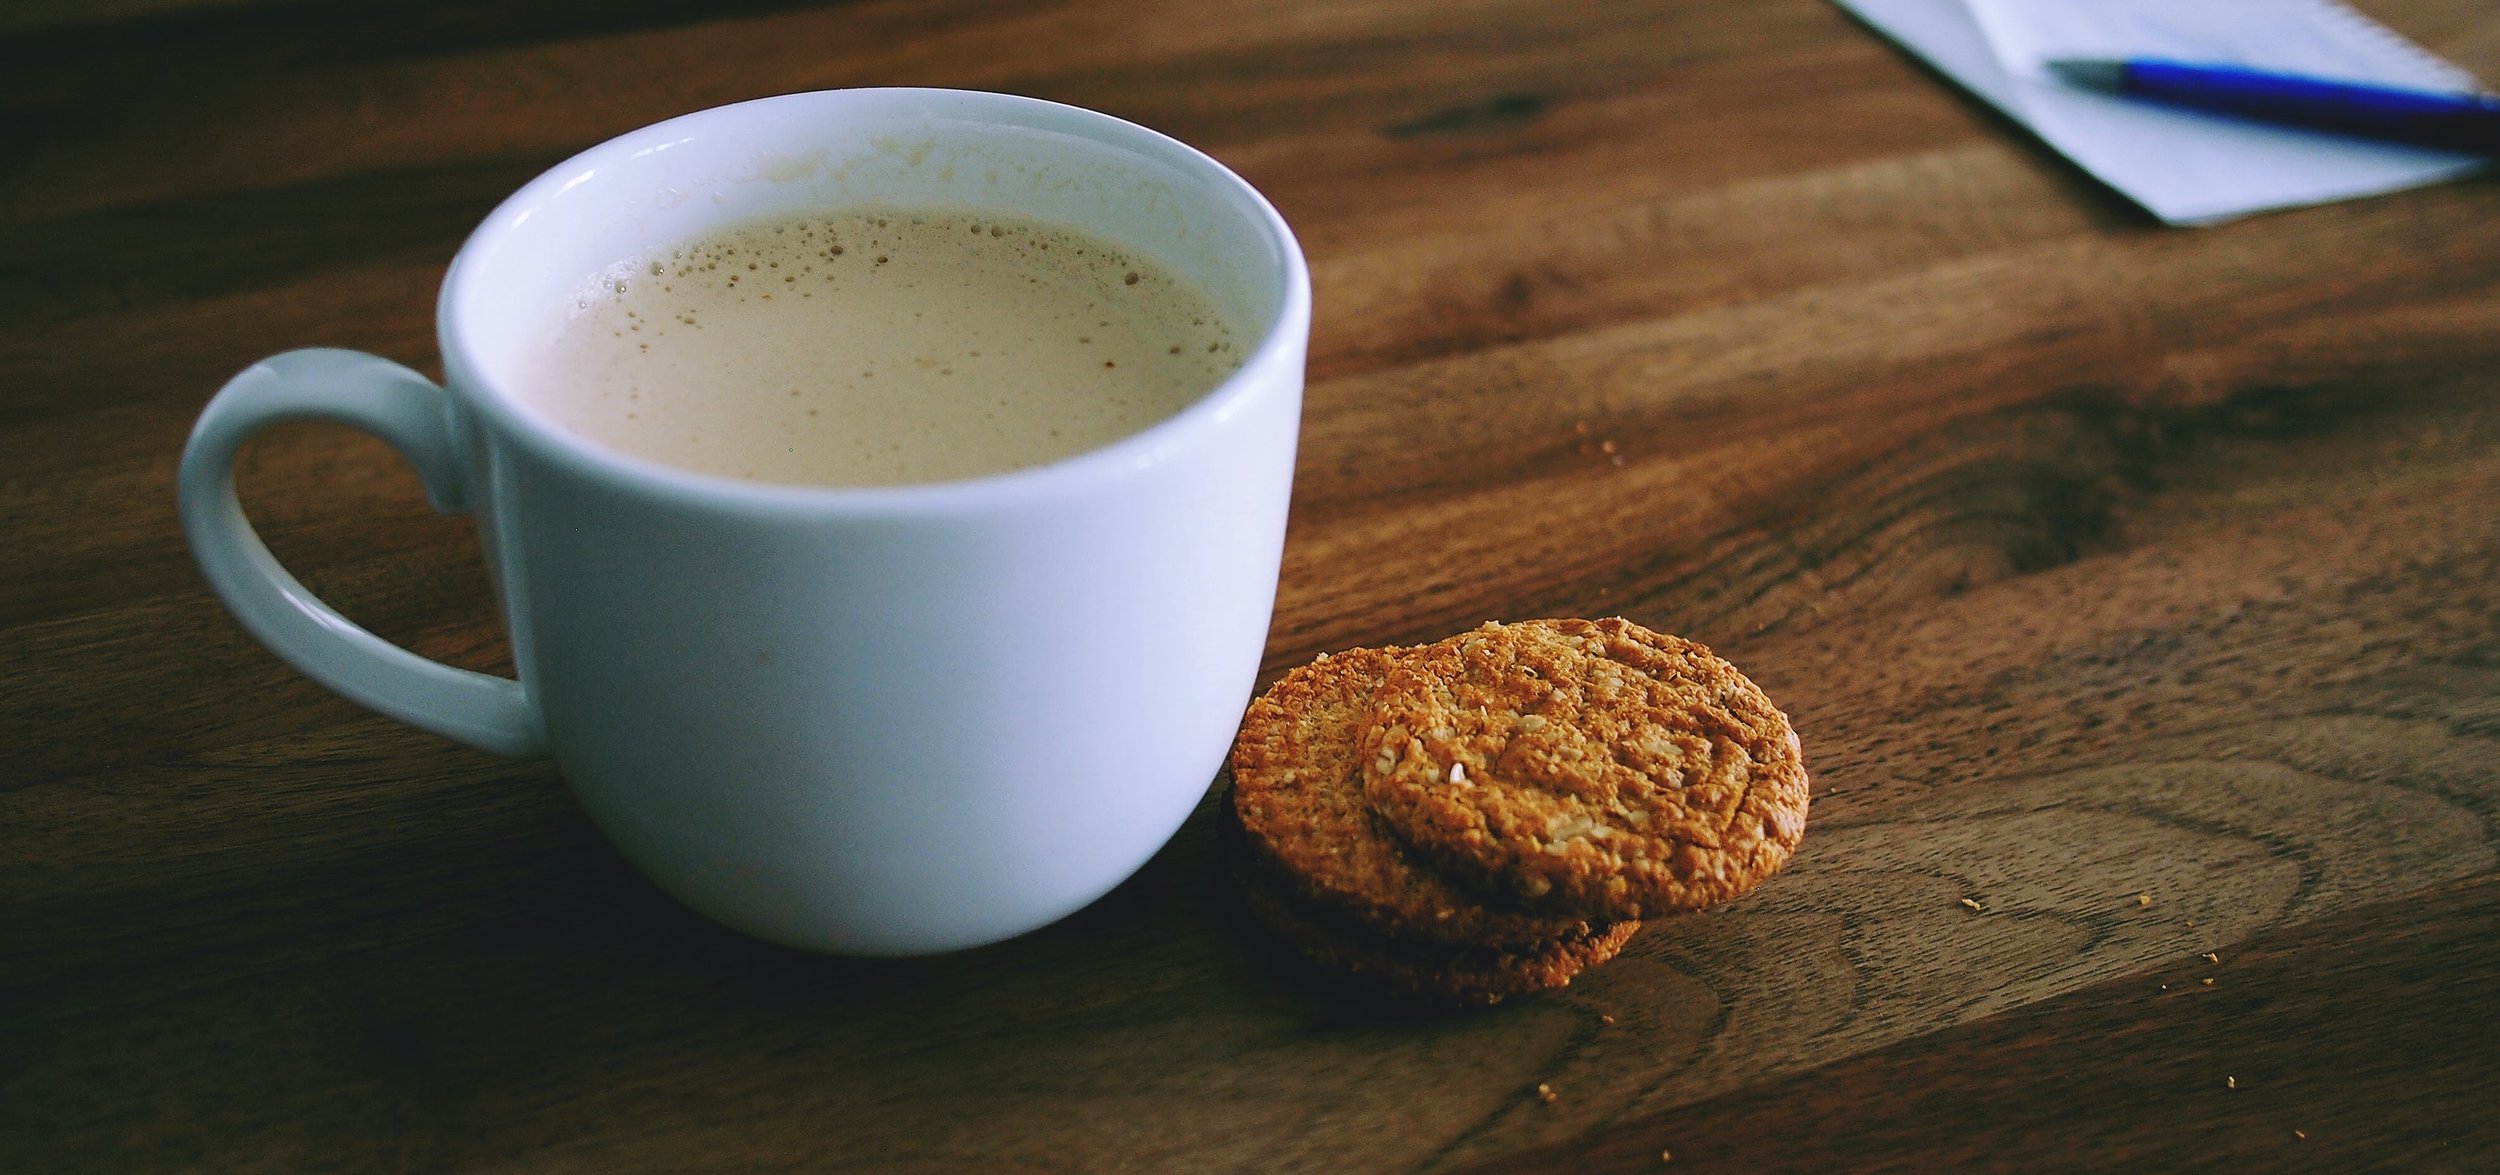
We’ve got three words for you: Milk. And. Cookies.
There’s just something about the cold season that really needs milk and cookies. And we’ve got a specific combo in mind: warm and spiced oat milk with our customizable cold brew cookies! Sub cold brewed coffee for some of the liquid in your favorite cookie recipe and dunk the resulting magic in this warm and creamy milk, grab a a blank and a book and cozy up.
These steamers use rich and think oat milk with vanilla and just a hint of cinnamon. You can add your favorite drink spices to the recipe, but we like to keep it simple to pair with a powerful cookie.
Gather your ingredients
This recipes makes 2 drinks. Scale up or down as you like.
2 cups of oat milk. We recommend making your own. It’s easy and inexpensive. Here’s a recipe.
1/2 tsp vanilla
1 tsp ground cinnamon
2 cinnamon sticks (optional and adorable)
Make your steamers
Add the milk, vanilla and ground cinnamon to a saucepan over medium heat.
Stir consistently until the milk starts to steam.
Pour 1/2 of the milk into two mugs (1/4 in each mug)
Add the rest of the milk to a mason jar with a lid. Shake vigorously until you see it get frothy.
Add the the frothy milk evenly into your two mugs and garnish each with a cinnamon stick.
It’s that simple. You’re ready to dunk!
Brew some Be Well tea to stave off the sniffles
Tea is a cold and flu season staple. A hot cup can help you feel better when seasonal ailments strike, clearing up the sniffles with steam and coating that scratchy throat with honey or agave. The right brew can also help keep you well before the first sneeze hits. Here’s to your health!
We’re hearing that this winter could be a nasty one for colds and flus in U.S., with the flu season starting early and hitting hard. There is plenty you can do to protect your health and the health of those you love, especially getting vaccinated, washing your hands, and wearing a mask in crowded locations.
Of course, what you put in your body can help boost your immune system and reduce inflammation, too. Foods and drinks full of vitamins C and D, zinc and other key ingredients may an excellent supplement to the flu-avoiding basics listed above.
That’s why tea is a cold and flu season staple. A hot cup can help you feel better when seasonal ailments strike, clearing up the sniffles with steam and coating that scratchy throat with honey or agave. The right brew can also help keep you well before the first sneeze hits.
The key ingredients
The ingredients in this tea recipe are heavy hitters when it comes to fighting inflammation and reducing the length and severity of colds and flus.
Green tea and peppermint are anti-inflammatory and anti-viral. Plus they taste great! Echinacea has a long and researched wellness history. According to the National Library of Medicine, “Echinacea decreased the odds of developing the common cold by 58% and the duration of a cold by 1.4 days.”
Likewise, vitamins C and D reduce inflammation and decrease the strength and length of colds. Lemon adds the vitamin C here along with flavor. Vitamin D is hard to get from plant sources other than mushrooms, so if you have some drops, we recommend those here. But they’re optional.
Finally, honey or agave add sweetness and a soothing throat coat.
As always, play around with the ingredients to make this recipe your own!
Gather your ingredients
To make 2 cups of hot Be Well tea
5 oz dried green tea (We love Dona brand, but you can use your favorite)
3 oz of dried peppermint*
2 tbsp dried echinacea
1 lemon, sliced
2 tbsp of honey or agave
Optional: 2 drops of liquid vitamin D
Brew up your tea
Bring 12 oz of water to a boil in a kettle
Divide the green tea, peppermint and echinacea into two reusable tea filters and place inside two mugs
Once the water comes to a boil, pour over the filters to fill the mugs almost to the top
If using, add one drop of vitamin D to each cup and stir
Let steep for 5 minutes
Remove the infusion bags, add 1tbsp of honey or agave to each to cup (or add the amount you prefer) and stir to dissolve
Add 2-3 lemon slices per cup and stir
Allow to cool another 3-5 minutes
Sip slowly, being sure to inhale the steam
We hope you stay warm, cozy and well this winter. Here’s to your health!
*Dried peppermint is not the same as dried mint, which comes from a different plant. If you can’t find dried peppermint, you can use peppermint tea blends instead, and cut out the tea in this recipe. Just read the label to make sure you’re getting peppermint!
Spiced hot chocolate
Some fall evenings demand hot cocoa. For a special treat (like a Tuesday night!), use a touch of high-quality cocoa powder and sub in bittersweet chocolate for the rest, then add cinnamon and a hint of cayenne. Some call it spiced cocoa or Mexican hot chocolate, we call it Fall in a mug.

As the days get shorter and Halloween approaches, we finally get hints of Fall weather here in Texas. It can still reach 80 degrees and higher during the day, but those early mornings start flirting with a chill, and as the sun dips earlier and earlier at night, we bring the blankets and sweaters out of hiding, knowing we’ll be reaching for them soon.
I love that the chill comes right at Halloween, ushering us on to Dia de los Meurtos, the Day of the Dead. During this time, we celebrate the joy of cooler weather, the magic of costume and disguise, and the lives and loves of the past and future.
It’s a time of the unexpected, a mix of sweet, of sorrow, of comfort and of action. It bring to mind the spicy, sweet and decadent treat of spiced hot chocolate.
Gather your ingredients
Makes 4 Servings
3 cups of milk—cashew and oat milk work great here because of their thickness, or you can go with whole.
4 cinnamon sticks, crushed to a gravel-like consistency
3 ounces bittersweet chocolate, finely chopped
Black Onyx Chocolate Sugar OR a mix of 2 tbsp high-quality cocoa powder and 3 tablespoons demerara or granulated sugar
1 teaspoon vanilla extract
Pinch of salt
¼ teaspoon ground cayenne pepper, plus more for serving
Lightly sweetened whipped cream (for serving)
Make the hot chocolate
Add the crushed cinnamon to an infusion filter (or pull it out with a sieve later).
In a medium, heavy-bottomed sauce pan, add the milk and cinnamon and heat on medium low until the milk begins to steam. Don’t bring it to a boil or the milk will burn.
Add the chopped bittersweet chocolate and stir constantly until melted.
When just melted, add the remain ingredients, expect for the whipped cream.
Stir everything together until the chocolate milk is smooth and creamy.
Divide into four mugs and top with whipped cream and a hint more cayenne.
Sip while watching a spooky movie, telling tales of the ancestors, or handing out treats to the nieghborhood ghosts.
Mulling Spice Packs
Cooler fall weather calls for warm beverages with hints of cloves, cinnamon and orange. And when you warm a batch on the stove, the whole house smells glorious. With these mulling spice packs ready to go, you can make fall magic at a moment’s notice.
Cooler fall weather calls for warm beverages with hints of cloves, cinnamon and orange. And when you warm a batch on the stove, the whole house smells glorious. With these mulling spice packs ready to go, you can make fall magic at a moment’s notice.
To mull: To warm and flavor a beverage with spices.
To mull: To ponder at length.
Have two definitions of the same word ever been so well matched?
There’s something transporting about the scent and flavor of warmed orange, ginger and nutmeg. And since hot drinks will not tolerate a rush, the stage is set for long and slow pondering. That’s the scene-setting power of mulling spices.
To get mulling spices together takes a little effort. And that’s probably why we don’t break out the mulled cider or tea or wine every night. That’s why these spice packs are genius. Make up a batch once a week and you can enjoy a long, zesty ponder whenever you want.
Gather your ingredients
This recipe makes about 10 spice packs using CoffeeSock infusion filters. You can also keep the mixture loose in an airtight container and heap into the filters as needed. And the spices here? Our favorites! Swap them out for your favorites to make it your own.
5 cinnamon sticks
4 whole star anise
4 whole nutmeg
¼ cup chopped dried orange peel (Here’s how to dry citrus peel)
¼ cup chopped dried lemon peel
2 tbsp allspice berries
2 tbsp whole cloves
½ tsp black peppercorns
Make your spice blend
Place the cinnamon, star anise and nutmeg into a large reusable zip-top bag. You can also use a cotton bag or place them carefully under a clean kitchen towel.
Use a rolling pin or mallet to crush the spices until you have a chunky mix. You don’t need to go too hard here, you’re not trying to pulverize it.
Mix the crushed spices with the roughly chopped citrus peel, allspice berries, cloves and peppercorns.
At this point, you can either place the whole batch in an airtight container or parcel out 2 tbsps of mix into 10 reusable infusion filters or tea bags.
To make a mulled beverage
For a gently spiced flavor, add one spice packet per 5-6 servings of tea, cider or wine. Since cider is already sweet, you wont need extra sweetener, but you’ll add a little sweetness for mulled wine or tea.
Mulled cider
Pour ½ gallon of apple cider into a sauce pan and bring to a simmer.
Add one spice pack and simmer for at least 30 minutes and up to a couple of hours.
Ladle into mugs and top each with a little extra ground cinnamon or nutmeg.
Mulled tea
Brew 6 cups of black tea, like orange pekoe is good here, as is English breakfast or earl gray.
Add the brewed tea—the tea leaves discarded—to a saucepan and bring to a simmer.
Add ¼ a cup of honey or your choice of sweetener and stir to dissolve.
Add one spice pack and simmer for at least 30 minutes and up to a couple of hours.
Mulled wine
Pour one bottle of red wine into a saucepan and bring to a simmer. Malbec or Syrah works well here.
Add ¼ a cup of honey or your choice of sweetener and stir to dissolve.
Add one spice pack and simmer for about 30 minutes.
Herbal milk tea
If you love boba tea or bubble tea, we have good news! It’s simple to make at home, with or without the tapioca pearls. This caffeine free take on bubble tea is lightly sweet, refreshing and fun to drink!
This caffeine free take on bubble tea is lightly sweet, refreshing and fun to drink!

If you love boba tea or bubble tea, we have good news! It’s simple to make at home, with or without the tapioca pearls.
Bubble tea is often made with black tea, but we chose a minty and soothing herbal for a refreshing treat that leaves out the caffeine. It makes a fun after school or happy hour treat.
Try it and let us know what you think!
What you need for 2 glasses of milk tea
For the sweetener
½ cup of dark brown sugar
½ cup of water
For the tea
6 grams of loose herbal tea. We like a blend of camomile and mint, or try “The Field” loose tea from Dona.
2 cups of water
½ to 1 cup of creamy milk. We prefer oat milk. If you want dairy, go for 2% or whole.
If you enjoy tapioca pearls
2-4 oz of quick cooking tapioca pearls (use your favorite brand, or check out WuFuYuan’s “Black sugar” tapioca pearls
Water according to package directions
How to make your tea
Make the tapioca, if using, and set aside
Cook the tapioca pearls according to the package directions. We’re using the quick cooking variety, and that will take about 15 minutes, start to finish.
Once the pearls are all floating and have a chewy texture, drain them and rinse with cool water.
Set aside while you prep the tea.
Prep the brown sugar simple syrup
Add ½ cup dark brown sugar and ½ cup of water to a small saucepan.
Heat, stirring occasionally, until all of the sugar is dissolved.
Remove from heat and set aside to cool.
Steep your tea
Heat 2 cups of water to boiling in a kettle or small saucepan.
Add 6 grams of loose tea to your TeaSock. This is about 1.5 a normal serving of hot tea. You want your milk tea extra strong!
Add the TeaSock to the saucepan of water or place it in a heatproof glass measuring cup with a pour spout and cover with the hot water.
Steep for 5-10 minutes, depending on the brand and how strong you want it.
Let the tea cool completely, or add ice to cool more quickly.
Assemble your tea
Grab two tall tumblers and add ½ of the tapioca pearls to the bottom of each.
Top the pearls with ¼ of the simple syrup.
Add several cubes of ice.
Pour ½ the tea over the ice.
Add milk to taste and top with the remaining simple syrup.
Add a straw, give it a stir, and enjoy!
Iced Chai Latte
It’s easier than you think to make a creamy, delicious Iced Chai Latte at home. Think of it as a self-care moment to treat yourself to a little bit of caffeine midday without having to leave the house… Enjoy!
It’s easier than you think to make a creamy, delicious Iced Chai Latte at home. Think of it as a self-care moment to treat yourself to a little bit of caffeine midday without having to leave the house… Enjoy!

An Iced Chai Latte is one of life’s simplest pleasures, especially on a hot afternoon around 3:00 when your energy is flagging and your concentration is waning. Add a little Chai and you’ve got the one-two-three punch of decadence, sweetness and caffeine. It’s a summer afternoon trifecta.
And it’s simple enough to make every day if you want.
What you need
This recipe fills two small glasses or one tall glass.
3 tsp of loose leaf chai*
1/2 cup of water
1 tsp of sugar
3/4 cup of your milk of choice
Optional toppings: Chai Spiced Powdered Blend, Spiced Vanilla Bean Sugar
*Instead of using a TeaSock & loose leaf chai you can use Dona Masala Chai Concentrate
How to make an Iced Chai Latte
Boil 1/2 cup of water.
Add 3 tsp of Chai to your TeaSock.
Place the TeaSock in the boiling water, remove from heat and steep for 7 minutes.
Fill a tall glass with ice.
Add 3/4 cup - 1 cup of your milk of choice (the higher the fat the more creamier it will be).
Pour Chai concentrate over milk.
Stir in 1 tsp - 1.5 tsp of brown sugar or granulated sugar into your drink.
Enjoy!
Coffee Nice Cream
It’s easier than you think to make creamy, nondairy coffee-flavored soft serve at home. Think of it as an extra thick smoothie that you eat with a spoon. And pour chocolate syrup all over. And maybe some almonds, too. Enjoy!
It’s easier than you think to make creamy, nondairy coffee-flavored soft serve at home. Think of it as an extra thick smoothie that you eat with a spoon. And pour chocolate syrup all over. And maybe some almonds too… Enjoy!

Ice cream is one of life’s simplest pleasures, especially on a hot afternoon around 3:00 when your energy is flagging and your concentration is waning. Add a little coffee to your ice cream and you’ve got the one-two-three punch of decadence, sweetness and caffeine. It’s a summer afternoon trifecta.
Your ice cream break doesn’t even have to be unhealthy. Or…not that unhealthy. Swap the dairy for frozen bananas and a little oat milk, and you get that satisfying creaminess of your favorite scoop without the bloat factor.
And it’s simple enough to make every day if you want.
What you need
This recipe fills a loaf pan about 3/4 full, and can serve 4 people a bowl of their own.
3 large, ripe bananas
1/4 cup coffee or cold brew
1/4 cup cocoa powder
1/2 tsp vanilla
1/4 cup oat milk or other nondairy milk
Optional toppings: Chocolate syrup, toasted almonds, nondairy whipped cream…whatever you like!
How to make the nice cream
Slice the bananas into 1/2” pieces and freeze. If you can do it in a single layer, that’s even better. But you can also give them a shake every 30 minutes or so to keep them from clumping up as they freeze.
Add the frozen bananas to a food processor or high speed blender with all of the other ingredients. If your bananas are on the small side, don’t add all the liquid at first. Add more as needed.
Let the ingredients sit together for about 3 minutes to thaw slightly.
Blend until very smooth, stopping to scrape the sides as needed. This will take between 3-5 minutes to get all of the chunks blended.
Since banana size varies, add more liquid if the mixture seems to thick to blend, even after thawing for a few minutes. You can add extra milk or coffee, depending on your preference.
Pour the mixture into a loaf pan, cover, and place in the freezer for about 30 minutes. If you freeze longer than this or have leftovers, you’ll want to let it thaw for several minutes before scooping.
Scoop into bowls and add your favorite toppings.
Ginger mint iced tea
The mint is abundant this season. And it’s hot outside for many of us. Let’s put two and two together to make four. Four glass of mint iced tea, that is, with ginger for zing and honey for sweetness.
The mint is abundant this season. And it’s hot outside for many of us. Let’s put two and two together to make four. Four glass of mint iced tea, that is, with ginger for zing and honey for sweetness.

All summer long, we love to experiment with iced tea flavors. Texas summers are hot and long, and hydration is key. So when we want something with a little more oomph that plain water, iced tea hits the spot.
Iced tea is easy and inexpensive to make, and when you make it yourself, you get to decide what goes in and how much. So you can pump up the flavors you like, leave out the ones you don’t choose your caffeine level or leave it out altogether, and same goes for sugar.
This mint and ginger combo really hits the spot on hot afternoons. We like it lightly sweetened with honey, and throw in crushed ice when we have it for a happy hour mocktail!
How make ginger mint iced tea
Gather your ingredients (makes 4 cups )
1 bunch of fresh mint—about one cup of stemmed leaves—rough chopped
2-4 tbsp honey (depending on your sweetness preference)
2-3 oz of fresh ginger, peeled, chopped into 1/4” pieces
4 cups of filtered water
Optional: 2 tsp of black tea (if you want a stronger tea flavor and a little caffeine)
CoffeeSock infusion filters or a mine mesh sieve
Make your tea
Add the water to small saucepan along with the honey. Heat until almost a boil and remove from the burner, stirring until the honey is dissolved.
On a cutting board or in a small bowl, combine chopped mint and ginger and use a pestle, masher, or fork to lightly smash together. You’ll still have lots of individual chunks. No need to make a paste. You just want to give all the pieces a light bruise, which will allow the ginger and mint to release more flavor.
Add the ginger and mint to your infusion bag, or, if you’re using a sieve, you can put them straight into the water.
If using tea leaves, add that to the bag (or water) as well.
Drop the infusion bag in the water and steps for 10 minutes
Remove the infusion bag, or run the infused tea through a fine mesh sieve until all of the mint, ginger and tea are gone.
Add to a pitcher and add ice.
Divide into 4 tall glasses and garnish with more mint
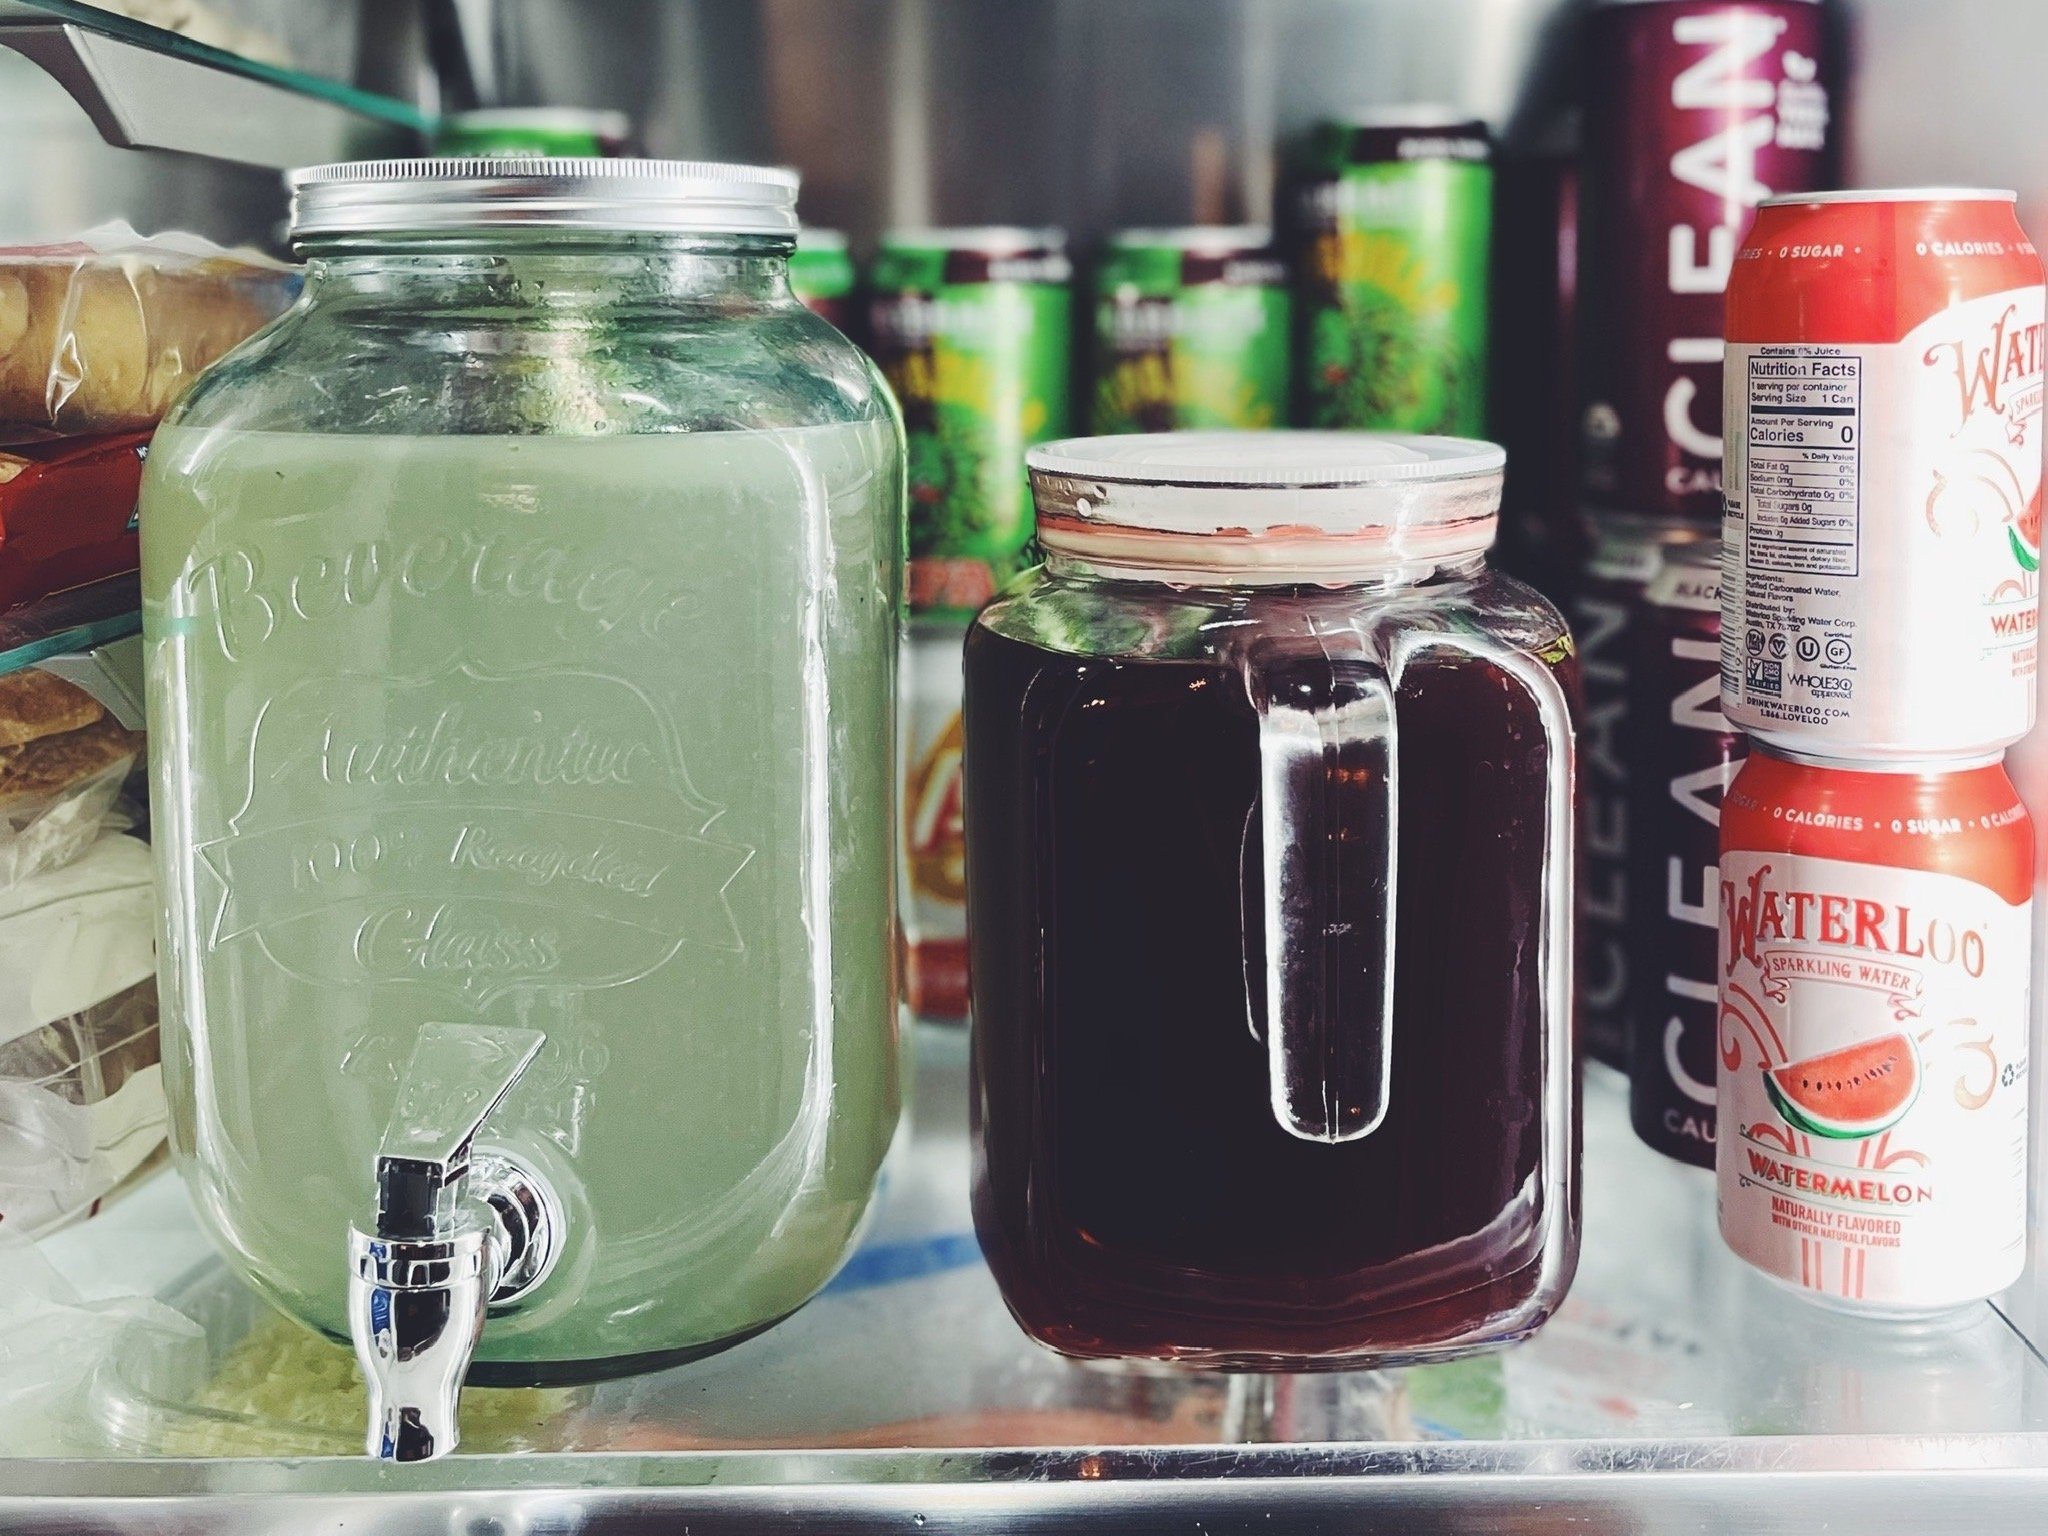
Cold Brewed Iced Tea
It’s just iced tea season around here! Just like cold brewed coffee, you can cold brew your favorite tea blends. Steam the loose tea, then let it steep slowly for a deeply flavorful and lightly sweet iced tea.
Steam your favorite loose tea then let it steep slowly for a deeply flavorful and lightly sweet iced tea.

As the days warm back up, we love a tall glass of tea in the afternoon. It’s a fantastic way to take a mid-day break or to mark the happy hour. Because iced tea, lightly sweetened, with a little mint and citrus, is as happy-making as it gets.
We’re using the Dona’s loose leaf blend, “The Field” with chamomile, mint and fennel. Add a squeeze of lemon and a little simple syrup and it’s pretty magical. Of course, this recipe works with your own favorite blend, so experiment away!
What you need for cold brewed iced tea
Makes 8 cups of tea
4 tablespoons of loose leaf tea (or 8-10 bags)
9 cups of filtered water (1 to steam the tea, 4 for steeping, and 4 to add later)
A few cubes of ice
A cold brewed tea filter or cotton tea filter
Simple syrup made from equal parts sugar and water (make as much as you want, but at least 1/8 cup to be safe)
A few lemon wedges
A pitcher or large mason jar for brewing and serving
How to make it
Add one cup of water to a kettle or shallow pan and heat to boiling.
Add the loose tea to your tea filter, seal it, and place it in a cup.
Pour enough hot water over the tea to submerge it and steep for 3 minutes. This quick hot steep will allow your tea to be more flavorful, especially if you’re using more subtle spices. If you’re using a strong, black tea, you could probably skip this part.
After 3 minutes, add enough ice to cool the liquid and stop the brewing. Remove the tea bag, which should be cool to the touch.
Place the bag in your pitcher or mason jar, and add 4 cups of cold, filtered water.
Let steep for at least 4 hours, but we recommend 8 hours or over night.
Make the simple syrup by heating the water and then adding the same amount of sugar to the hot water. Stir until the sugar is dissolved then set aside to cool. We like to make extra and store in a jar with a pour spout. And you can make flavored simple syrup for all kinds of uses.
After the tea has steeped, remove the tea bag and compost the spent tea.
Add the final 4 cups of cold, filtered water and sweeten with the simple syrup to taste.
Squeeze your lemon right in the pitcher, or set aside the wedges for self-serve.

Cinnamon maple cold brew
What if your cold brew tasted like French toast? Elevate your cold brew with the sweet and spice of maple and cinnamon. The magic in this recipe comes from brewing the coffee and cinnamon together, then topping with just the right amount of maple-sweetened milk or cream.
Elevate your cold brew with the sweet and spice of French toast. The magic in this recipe comes from brewing the coffee and cinnamon together, then topping with just the right amount of maple-sweetened milk or cream.
What you need
This recipe makes 4 servings.
One cup of coarse ground coffee of your choice
2-3 cinnamon sticks
32 oz of water
8 oz of milk or cream (we like oat milk)
2 tbs of pure maple syrup
1 tsp vanilla
Make your cold brew overnight
Add the ground coffee and cinnamon sticks to the cold brew filer
Pour the water slowly over the coffee and tie off the bag
Steep for 12 or more hours then drain.
Get the CoffeeSock cold brew instructions here: https://coffeesock.com/instructions
Make the maple-sweetened milk
Add the milk or cream, maple syrup, and vanilla to a small saucepan and heat on low, stirring until everything is well combined.
Refrigerate the milk until chilled,
Put it together
In an 8 oz glass, add cold brew and a little ice if you like, then top with 1/8 t0 1/4 of the maple milk.
Enjoy!
Hibiscus Pick-me-up Tea
Hibiscus pick-me-up tea blends dried hibiscus flowers, black tea, honey, and citrus for a late-afternoon zing that won’t keep you up all night. It tastes great hot. It’s awesome over ice. And because we’re using loose tea, it’s very flexible—you can adjust the ratio of tea and flowers to your liking.

Ever since discovering the cold brew mocktail, we’ve been experimenting with more beverages that bring a little magic to the late afternoon. When attention flags and energy lags, we’re looking for just the right pick-me-up to add a little joy, ritual, and just enough zing to rev the engine again.
Enter hibiscus pick-me-up tea, our own blend of dried hibiscus flowers, black tea, honey, and citrus. It tastes great hot. It’s awesome over ice. And because we’re using loose tea, it’s very flexible—you can adjust the ratio of tea and flowers to your liking. You do you.
What you need
This recipe makes two 8-oz cups of tea. Because we want a little caffeine but not a full-strength cup, we’ve cut the usual tea amount down a bit. Adjust up to 3 or 4 tsp if you want more caffeine, or switch to herbal if you want less.
⅛ cup dried hibiscus leaves
1-2 tsp of loose black tea or Earl Gray
2 strips of citrus zest (I love orange here, but sometimes I’ve only got a lemon, which works great too.)
2 tbps honey or agave
A way to brew loose tea (We use the tea sock of course!)
Make your tea
To make individual cups
Divide the hibiscus leaves and loose tea into two tea socks or other brew method.
Bring 16 ounces of water to boil in a kettle.
Add your tea blend to two 8 ounce tea cups along with one citrus peel.
Pour the hot water over the tea and let it steep for 3-5 minutes.
Stir in up to 1 tbsp of sweetener per cup.
To make in a batch
Use this method if you’re making 4 or more cups.
Add all of the dried flowers and loose tea into a tea sock or other brew method.
Bring water to a boil in a medium-sized sauce pan. (Multiply 8 ounces times the number of servings. So, 32 ounces for 4 cups)
Remove the pan from the heat and add in the citrus zest and tea bag.
Let steep for 5-8 minutes, or until the tea has a nice, rich color.
Remove the tea bag and stir in your sweetener.
Divide into your serving cups.
To make it iced
Follow directions above, using half the water.
Once tea is steeped and you’ve added the sweetener, add the other half of the water as either cold water or seltzer.
Toss in a couple of ice cubes.
Chocolate peanut butter cold brew smoothie
For breakfast or an afternoon pick me up, this smoothie wraps banana and peanut butter into just the right amount of sweetness and jolt. We make this in honor of our local smoothie shop, and because it’s perfect.
For breakfast or an afternoon pick me up, this smoothie wraps banana and peanut butter into just the right amount of sweetness and jolt. We make this in honor of our local smoothie shop, and because it’s perfect.

Some mornings I wake up really craving a smoothie from the shop down the street. And some mornings (and afternoons), the one I really want is filled with banana, peanut butter, chocolate and cold brew coffee. They call it the Business Time, and it’s a truly inspiring blend. (Shout out to The Soup Peddler!)
After experimenting with the ingredients at home, I’ve landed on a version that tastes pretty amazing and feels healthy enough to call it a quick breakfast.
So this one goes out to the Soup Peddler for the inspiration and to all the smoothie-for-breakfast folks out there.
What you’ll need
The ingredients listed here make one glorious smoothie. Double or triple to serve more.
½ a ripe banana, frozen. About 4 good-sized chunks.
¼ a cup of cold brew coffee.
1 tbsp creamy peanut butter
1 tsp of cocoa powder
¼ cup of milk (Oat milk is excellent here)
1 tsp of honey or maple syrup
Blend up your smoothie
Add all ingredients to a high speed blender and blend until smooth
Taste and adjust sweetness to taste
Serve and enjoy
Tips for the best consistency
To get a thick, creamy smoothie, make sure you have the right amount of frozen and cold liquid and you’re using a sufficiently high speed blender. Here are a few tips to try.
Make sure your bananas are nice and frozen.
You can double the amount and save half for later if a larger amount works better in your blender.
If I have enough foresight, I pop some cold brew into small ice cube trays and freeze them. If you don’t have a super high speed blender, then you want small cubes. Try freezing half the cold brew and using liquid for the other half.
You can also freeze small portions of the milk, or even premix cold brew and milk and freeze that into cubes!
Try adding the milk last and only using the amount necessary to get the consistency you want. Some folks love a thinner smoothie. Some want to eat it with a spoon. You do you.
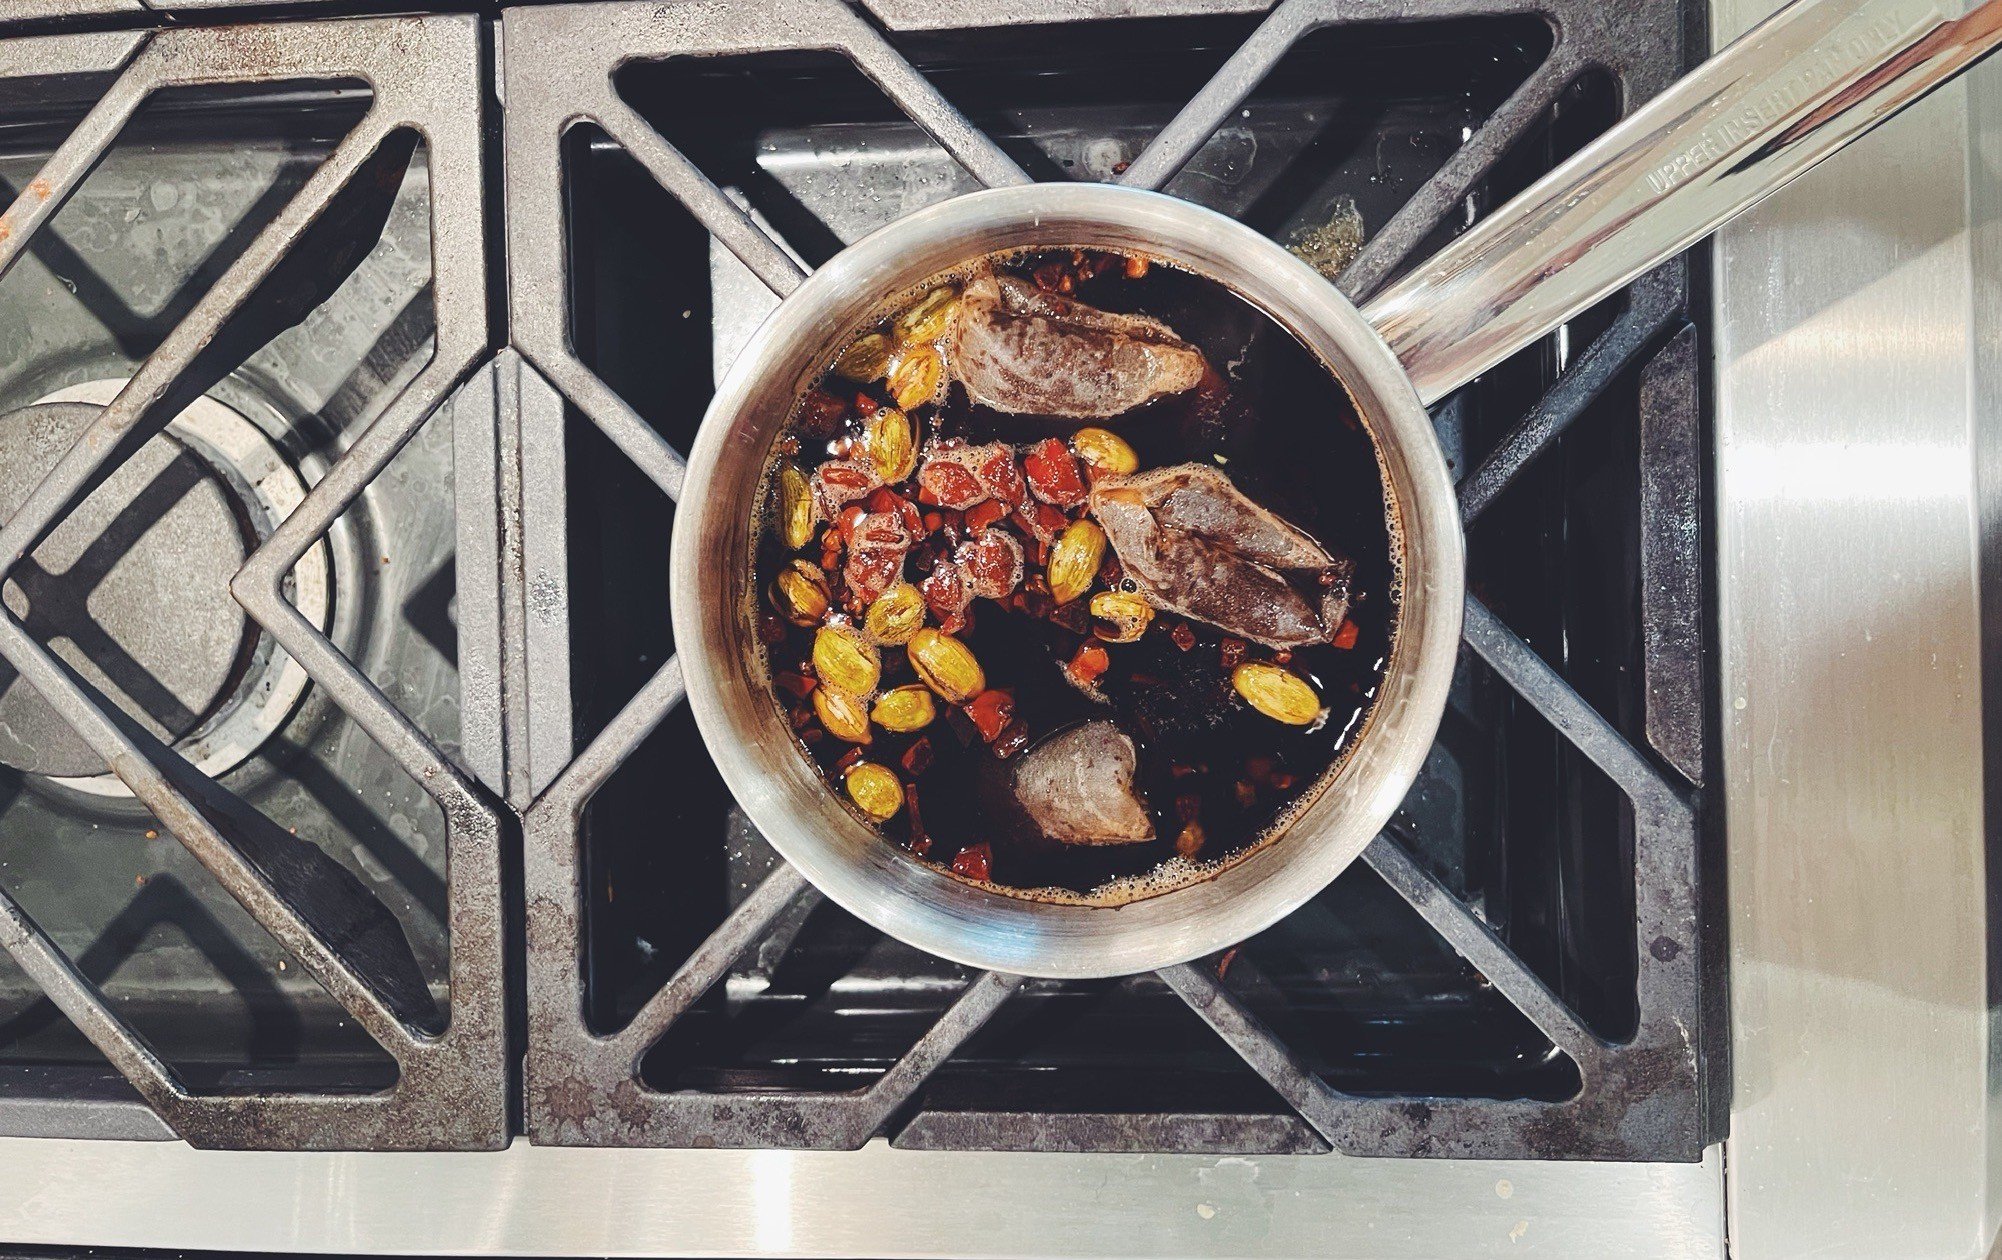
Dried chili infusions
Toss a few dried chilis in a CoffeeSock infusion bag and use it to flavor beans, stews and broths. It’s simple, economical and capital-F Flavorful.
Toss a few dried chilis in a CoffeeSock infusion bag and use it to flavor beans, stews and broths. It’s simple, economical and capital-F Flavorful.

Ever since our friend Gina shared an amazing soup she made with our infusion bags, we’ve been on a tear. We knew these bags worked wonders for teas and herbal baths, but we had not yet tossed chili peppers in them.
We are blind no more. Dried chilis are about the simplest most economical way to spice up everything, from a simple pot of black beans to Gina’s hearty black bean soup recipe.
Here’s how to make your own dried chili infusions.
What you need
2-4 dried chilis, depending on your spice tolerance
1/2 gallon of liquid to infuse
What chilis to use
Here’s where you can have some fun. You can find many varieties of dried chilis on the shelf at most supermarkets and an endless supply at your local Mexican market.
Gina recommends dried guajillo peppers for her black bean soup. Here are a few favorites:
Guajillo peppers are one of the most common you’ll find. They’re spicy but on the milder side, so they’re typically a crowd pleaser.
Ancho is another popular but mild variety, with a little more of a smoky vibe.
Chipotles also have a signature smokiness, but they turn up the heat a bit from the anchos to a medium spice level. Apparently chipotles are smoked jalapeños. (We learned something new!)
Chile de árbol is for those who want to bring the heat.
Here’s a handy article on picking the chili that works for you.
How to infuse
You have a couple of options here: Cut the chilis or don’t. Use heat or don’t. We’ll walk through both.
Should I cut the chilis?
Cutting the dried chilis will allow more liquid to permeate the skin in more places. You might want to do that if you’re wanting a spicier infusion or if you’re making a cold infusion and want to steep it for less time.
If you prefer milder, especially if you’re using heat, then leave the chilis whole.
Do I boil the liquid or cold steep the chilis?
This mostly depends on what you’re making. If you’re making a soup, broth or stew, you’re probably going to eat it the same day, so you’ll want a quicker steeping method that extracts flavor faster. Toss the closed infusion bag right into the stew while it’s cooking.
That’s the method we use for the black bean soup.
If you want to infuse a cold liquid, for a cold broth, chili-infused water, or spiced up Vodka, you’ll add the infusion bag to the liquid and let sit for up to one week, depending on the type and strength of your chilis.
How long do I steep the chili infusion bags?
For a soup or stew, simmer for 30 minutes to one hour. If you’re using the hot chilis, keep in mind that the longer they stay in the soup the hotter it will be.
For a cold steeped liquid with cut chilis, steep for a minimum of 30 minutes if you’re using the hot chilis and up to 24 hours if you’re using milder ones.
For cold steeped liquid with whole chilis, you can steep up to one week for a complex and bold flavor.
Experiment and let us know your favorites!
Chile-Infused Black Bean Soup
Dried chilis are about the simplest most economical way to spice up everything, from a simple pot of black beans to Gina’s hearty Chile infused black bean soup!


DIY Lemonade—All the citrus without all the plastic
There’s nothing quite like the sparkly jolt of citrus, especially on a midwinter afternoon. Add a little sweetness and lemonade is truly liquid joy. Skip all the plastic waste of store bought and make your own. As a bonus, you can control the amount and type of sugar you use!

Squeezing lemons for lemonade
We gulp down lemonade in this house. There’s nothing quite like the sparkly jolt of citrus, especially on a midwinter afternoon. Add a little sweetness and lemonade is truly liquid joy.
The thing is—I love it a lot. And the kids love it, a lot. What we don’t love is the stack of plastic containers we leave behind by drinking it.
So we started making our own. It’s fast, easy, fun, and so much more sustainable. And bonus! You can control the amount and type of sugar that goes in.
Here’s what you’ll need
This recipe makes one gallon of lightly tart and sweet lemonade. You can play around with the amounts to get your own favorite formula.
5 large lemons
1 2/3 cup of sugar
1 2/3 cup of water to make simple syrup
Filtered or distilled water to make a gallon
1 gallon pitcher
To make your lemonade
Make the simple syrup. Add the sugar to saucepan along with 1 2/3 cup of water. Heat on medium until the sugar fully dissolves and the liquid is slightly thick. This is your simple syrup. Remove the pan from the heat and set aside to cool while you juice the lemons. (Pro tip: Double the amount of simple syrup you make and use it every time you want pre-dissolved sugar!)
Juice the lemons. We use a hand held metal juicer, but you can use any juicing method you have available, including using your hands to squeeze those lemons. Just make sure you remove all the seeds from the juice.
Put it all together. Once the syrup has cooled a bit, add it to your pitcher with the lemon juice and stir to combine. Then fill your container with filtered water and give it a few more stirs to combine.
Chill and serve. You could totally drink this right away with some ice cubes. Or chill in the fridge for a few.
Pour some liquid sunshine right from the fridge.
We love a gallon-sized glass jars with a pour spout. No hauling the container in and out of the fridge! Click on the image to check out out cold brew kits, and pick up a gallon-sized jar made from 100% recycled glass.
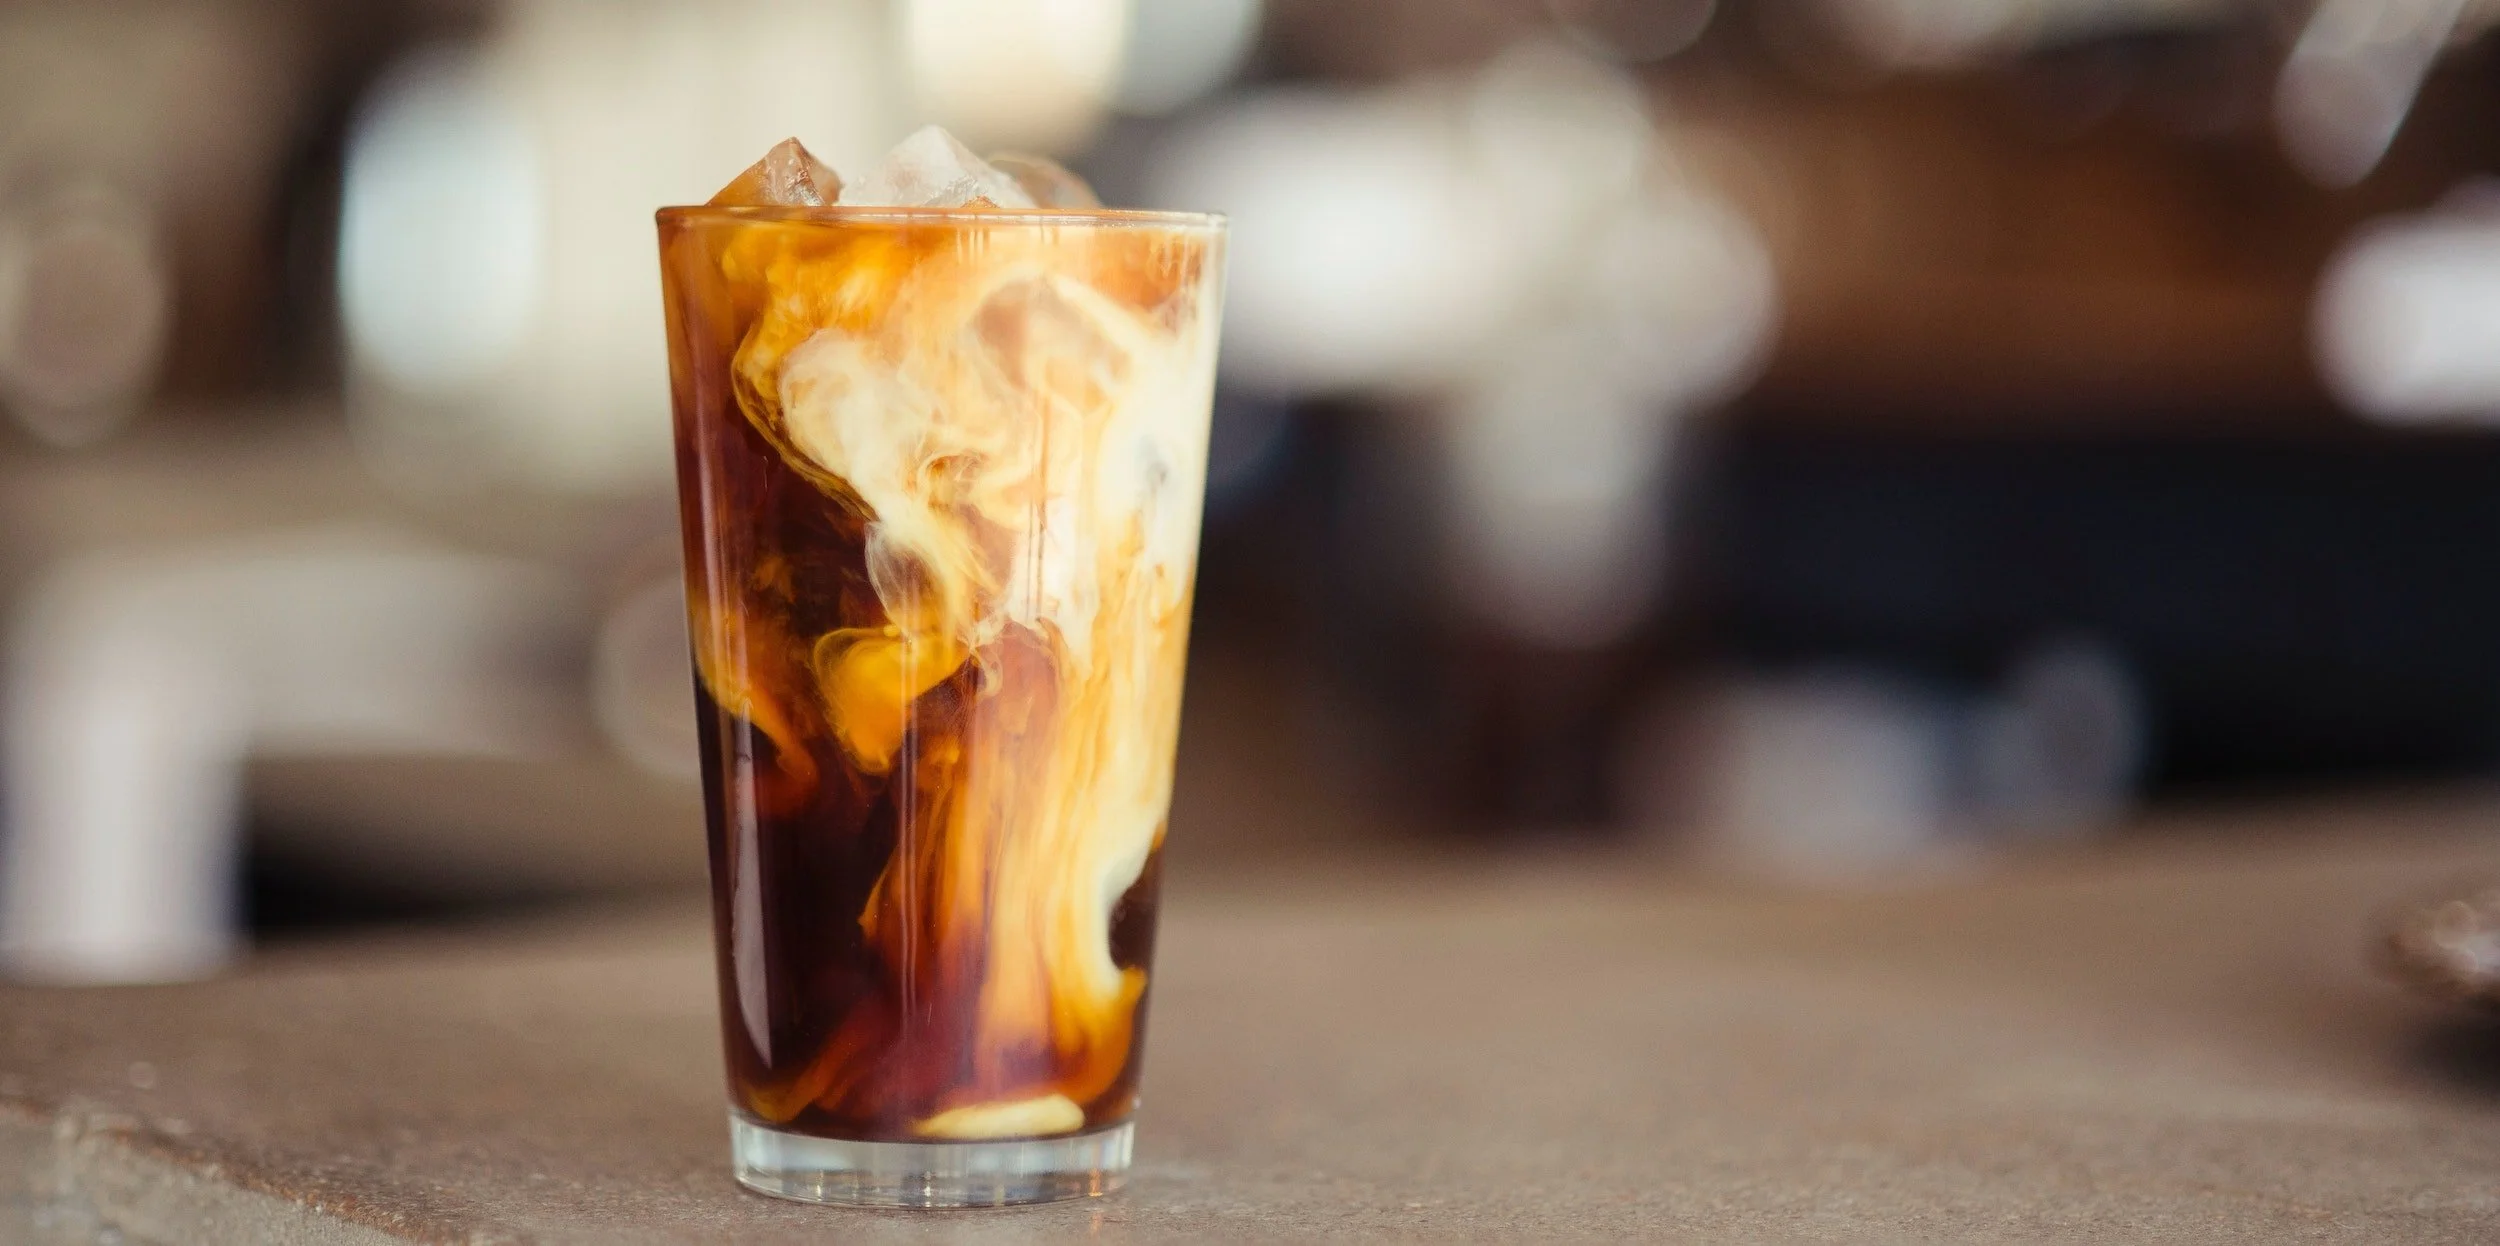
Cold Brew & Tonic Mocktails
Love a stiff drink but don’t want the alcohol? What if your cocktail gave you a clearer head? Enter the coffee mocktail! This simple cold brew and tonic recipe is easy to pull together and feels more special than a simple cup of coffee if you’re looking for something more celebratory.

Love a stiff drink but don’t want the alcohol? What if your cocktail gave you a clearer head? Enter the coffee mocktail!
I was introduced to the concept at a local coffeeshop where I had my first cold brew Manhattan. I’ve been hooked ever since. I might not go full Manhattan on the regular, but this simple cold brew and tonic recipe is easy to pull together and feels more special than a simple cup of coffee.
Enjoy it during your next happy hour, or bring back the coffee klatch and serve a round to your neighbors and friends.
Cold Brew & Tonic Mocktails
Ingredients for one drink
2 ounces of cold brewed coffee
3 ounces of tonic
A dash of orange or chocolate bitters*
Orange peel for garnish
*Bitters technically contain alcohol, but with only a dash or two in your drink, it does not amount to a measurable quantity. In fact, they are sold in grocery stores as nonalcoholic.
Put it all together
Add the tonic water and a few ice cubes to a high ball glass. (Or really any short glass.)
Slowly pour the cold brew over the top so that it seeps over the tonic slowly, partly floating. It’s OK if all mixes together, that’s how it will end up anyway.
Add a dash of bitters to taste and run a slice of orange peel around the rim of your glass.
Drop the orange peel on top and serve.